|

This
Tutorial is copyrighted to the Tutorial Writer, © Emmy Kruyswijk 2011.
This Tutorial
may
not be forwarded, shared or otherwise placed on any Web Site or group without written
permission from
Emmy Kruyswijk
Do you want to link my lessons?
Please send
me a mail.
Materials:
download
here
4 Disney tubes,1 template
van
Peachy, 1 font Fiolex Girls
filters: Kang - Houdini is only sleeping, Cybia - screenworks - Rib
Webbing,
FM Tile Tools - Blend Emboss.
Download
here
Before you begins.......
Filters : Install first your plug-ins before you open PSP and put
them in the folder plug-ins.
Open your image and template in PSP
Open the font and minimize
2 Hearts joined Forever

Foreground color#ce4242 and background
color #fcdcaa.
1.
Open new image 600x600.
Fill this with gradient linear.
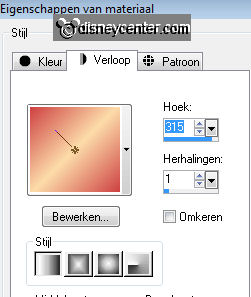
Adjust - Blur - Gaussian blur - ratius at 25.
Duplicate this layer - imageg - mirror.
Put the opacity of this layer at 50.
2.
Copy scratched and paste as a new layer.
Fill this layer with the foreground color.
Effects - Kang - Houdini is only sleeping with this setting.
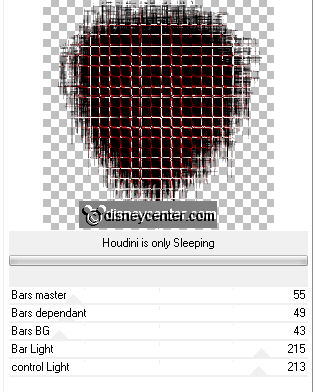
Put the blend mode of this layer at Overlay.
3.
Go to Pick tool - click on Pick.
Pull this layer a little further.
Effects - FM Tile Tools - Blend Emboss with default setting.
4.
Copy Left Frame and paste as a new layer.
Image - mirror.
Select the frame - fill with the background color.
Let selection stay.
5.
Copy the tube vagebond and paste as a new layer on the selection.
Move this in the middle.
Selections - invert - and click at the delete key of your keyboard.
Selections - select none.
6.
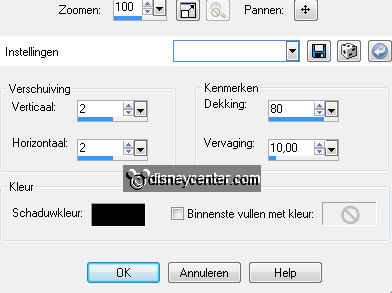
Effects - 3D Effects - drop shadow - with this setting.
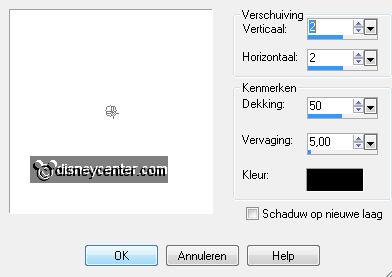
Copy the Left Heart Frame and paste as a new layer.
Select the white frame - fill with the foreground color.
Effects - 3D Effects - Inner Bevel - with this setting.
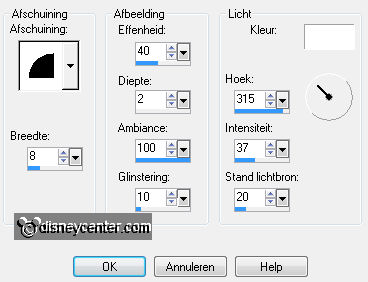
Selections - select none.
7.
Lock the 3 bottom layers - stay at 1 of the other layers.
Layers - merge - merge all layers.
Open the other layers.
Move the heart to the left and a little to the top.
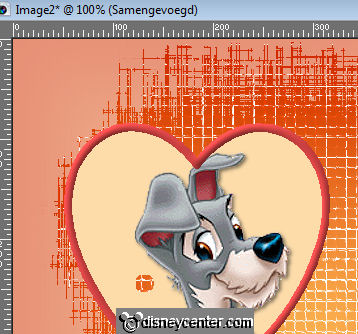
Give the same drop shadow as in point 6.
8.
Copy Right Heart and paste as a new layer.
Image - mirror.
Select the heart - fill this with the background color.
Let selecton stay.
9.
Copy the tube Lady and paste as a new layer.
Selections - invert - and click at the delete key of your keyboard.
Selections - select none.
10.
Give the same drop shadow as in point 6.
Copy Right Heart Frame and paste as a new layer.
Select the white frame - fill this with the foreground color.
Give the same Inner Bevel as in point 6.
Selections - select none.
11.
Lock the 4 bottom layers - stay at 1 of the other layers.
Layers - merge - merge all layers.
Open the other layers.
Move a little to the right.
Layers - arrange - move down.
Give the same drop shadow as in point 6.
12.
Copy tekst - and paste as a new layer.
Place this above the 2 hearts.
Adjust - Hue and Saturation - colorize - with this setting.
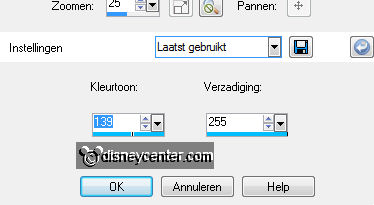
Give the same drop shadow as in point 6.
13.
Copy Brad and paste as a new layer. Place this at the left heart.
Copy Chain and paste as a new layer. Place this at the Brad.
Copy Little Heart and paste as a new layer.
14.
Select the hart and fill this with the foreground color.
Copy LittleHeart Frame and paste as a new layer.
If everything is right, it's falling into the place exactly
Lock all layers,
except the top 2.
Layers - merge - merge all visible layers.
15.
Open the other layers - Place this heart now to the chain.

Lock all layers again, except the top 3.
Layers - merge - merge all visible layers.
Give the same drop shadow as in point 6.
16.
Open the other layers.
Duplicate this layer - Place this on the right heart.
Image - free rotate - Left 35.
17.
Copy the tube lady2 and paste as a new layer.
Place this on the left little heart.
Give the same drop shadow as in point 6.
18.
Select the right little heart.
Copy tube lady 1 and paste as a new layer.
Place this on the selected heart.
Selections - invert - and click at the delete key of your keyboard.
Give the same drop shadow as in point 6.
19.
Go to text tool - font Fiolex Girls - size 150 pixels -
background color #3fc3f8.
Lock the foreground colort.
Write - Valentine - Convert to raster layer.
Give the same drop shadow as in point 6.
Duplicate this layer.
20.
New raster layer - Put your watermark into the image.
Layers - merge - merge all.
Image - Resize 75% - Resize all layers checked.
21.
Image - add border 2 - foreground color.
Image - add border 2 - background color #3fc3f8.
Image - add border 2 - foreground color.
22.
Selections - select all - selections - modify - selections - contract 6.
Effects - 3D Effects - Cutout with this setting.
Repeat the 3D Effects Cutout, but now vert. and horz. at -2.
Selections - select none.
23.
Image - add border 25 - color #fcdcaa.
Select the border - fill this with the gradient radial with this settingg.
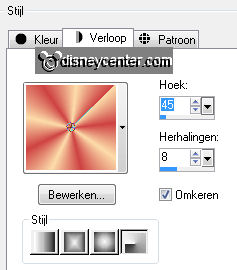
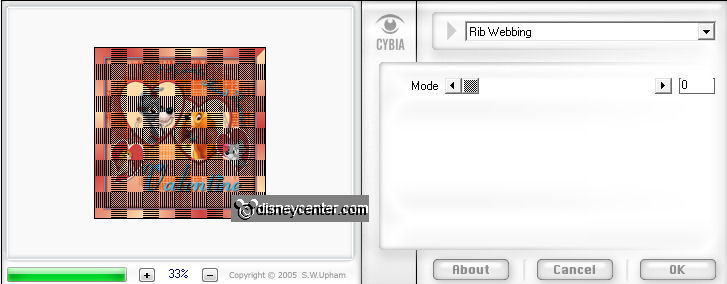
Effects - Cybia - screenworks - Rib Webbing.
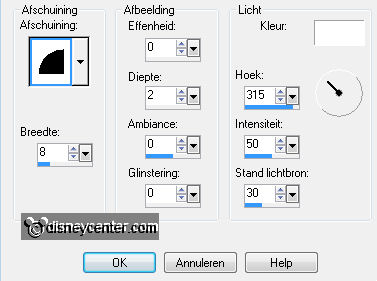
Effects - 3D Effects - Inner Bevel - with this setting.
Selections - select none.
24.
Image - add border 2 - foreground color.
Image - add border 2 - background color #3fc3f8.
Image - add border 2 - foreground color.
25.
File - export - jpeg optimizer.
Ready is the tag
I hope you like this tutorial.
greetings Emmy

Tutorial written
14-03-2011
| 
