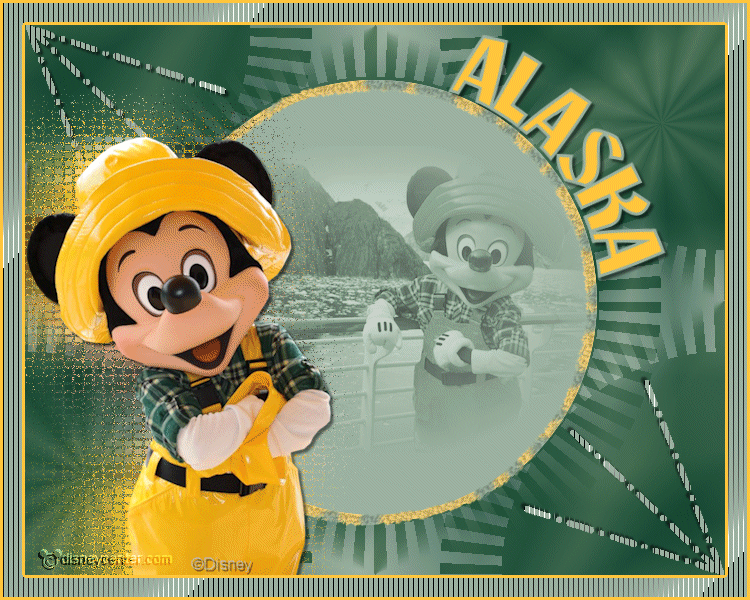
1.
File - open new transparent image 700x550.
Set in the material palette the foreground color at #9cb2a0
and the background color at #426b5b.
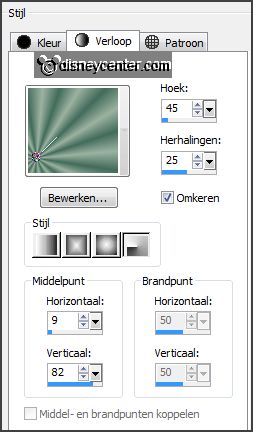
Make from the foreground a gradient
radial - with this setting.
2.
Activate flood fill tool - fill the layer with
the gradient.
Layers - duplicate.
Image - mirror.
Image – flip.
3.
Set in the layers palette the opacity to 50.
Layers - merge - merge down.
Layers - duplicate.
4.
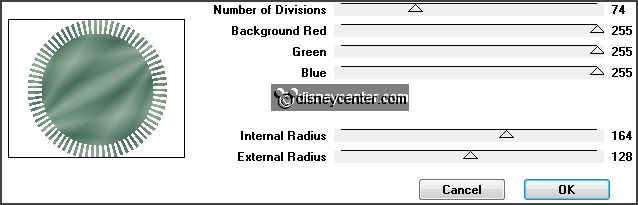
Effects – plug-ins – Alf’s Border FX – Gear –
with this setting – click
OK.
Effects – plug-ins – Mac’s – Remove white –
click OK.
Effects – Image effects – seamless tiling – default setting.
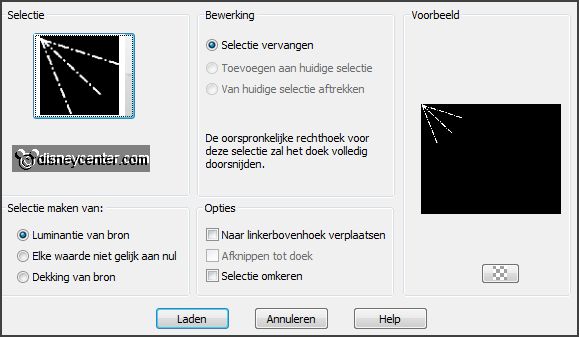
5.
Selections – load/save selection – load selection from disk – look
Emmymicgeel – with this setting.
Layers – new raster layer.
Set in the material palette the foreground back to color.
Fill the selection with the foreground color.
Selections – select none.
6.
Effects – plug-ins – Tramages – Tow the
Line – with this setting - click OK.
Effects – 3D Effects – drop shadow – with this
setting.
Layers - duplicate.
Image - mirror.
Image – flip.
Layers – merge – merge down.
7.
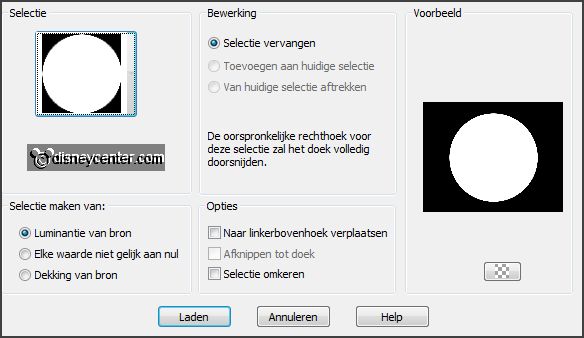
Selections – load/save selection – load
selection from disk – look Emmymicgeel1 –
with this setting.
Layers – new raster layer.
Fill the selection with the foreground color.
8.
Activate the misted tube mickey-alaska – edit – copy.
Edit – paste as a new layer on the image.
Set in the layer palette the blend mode to Luminance and the opacity to 50.
9.
Layers – new raster layer.
Change the background color in # ffc63d.
Fill the selection with the background color.
Selections –modify - contract 7 pixels – click at the delete key.
Selections – select none.
10.
Layers - duplicate – and 1 more time.
Activate the original layer.
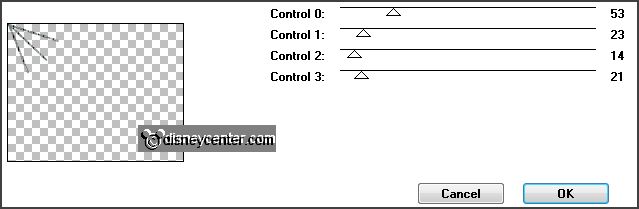
Effects – plug-ins – Alien Skin Eye Candy Textures – Animal Fur –
click at
settings – click at Emmyalaska – click OK.
11.
Activate copy of raster 5.
Repeat Alien Skin – Animal Fur – click at Pattern – click at Random Seed – click
OK.
12.
Activate copy (2)of raster 5.
Repeat Alien Skin – Animal Fur – click at Random Seed – click OK.
Lock the 2 top layers.
13.
Activate the tube mickey1 – edit – copy.
Edit – paste as a new layer on the image.
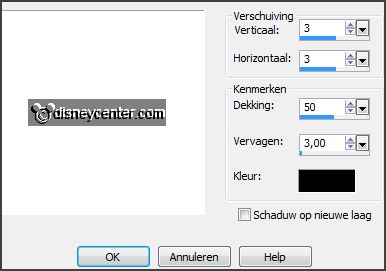
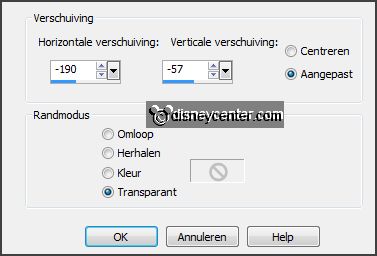
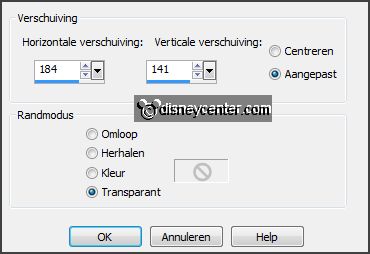
Effects – Image effects – offset – with this
setting.
14.
Layers - duplicate.
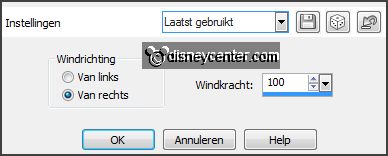
Effects – Distortion effects – Wind – with
this setting.
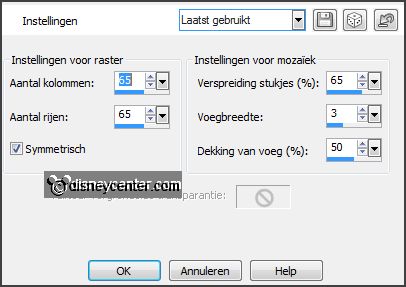
Effects – Texture effects – Mosaic Antique –
with this setting.
Layers – arrange – move down.
15.
Activate the top layer.
Effects – 3D Effects – drop shadow – setting is right.
16.
Activate the word-art-Emmyalaska – edit – copy.
Edit – paste as a new layer on the image.
Effects – Image effects – offset –
with this setting.
17.
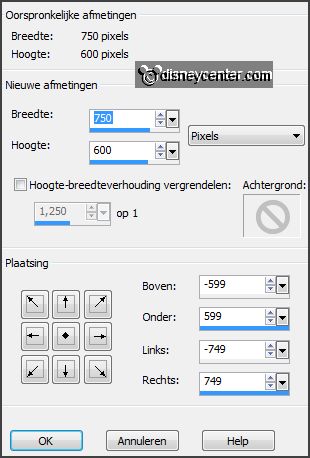
Image – canvas size – with this setting.
Layers – new raster layer.
Fill the layer with the foreground color.
Layers – arrange – move down.
18.
Layers – new raster layer.
Fill the layer with the background color.
Selections – select all.
Selections – modify - contract 25 pixels.
Selections - invert.
Selections – modify - contract 3 pixels –
click at the delete key.
19.
Activate raster 8 (foreground layer).
Effects – plug-ins – Tramages – Tow the Line –
setting is right - click OK.
Selections – select none.
20.
Activate the top layer.
Layers – new raster layer –put your
watermark into the image.
21.
Edit - copy merged.
Open animation shop – edit – paste as a new animation.
Back in PSP.
22.
Lock raster 5 op slot and open copy of raster 5.
Edit - copy merged.
In AS – paste after active frame.
23.
Back in PSP.
Lock copy of raster 5 and open copy(2) of raster 5.
Edit - copy merged.
In AS – paste after active frame.