Put the pattern in the folder patterns
Open your tubes PSP.
Bonsai
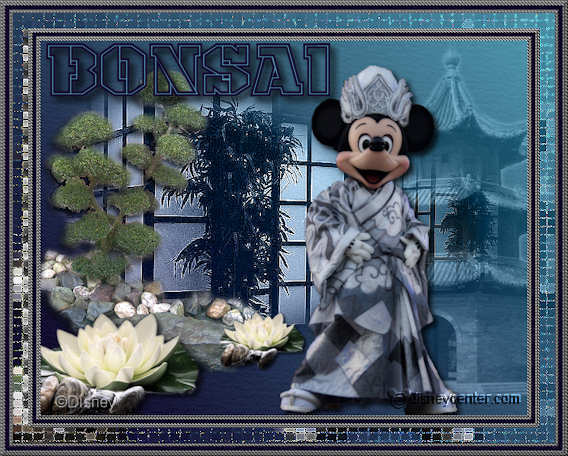
Foreground color #5096ac and background color #100225
1.
Open new transparent image 650x500.
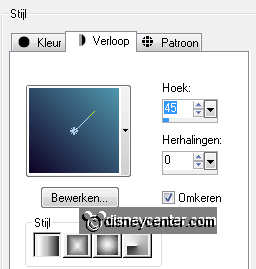
Fill this with gradient linear - with this setting.
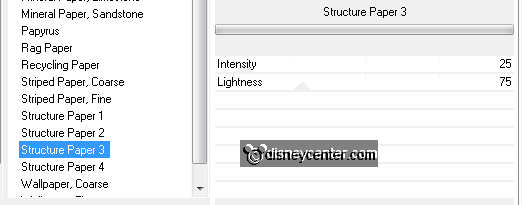
Effects - IC.Net Software - Filters Unlimited 2.0 - Texture Papers - Structure
Paper 3 - with this setting.
2.
Copy japan02 and paste as a new layer.
Place this in the middle.
Set the blend mode of this layer at luminance old.
Effects - edge effects - enhance.
3.
Copy pagode2 and paste as a new layer.
Place this at the right side.
Image - resize 85% - all layers not checked.
Set the opacity of this layer at 50 - the blend mode of this layer at luminance
old.
4.
Copy bonsai4 and paste as a new layer.
Image - mirror.
Place this at the left side.
Effects - 3D Effects - drop shadow - with this setting.

5.
Copy lotus and paste as a new layer.
Place this left at the bottom - image - resize 75% - and one more time 75% - all
layers not checked.
Give the same drop shadow as in point 4.
Duplicate this layer - image - resize 50% - all layers not checked.
Place this at the bottom of the bonsai - see example.
6.
Copy mickimono2 and paste as a new layer.
Image - resize 90% - all layers not checked.
Place this right - see example.
Give the same drop shadow as in point 4.
7.
Layers - merge - merge all visible.
Edit - copy - and paste as a new image.
Set the background at silver pattern.
8.
Image - add border 3 - color white.
Select the white border- and fill this with the silver pattern.
Effects - 3D Effects - Inner Bevel - with this setting.
Selections - select none.

Image - add border 3 - color white.
Select the white border- and fill this with the silver pattern.
Effects - 3D Effects - Inner Bevel - with this setting as above.
Selections - select none.
9.
Image - add border 5 - background color.
Repeat point 8.
Selections - select all - selections - modify - contract 17 - selections -
invert.
Copy - paste as a new image (border) -
Selections - select none.
10
Image - add border 20 - color white.
Select the white border.
Copy the image (not the border) that you put away and paste in the selection.
Effects - texture effects - Mosaic antique - default setting.
Effects - edge effects - enhance.
Selections - select none.
11.
Image - add border 17 - color white.
Select the white border - copy the border (see point 9) - paste in the selection.
Selections - select none.
12.
New raster layer - put your watermark into the image.
Image - resize 75% - all layers checked.
Copy word-art Bonsai and paste as a new layer.
Place this left at the top.
Layers - merge - merge all.
File - Export - JPEG optimize.
Ready is the tag
I hope you like this tutorial.
greetings Emmy

Tutorial written
14-08-2011
