|

This
Tutorial is copyrighted to the Tutorial Writer, © Emmy Kruyswijk November
2009.
This Tutorial
may
not be forwarded, shared or otherwise placed on any Web Site or group without written
permission from
Emmy Kruyswijk
Do you want to link my lessons?
Please send
me a mail.
Materials
here
1 tube, mask naamloos1,
filters: Graphics Plus - Cross Shadow, VM Natural - Splash and Cross
Weaver,
Put the
filters in the folder plug-ins.
And the mask in the folder mask
Castle
1. Open a new image 500x425
2. Take #6d87a6 as foreground and white as background color.
3. Flood fill this with the foreground color.
4. New raster layer.
5. Flood fill this with white.
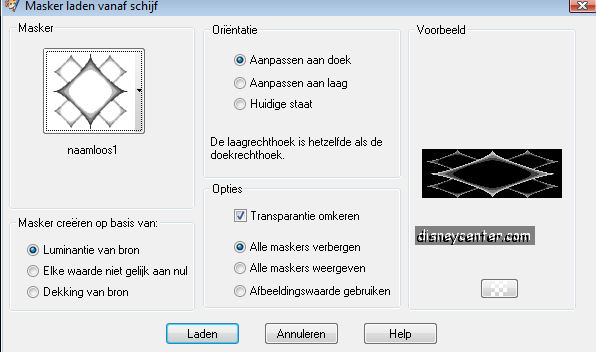
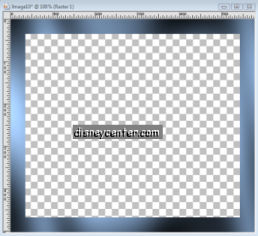
6. Go to Layers - Load/Save Mask.
7. Load mask from disk... look for naamloos 1.
8. Layers - Merge - merge group.
9. Effects - 3D effects - drop shadow - vert. and horz.3, opacity 5, blur
5.00, color black.
10. Copy your tube and paste a a new layer.
11. Layers - Arrange - Move Down.
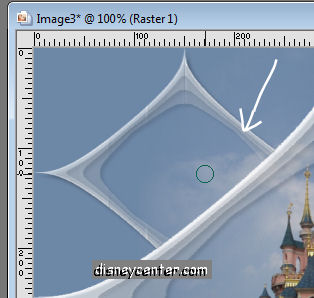
12. Stay at raster 2 and delete with the eraser tool, the sky from your tube in
the four squares of the mask.
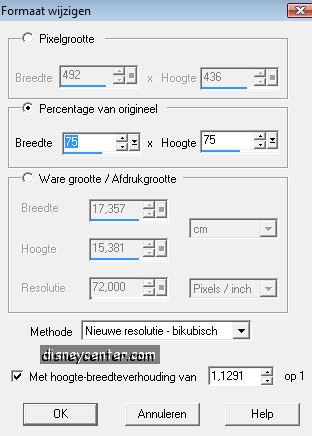
13. Go to image - Resize 75% all layers checked.
14. Put your watermark in the image.
15. Image - Add border 2 white.
16. Image - Add border 25 #6d87a6
17. Select the border- flood fill with the gradient, foreground white.

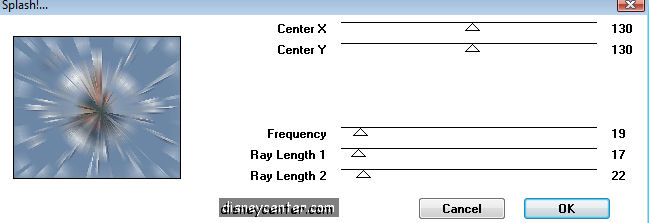
18. Effects - VM Natural - Splash.
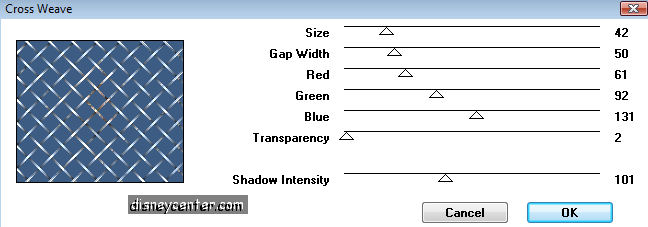
19. Effects - VM Natural - Cross Weave. Select none.
20. Image - Add border 2 white.
21. Image - Add border 35 color #6d87a6
22. Select the border
23. Effects- Graphics Plus - Cross Shadow default settings. Select none.
24. Copy the selected border and paste as a new image.
25. Minimize this one, we use that later.
26. Image - Add border 2 white.
27. Repeat point 16,17,18,19 and 20.
28. Go to your border (new image)
29. Duplicate this 2 times.
30. Lock the 2 top layers and stay at raster 1.
31. Adjust- Add/Remove Noise - Add Noise - Gaussians at 10
32. Lock raster 1 and active raster 2
33. Adjust- Add/Remove Noise - Add Noise - Gaussians at 20
34. Lock raster 2 and active raster 3
35. Adjust- Add/Remove Noise - Add Noise - Gaussians at 30
36. Unlock all layers
37. Stay at raster 1 and copy this layer
38. Go back to the other image and past as a new layer.
39. Again back to the border.
40. Stay at raster 2 and copy this layer
41. Go back to the other image and past as a new layer.
42. Stay at raster 2 and copy this layer
43. Go back to the other image and past as a new layer.
44. Open animation shop
45. Back to Paint Shop Pro
46. Lock raster 2 and 3
47. Stay on the background (this layer is always active than)
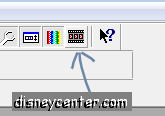
48. Click at the blue/grey border of the image (see below) Copy merged.

49. Go to animation shop.
50. Paste as a new animation
51. Back to your image in PSP
52. Lock raster 1 and unlock raster 2.
53. Click at the blue/grey border of the image. Copy merged.
54. Go to animation shop.
55. Paste after current frame.
56. Back to your image in PSP
57. Lock raster 2 and unlock raster 3.
58. Click at the blue/grey border of the image. Copy merged.
59. Go to animation shop.
60. Paste after current frame.
61. Go to animation - Resize animation - 75%.
62. Click on View animation
63. File - save as....give a name - next - next - next -
complete.
Ready is the tag
I hope that you like this tutorial.
greetings Emmy,

Tutorial written
07-08-2009
| |