Needing:
2 tubes, 1 word-art, 1 preset Alien Skin, 1 animation - all made by
me.
1 mask and 1 tube unknown.
Plig-ins:
FM Tile Tools – Blend Emboss, Alien Skin Eye Candy
Impact – Gradient Glow, Xenoflex 2.0 – Constellation, - download
here.
Animation Shop.
Before you begins.......
Open the tubes in PSP,
Put the plug-ins in the folder plug-ins and the
mask in the folder mask.
Double click the preset Alien Skin (Emmychampagne), he imports itself in the
plug-in.
Material

Champagne
1.
File - open new transparent image 600x450.
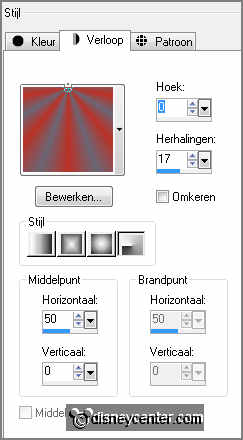
Put in the material palette the foreground at #6b6675
and the background at #ba3227.
Make from the foreground a gradient radial –
with this setting.
2.
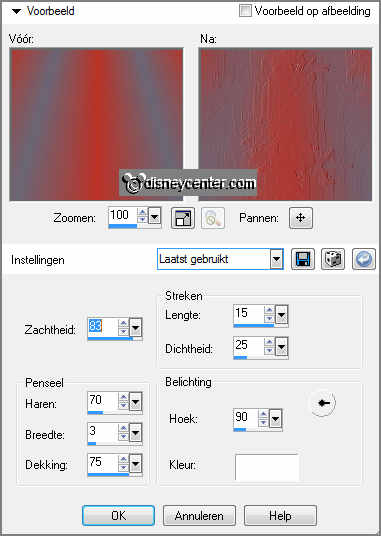
Activate flood fill tool – fill the layer with the gradient.
Effects – Media Art effects – brush strokes –
with this setting.
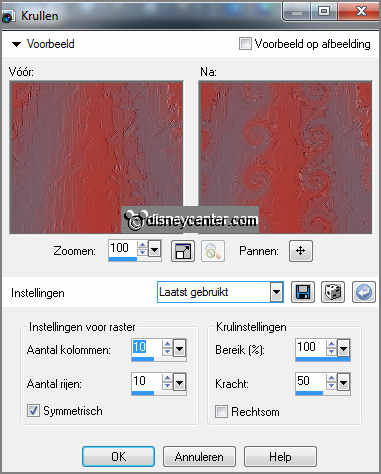
Effects – Distortion effects – Curlicues –
with this setting.
Effects – plug-ins – FM Tile Tools – Blend Emboss – default setting - click.
3.
Put in the material palette the foreground back to color.
Layers – new raster layer – fill this with the background color.
Layers – new raster layer – fill this with the foreground color.
4.
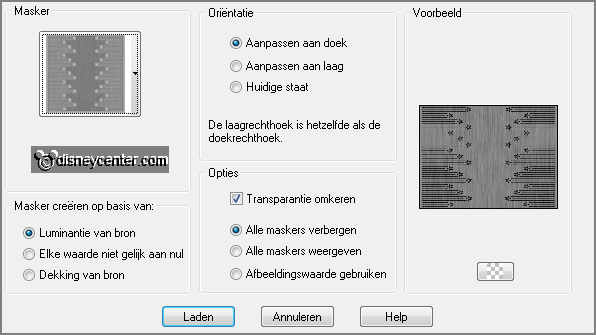
Layers – load/save mask – load mask from disk – look 96maskkelsWWA –
with this setting.
Layers - merge – merge group.
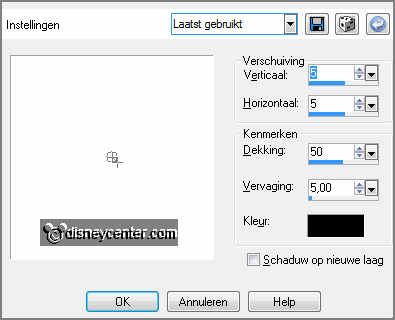
Effects – 3D Effects – drop shadow –
with this setting.
5.
Effects – plug-ins – FM Tile Tools – Blend Emboss – default setting click OK.
Layers – merge – merge down.
Image – resize 85% - all layers not checked.
Effects – plug-ins – Alien Skin Eye Candy Impact – Gradient Glow – click at Settings – User Settings –
click at Emmychampagne – click OK.
6.
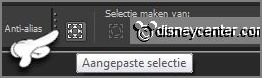
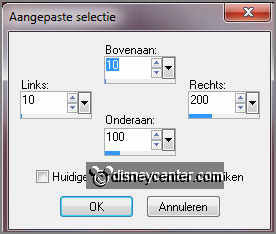
Activate selection tool – custom selection –
with this setting.
Layers – new raster layer.
Fill the selection with the foreground color.
7.
Selections – modify - select selection borders –
with this setting.
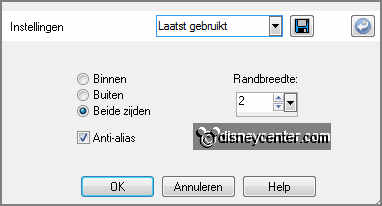
Fill the selection with the background color.
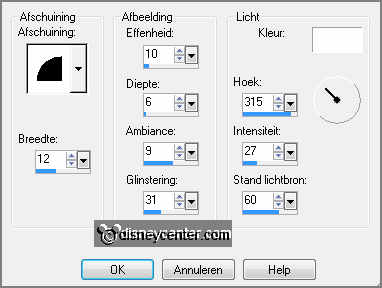
Effects – 3D Effects – Inner Bevel –
with this setting.
8.
Effects – plug-ins – Alien Skin Eye Candy Impact – Gradient Glow – click at Settings – User Settings –
click at Emmychampagne – click OK.
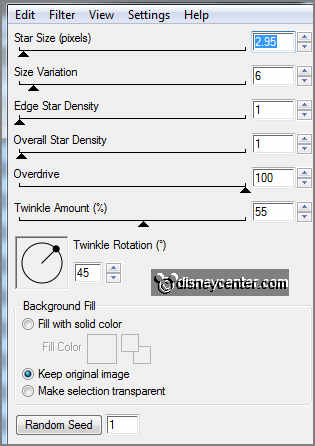
Effects – plug-ins – Xenoflex 2.0 – Constellation –
with this setting.
Selections - select none.
9.
Activate word-art-Emmynewyearsshow – edit - copy.
Edit - paste as a new layer on the image.
Activate move tool – place the word-art on the rectangle - see example.
10.
Activate the tube tafel - edit - copy.
Edit - paste as a new layer on the image.
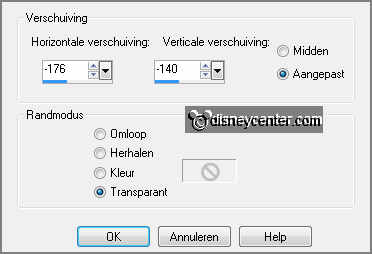
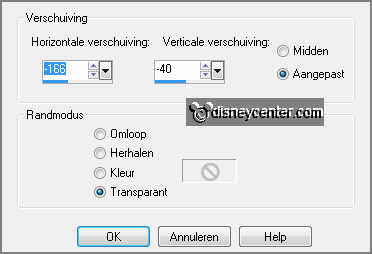
Effects - Image effects – offset –
with this setting.
Effects - 3D Effects – drop shadow - setting is right.
11.
Activate the tube champagne – raster 2 - edit - copy.
Edit - paste as a new layer on the image.
Effects - Image effects – offset – with this setting.
12.
Activate the tube champagne – copy of raster 2 - edit - copy.
Edit - paste as a new layer on the image.
Move thee tube exactly at the other tube champagne.
13.
Layers – new raster layer – put your watermark into the image.
Lock the layers of champagne and stay at one of the other layers.
Layers – merge – merge all visible.
14.
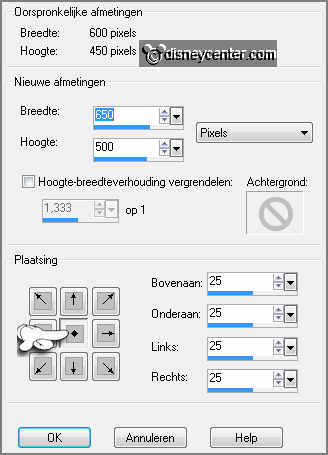
Image – canvas size –
with this setting.
Effects – plug-ins - – Alien Skin Eye Candy Impact – Gradient Glow – click at Settings – User Settings –
click at Emmychampagne – click OK.
15.
Layers – new raster layer – fill this with the background color.
Layers – arrange – send to bottom.
Selections – select all.
Selections – modify – contract 15 pixels.
Image – crop to selection
16.
Open the first layer of the champagne – edit – copy merged.
Open animation shop – edit – paste as a new animation.
17.
Back to PSP – lock the first layer champagne and open the second layer.
Edit – copy merged.
18.
In AS – paste after active frame – paste after active frame - paste after active
frame. (total 4 frames)
Edit – select all.
19.
Open animation Emmychampagne – edit – select all.
Edit - copy.
Back to the image – paste in selected frame. Put the animation at the bottom
right – see example.
20.
Animation – Frame properties – first frame to 100 – second and third frame to 75 –
fourth frame to 150.
File - save as - give name - click 3
times at next and than at finish.
