
This
Tutorial is copyrighted to the Tutorial Writer, © Emmy Kruyswijk 2009.
This Tutorial
may
not be forwarded, shared or otherwise placed on any Web Site or group without written
permission from
Emmy Kruyswijk
Do you want to link my lessons?
Please send
me a mail.
Materials:
Download
here
1
Disney
tube,
1 tube 1 mask, preset shapes., template from
BabesDesignz
filter: Penta.com - Dot and Cross,
Graphics Plus -
Cross Shadow.
Download
here
Put the plug-ins in the folder plug-ins and the mask in the
folder mask. Also the preset shape in the folder preset shapes.
Christmas.

Foreground color #4c743f and background color
#dce3e3
1. Open new image 600x600
2. Fill this with the foreground color.
3. New raster layer - fill this with
the background color.
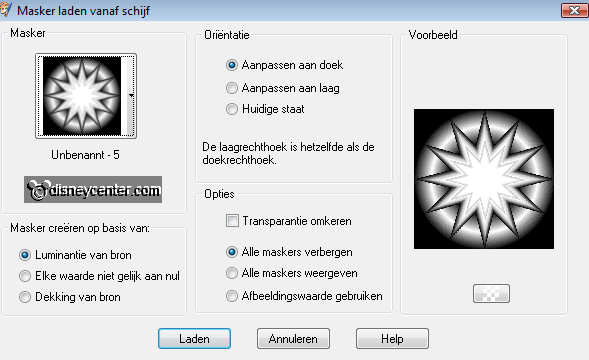
4. Layers - Load/Save Mask - Load mask from disk - Unbekannt 5 -
with this setting.
5. Layers - merge - merge group.
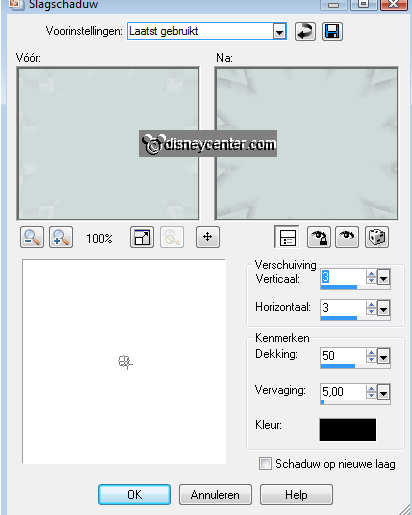
6. Effects - 3D Effects - drop shadow with this setting.
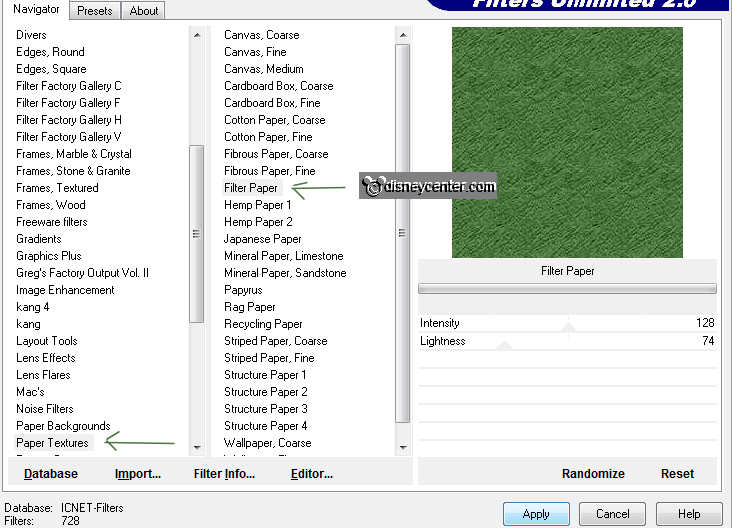
7. Stay at raster 1 - Effects - Filters Unlimited 2.0 - Paper
Textures - Filter Paper - with this setting.
8. Go back to the top layer.
9. Open the BabesDesignz_template8.
10. Copy the dot circle and paste as a new layer.
11. Give the same drop shadow as in point 6.
12. Copy the small circles and paste as a new layer.
13. Select the black circles and fill this with #960000.
14. Selections - select none.
15. Give the same drop shadow as in point 6.
16. Copy the circle and paste as a new layer.
17. Make this bigger with the zoom in option
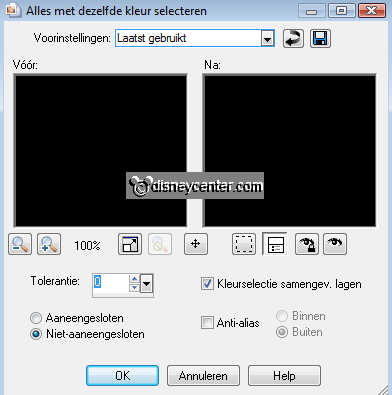
18. Select the black circle - Selections - modify - Select color
range.
19. Fill this with color #960000.
20. For the dot circle - put your paintbrush at 10 and go over the
dot circle- Till this is filled also.
21. Selections - select none.
22. Copy the circle and paste as a new layer.
23. Give the same drop shadow as in point 6.
24. Effects - Penta.com - Dot and Cross with this setting.

25. Copy the tube ChristmasMick and paste as a new layer.
26. Give the same drop shadow as in point 6.
27. Copy the tube GGChristmasBow and paste as a new layer.
28. Give the same drop shadow as in point 6.
29. Duplicate this layer - image - mirror.
30. Stay at raster 3. Put the fore- and background color at white.
31. Go to preset shape tool and find gerdaxmas.
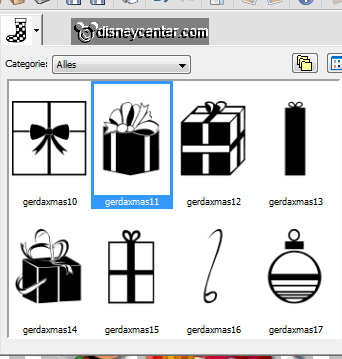
32. And fill the 7 little red circles with another preset shape of gerdaxmas.
33. Give them all the same drop shadow as in point 6.
34. Layers - merge - merge all.
35. Image - Resize 75%.
36. Put your watermark into the image.
37. Image - add border 5 color #960000
38. Select the border.
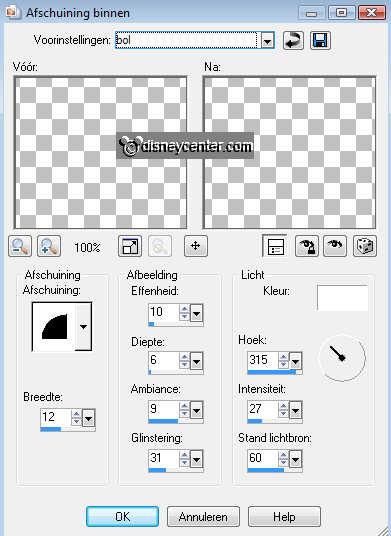
39. Effects - 3D Effects - Inner Bevel with this setting.
40. Selections - select none.
41. Image - add border 10 - color white.
42. Put the foreground back to #960000.
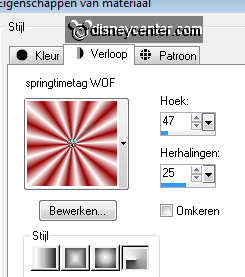
43. Select the white border - fill this gradient radial.
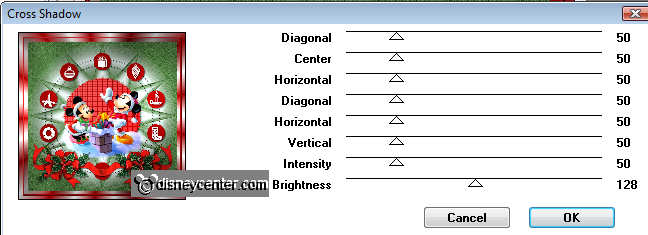
44. Effects - Graphics Plus - Cross Shadow with this setting.
45. Selections - select none.
46. Image - add border 5 color #960000
47. Repeat point 38, 39 3n 40
48. Image - add border 10 - color white.
49. Repeat point 38, 39, 40 en 41.
50. Image - add border 5 color #960000.
51. Repeat point 43, 44 en 45.
Ready is the tag
I hope you like this tutorial.
greetings Emmy,

Tutorial written
01-06-2009
