7. Stay again
at group raster 2.
8. Go to selection
tool - Selection - square.
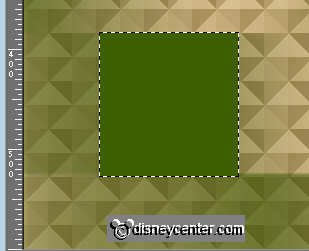
9. Draw a
square of 140x140. Make this 75 pixels of the left side and bottom.
10. New raster
layer - fill this with the background color.
11. Duplicate
this layer and place this just above the other one.
12. Go back to
the first square.
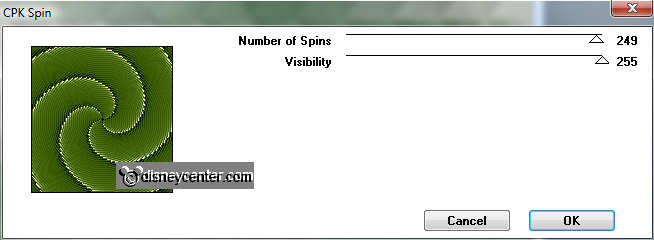
13.
Effects - CPK Designs - CPK Spin with this setting.
14. Selections
- select none.
15. Effects -
3D Effects - drop shadow with this setting.
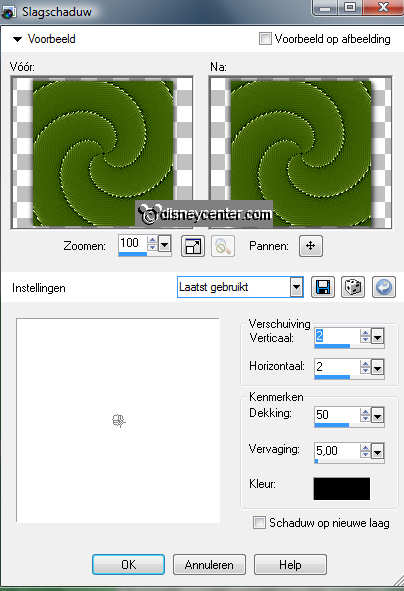
16. Repeat the
drop shadow, but now with Horz. and vert. at -2.
17. Duplicate
this layer and place this above the middle square.
18. Stay at
the middle square.
19. Go to
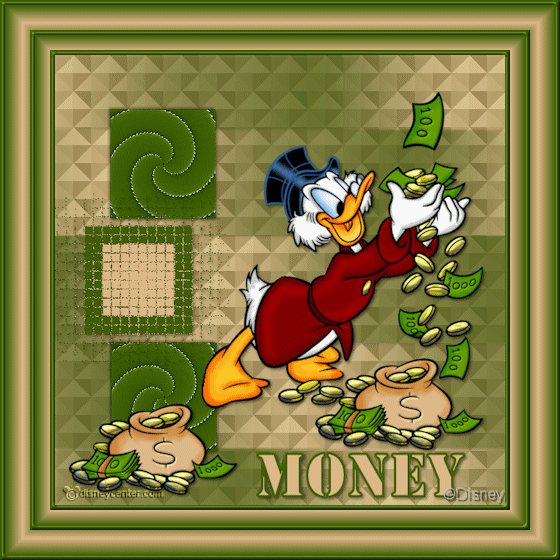
selection tool - Selection - square. Draw a square
in this square. About 10 pixels of the side.
20. New raster
layer and fill this with the foreground color.
21. Lock all
layers, except the 2 middle squares.
22. Layers -
merge - merge all visible layers.
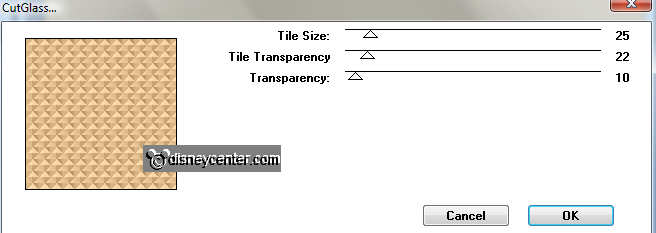
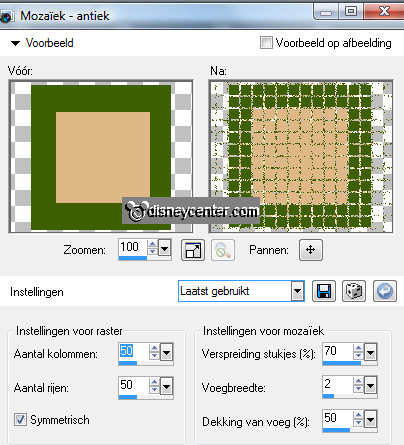
23. Effects -
Texture effects - Mosaic -Antique with this setting.
24. Move now
the middle square to the left. see example.
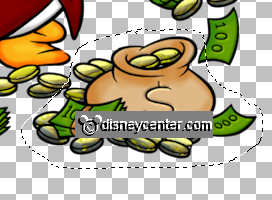
25. Copy the
tube Scrooge McDuck and paste as a new layer.
26. Place this
at the right side.
27. Give the
same drop shadow as in point 15.
28. Go to
selection tools - freehand selection - Remove the dollar bag. Remove
the excess with the eraser tool.
29. Copy this dollar
bag and paste as a new layer.
30. Place this
in the lower left corner..
31. Give the
same drop shadow as in point 15.
32. Go to text
tool - font Stencil (or other) - size 85.
33. Write
Money and place this right at the bottom.
34. Give the
same drop shadow as in point 15.
35. Put your
watermark into the image.
36. Image
- Resize 75% - All layer checked.
37. Image -
add border 5 - color white.
38. Select
this border - fill this with the background color.
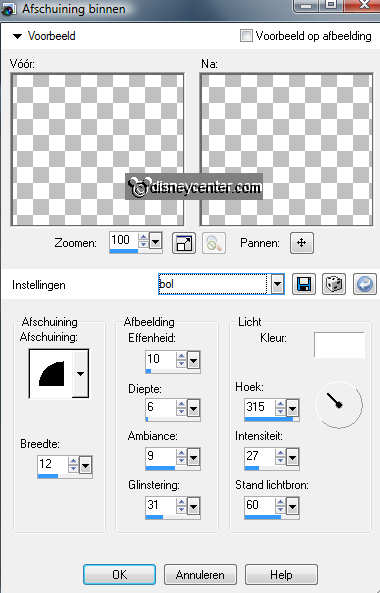
39. Effects -
3D Effects - Inner Bevel with this setting.
40. Selections
- select none.
41. Image -
add border 15 - color white
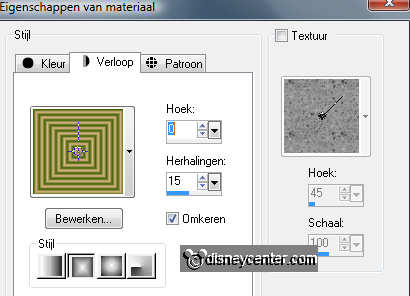
42. Fill this
with gradient rectangular with this setting.
43. Selections
- select none.
44. Image -
add border 5 - color white.
45. Select
this border - fill this with the background color.
46. Give the
same Inner Bevel as in point 40.
47. Selections
- select none.
48. Image -
add border 25 - color white.
49. Fill this
with gradient rectangular as in point 42.
50. Selections
- select none.
51. Image -
add border 5 - color white.
52. Select
this border - fill this with the background color.
53. Give the
same Inner Bevel as in point 40.
54. Select now
from the tube one coin and 1 banknote. And paste as a new image.

55. Copy the
coin and paste as a new layer.
56. Place this
above the left dollar bag.
57. Copy the
banknote and paste as a new layer.
58. Place this
again above the coin.
59. Repeat
point 55 and point 57 till you are by the hands with money. (9 layers
total)
60. See for
yourself what you like the best.
61.