Foreground color #7797be and background color #808080
1.
Open new transparent image 700x600.
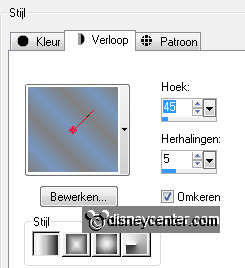
Fill this with gradient linear - with this setting.
Duplicate this layer - image mirror.
2.
Set the opacity of this layer at 50.
Layers - merge - merge down.
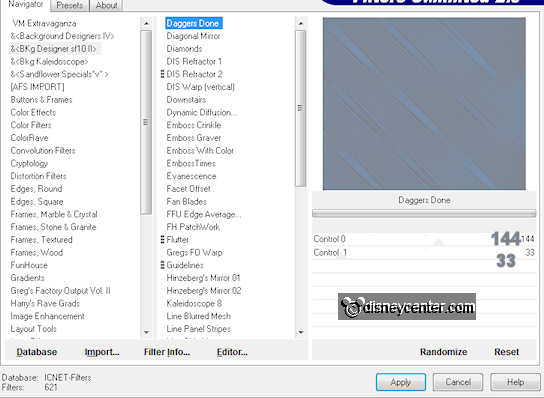
Effects - Filter Unlimited 2.0 - <&Bkg Designer sf10 II - Daggers
Done - with this setting.
3.
Duplicate this layer - image - mirror.
Set the opacity of this layer at 50.
Layers - merge - merge down.
4.
Selections - select all.
New raster layer - fill this with the silver pattern - Angle 0 -
Scale 100.
Selections - modify - contract 3 - click at the delete key.
Selections - select none.
Layers - merge - merge down.
5.
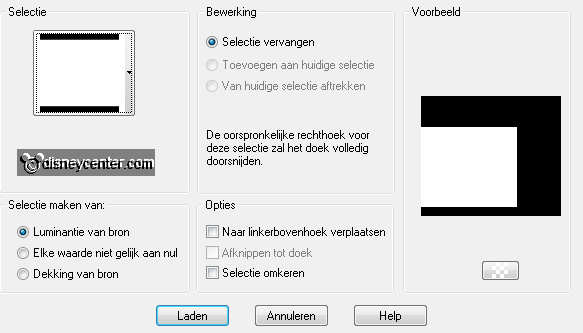
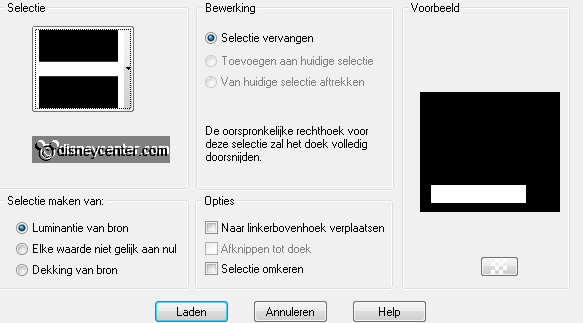
Selections - Load/save selection - Load selection from disk -
look emmynewyear1 - with this setting.
New raster layer - fill this with the background layer.
Selections - select none.
New raster layer.
Selections - Load/save selection - Load selection from disk - look emmynewyear2 - with this setting.
6.
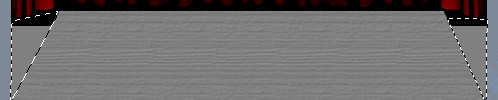
Go to Move Tool - Pick - hold down the shift key
Slide the tip slightly to the left and right. See below.
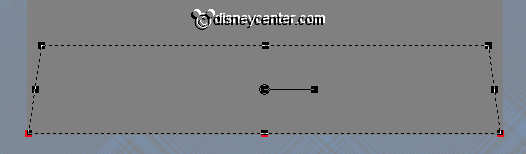
Go to Move Tool - Move.
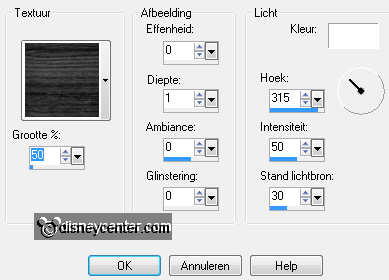
Effects - texture effects - texture - woodgrain - with this setting.
Selections - select none.
7.
Make raster 2 active.
Selections - select all - selections - float- selections - defloat.
Copy gordijnen - and paste as a new layer on the image.
Selections - invert - click on the delete key.
Selections - select none
8.
Go to Free hand selection - point to point - and make a selection as
below.
New raster layer - click with the dropper tool in the black parts,
for the right color.
Fill the selection with this color.
Pull this layer below the curtains layer.
9
Make raster 2 active.
Lock the top 3 layers.
Selections - select all - selections - float - selections - defloat.
New raster layer - fill this with the silver pattern - setting is
right.
Selections - modify - contract 3 - click at the delete key.
Selections - select none
Layers - arrange - bring to top.
Open the top 3 layers again.
10.
Take a look if there something black outside the silver edge comes.
Erase this. Stay there for at raster 4 (black fill)
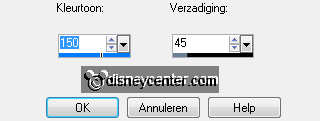
Make now raster 3 active.
Adjust - Hue and Saturation - colorize - with this setting.
11.
Lock the bottom layer and make 1 of the other layers active.
Layers - merge - merge visible.
Effects - 3D Effects - drop shadow - with this setting.
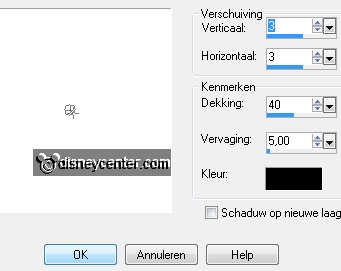
Repeat the drop shadow - now with -3.
12.
Open out the scrapkit Discoball-01-SS-B- image - resize 50% and 1
time 75% - all layers checked.
Copy this and paste as a new layer on the image.
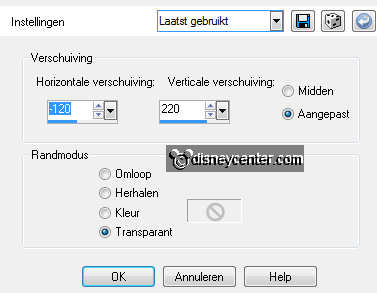
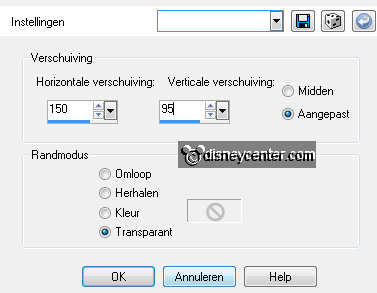
Effects - Image Effects - Offset - with this setting.
Give the same drop shadow as in point 11. Without repeat.
13.
Copy LD Goldvorm and paste as a new layer on the image.
Image - flip.
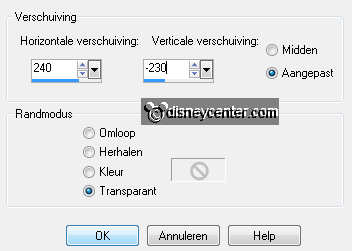
Effects - Image Effects - Offset - with this setting.
Give the same drop shadow as in point 12.
14.
Open out the scrapkit Champagne-01-SS - image - resize 40% - all
layers checked.
Copy this and paste as a new layer on the image.
Place this at the bottom right - 30 pixels from the side.
Give the same drop shadow as in point 12.
Duplicate this layer and place left of the other glass - a little
down - see example.
15.
Open out the scrapkit Martini-01-SS - image - resize 40% - all
layers checked.
Copy this and paste as a new layer on the image.
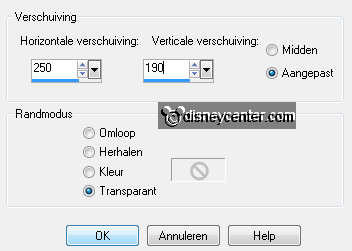
Effects - Image Effects - Offset - with this setting.
Give the same drop shadow as in point 12.
16.
Open out the scrapkit Bow-01-SS - image - resize 35% - all layers
checked.
Copy this and paste as a new layer on the image.
Image - mirror.
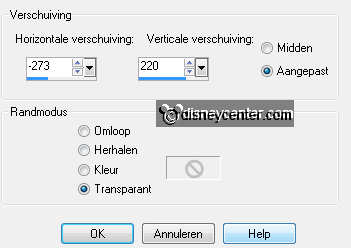
Effects - Image Effects - Offset - with this setting.
Give the same drop shadow as in point 12.
17.
Change the colors in foreground white and background #808080.
Go to text tool - I took Monotype Corsiva - set this
setting as below.

Type - Happy - convert to raster layer.
Give the same drop shadow as in point 12.
Type - 2012 - convert to raster layer.
Image - free rotate - 90 right.
Give the same drop shadow as in point 12.
Place this both in the middle of the Goldvorm. see example.
18.
Set the size back tor 48 - the rest stays good.
And type - Dancing into 2012 - convert to raster layer.
Give the same drop shadow as in point 12.
Place this at the bottom - see example.
19.
Open out the scrapkit Chandelier-01-SS - image - resize 40% -
all layers checked.
Copy this and paste as a new layer on the image.
Effects - Image Effects - Offset - with this setting.
Give the same drop shadow as in point 12.
20.
New raster layer - set your watermark into the image.
Layers - merge - merge all.
Edit - copy - Open animation shop.
21.
Paste as a new animation.
Edit - duplicate selected - continue until you have 11 frames.
Edit - select all.
22.
Open dans animation - Edit - select all.
Copy - place this at the wooden floor - paste into selected
frames.
Animation - Frame properties at 35.
23.
Open animation glitter1 - edit - select all.
Copy - place on the disco bal - paste into selected frames.
Do this as often and as much as you want.
Animation - resize format of animation 85% - Maintain aspect ratio
checked.