
This
Tutorial is copyrighted to the Tutorial Writer, © Emmy Kruyswijk 2009.
This Tutorial
may
not be forwarded, shared or otherwise placed on any Web Site or group without written
permission from
Emmy Kruyswijk
Do you want to link my lessons?
Please send
me a mail.
Materials:

Animation Shop.
1
Disney tube,
2 tube, 2 animations.
filter: Filter Factory Gallery -
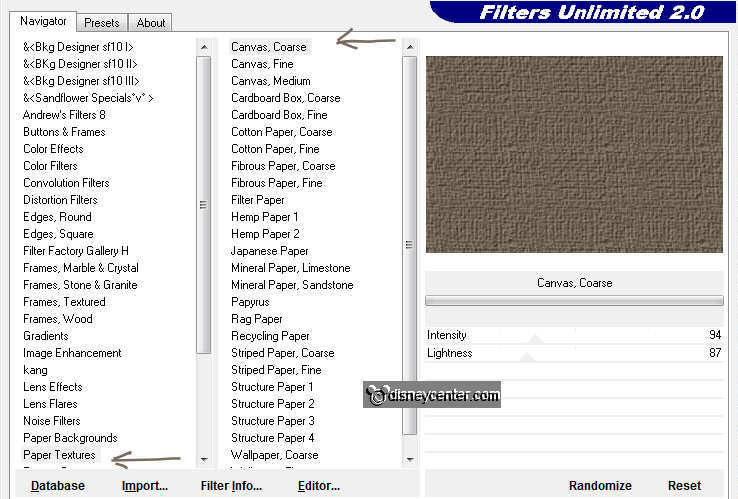
Xaggerate, filters Unlimited - Paper Textures - Canvas Coarse.
Download
here
Put the plug-ins in the folder plug-ins
This lesson is translated in
 by
Hélène
by
Hélène
Donald Duck
foreground
color #766b5c and background color #decdbc
1. Open new image 700x465
2. Fill this with the foreground color.
3. Effects - filters Unlimited - Texture Papers - Canvas Coarse.
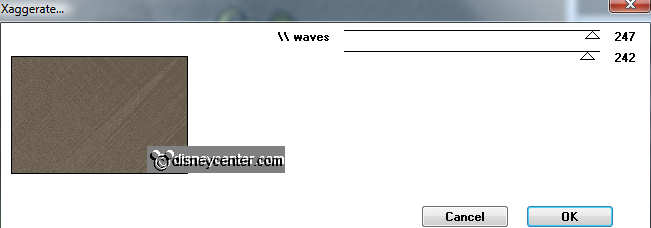
4. Effects - Filter Factory Gallery - Xaggerate - with this setting.
5. Copy the tube Back_doors and paste as a new layer.
6. Place this 100 pixels of the left side and bottom.
7. Copy the tube Donald101_cmh and paste as a new layer.
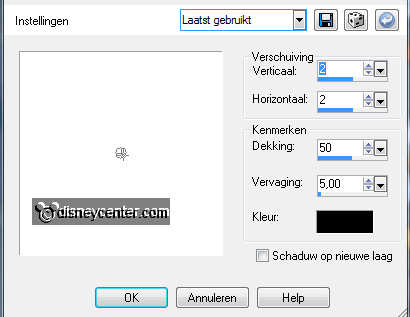
8. Effects - 3D Effects - drop shadow with this setting.
9. Place this to the right side.
10. Remove the stones from the tube and paste as a new image. By
doing this below.
11. Go to selection tool - selection - Free hand selection.
12. If there is anything yellow, remove that with the eraser tool.
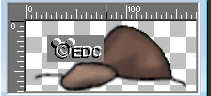
13. Copy the stones and paste as a new layer.
14. Duplicate this layer 2 times and place them different at the
bottom.
You can also shrink and mirror one of the stones.
15. Copy thee tube vaas and paste as a new layer.
16. Place this left at the bottom. About 35 pixels of the side. see
example.
17. Copy the tube plant_2 and paste as a new layer.
18. Place this on the vase. Put the opacity of the plant at 50.
Make sure the layer of the plant is
active.
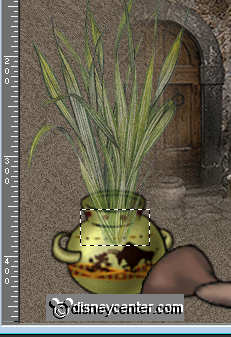
19. Remove a part of the plant in the selected area, with the
eraser. Make the image larger using the zoom.
20. If you like it, put than the opacity of the plant back to 100.
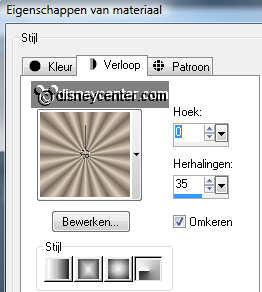
21. Image - add border 40 - background color #decdbc.
22. Select the border - fill this with the gradient radial.
23. Selections - select all - selections - contract 40.
24. Effects - 3D Effects - drop shadow with this setting.
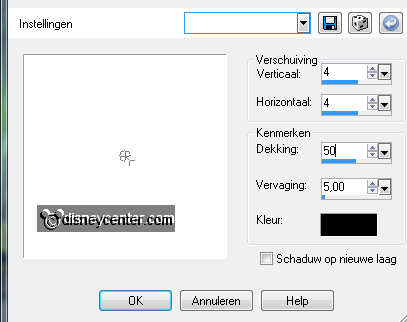
25. Repeat the drop shadow, but now horz.- and vert. on -4.
26. Put your watermark into the image.
27. Open now animation shop.
28. Open the animations vlam (flame) 1 and vlam (flame) 2.
29. Edit - select all - Do this for the 2 animations.
30. Go back to PSP - copy the image.
31. Back in animation shop - paste as a new animation.
32. Edit - Duplicate selected.
33. Edit - select all - Edit - Duplicate selected.
34. If all goes well you have 4 frames.
35. Go to the animation vlam 1, (all frame are still selected) -
copy
36. Click in the big image, in the first frame - paste in selected
frame.
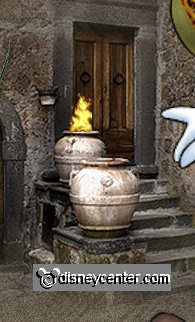
37. Place this at the vase on the back, see below.
38. Go to animation vlam 2 - (is also still selected) - copy
39. Click again in the first frame - paste in selected frame.
40. Place this at the vase on the front.
41. Animation - Frame properties on 15. (Make sure that all frames
are selected)
42. Animation - Resize format of animation 75%.
43. File - save as - give name - click 3 times at next and than at
finish.
Ready is the tag
I hope you like this tutorial.
greetings Emmy,

Tutorial written
29-07-2009
