|

This
Tutorial is copyrighted to the Tutorial Writer, © Emmy Kruyswijk
18-01-2013.
This Tutorial
may
not be forwarded, shared or otherwise placed on any Web Site or group without written
permission from
Emmy Kruyswijk.
Many of the material are made by me.
Please respect my work and don't change the file names.
At all Disney creations must be copyrighted.
Do you want to link my lessons?
Please send
me a mail.
Needing:
5
tubes, 1 mask - made by me.
1 tube from Carolina
Plug-ins: Penta.com - Color Dot, Penta.com - Dot and Cross, FM Tile
Tools - Blend Emboss,
I.C.NET Software - Filters Unlimited 2.0 - Edges Squares - Square Edge 11
Download here
Before you begins.......
Open the tubes and word-art in PSP,
Set the plug-ins in the folder
plug-ins and the mask in the folder masks.
Material

This lesson is translated in
 by
Xena by
Xena
Easter Couple

1.
File - open new transparent image 700x500.
Set in the material palette the foreground color on #d3e7dc
and the background on #4a6d2c.
Activate flood fill tool - fill the layer with the
foreground color.
2.
Layers - new raster layer.
fill the layer with the
background color.
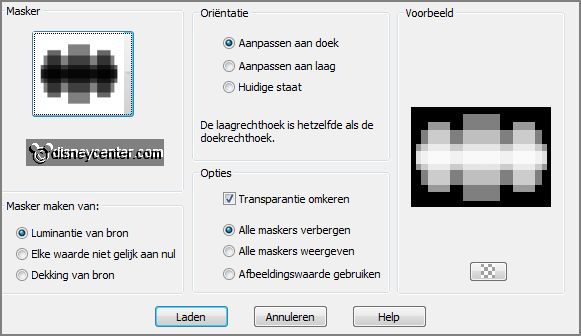
Layers - load mask from disk - look Emmymask14 - with this setting.
Layer - merge - merge group.
3.
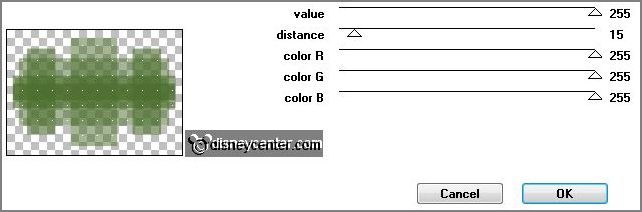
Effects - plug-ins - Penta.com - Color Dot - with this setting - click
OK.
Effects - Edge effects - enhance more.
4.
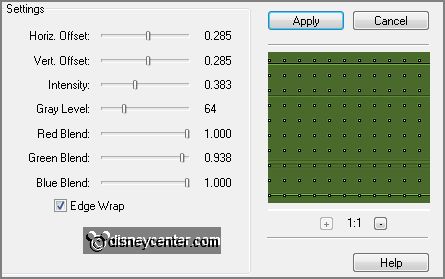
Effects - plug-ins - FM Tile Tools - Blend Emboss
- with this setting-
click OK.
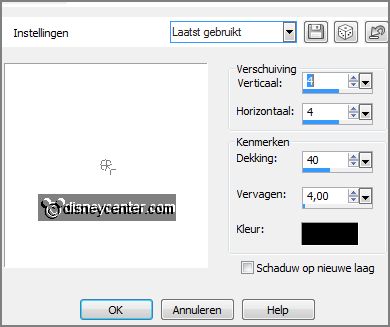
Effects - 3D Effects - drop shadow - with this setting.
5.
Activate the bottom layer.
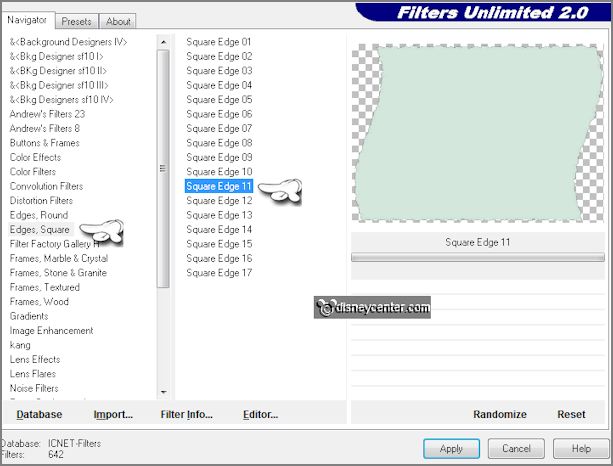
Effects - plug-ins - I.C.NET Software - Filters Unlimited 2.0 - Edges
Squares - Square Edge 11- click Apply
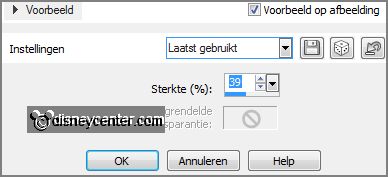
.Effects - Distortion effects - Pinch - with this setting.
6.
Effects - plug-ins - Penta.com - Dot and Cross - with this setting -
click OK.
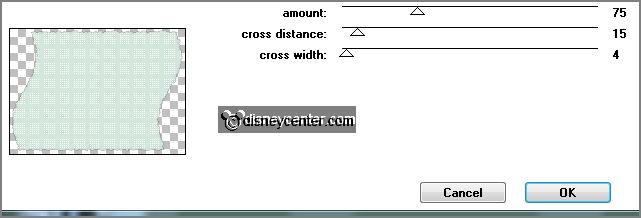
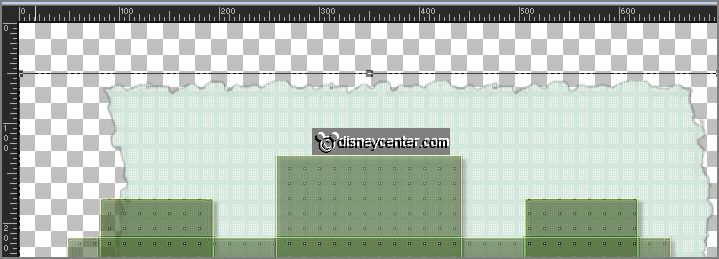
Image - canvas size - with this setting.

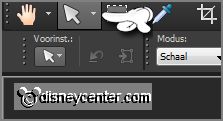
Activate pick tool - see below - and pull the layer
down and up till 50 pixels from the top and bottom.
7.
Activate the top layer.
Activate the tube eastercouple - edit - copy.
Edit - paste as a new layer on the image.
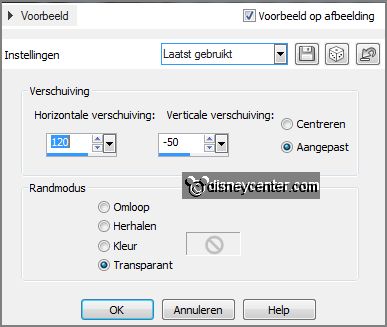
Effects - Image effects - offset -
with this setting.
Effects - 3D Effects - drop shadow - setting is
right.
8.
Activate the tube element 43 - edit - copy.
Edit - paste as a new layer on the image.
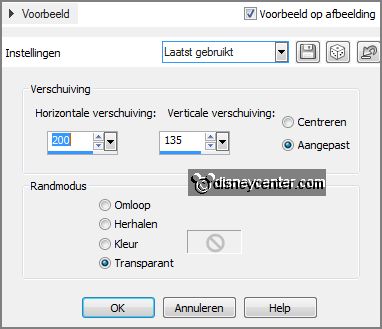
Effects - Image effects - offset - with
this setting.
Layers - arrange - move down - under group raster 2.
Effects - 3D Effects - drop shadow - setting is right.
9.
Activate the tube gras - edit - copy.
Edit - paste as a new layer on the image.
Activate move tool - set the tube to the left side.
Effects - 3D Effects - drop shadow - setting is right.
10.
Layers - duplicate.
Image - resize - 75% - all layers not checked.
Place this right near the other.
11.
Layers - duplicate.
Image - resize - 75% - all layers not checked.
Place this right near the other.
12.
Activate the tube Emmyeaster - edit - copy.
Edit - paste as a new layer on the image.
Place this tube at the bottom.
Effects - 3D Effects - drop shadow - setting is right.
13.
Activate the tube takhedera - edit - copy.
Edit - paste as a new layer on the image.
Place this right at the top against the sign garden- see example.
Effects - 3D Effects - drop shadow - setting is right.
14.
Activate the tube Emmyhappyeaster - edit - copy.
Edit - paste as a new layer on the image.
Set the tube at the top left on the hedera branch- see example.
Effects - 3D Effects - drop shadow - setting is right.
Layers - arrange - move down.
15.
Layers - new raster layer - put your watermark into the image.
Layers - merge - merge all.
16.
Image - resize 85% - all layers checked.
File - export - PNG Optimizer.
Ready is the tag
I hope you like this tutorial.
greetings Emmy
Tested by Nelly

tutorial written 18-01-2013.
| 