|

This
Tutorial is copyrighted to the Tutorial Writer, © Emmy Kruyswijk 03-02-2012.
This Tutorial
may
not be forwarded, shared or otherwise placed on any Web Site or group without written
permission from
Emmy Kruyswijk
At all Disney creations must be copyrighted.
Do you want to link my lessons?
Please send
me a mail.
Needing
Animation shop
1 masker
1 template from
Linda, I took- Lin_WildOnes1,
download here
1 image, 1 brush, 1 cluster, made by me.
1 animation from
Lovely is by the materials
Plugins: Richard Rosenman,
download here.
Materials

Before you begins……
Open image, cluster and template in PSP
Put the plug-in in the folder plug-ins.
The mask in the folder mask
The brush in the folder brush.
Easter Time
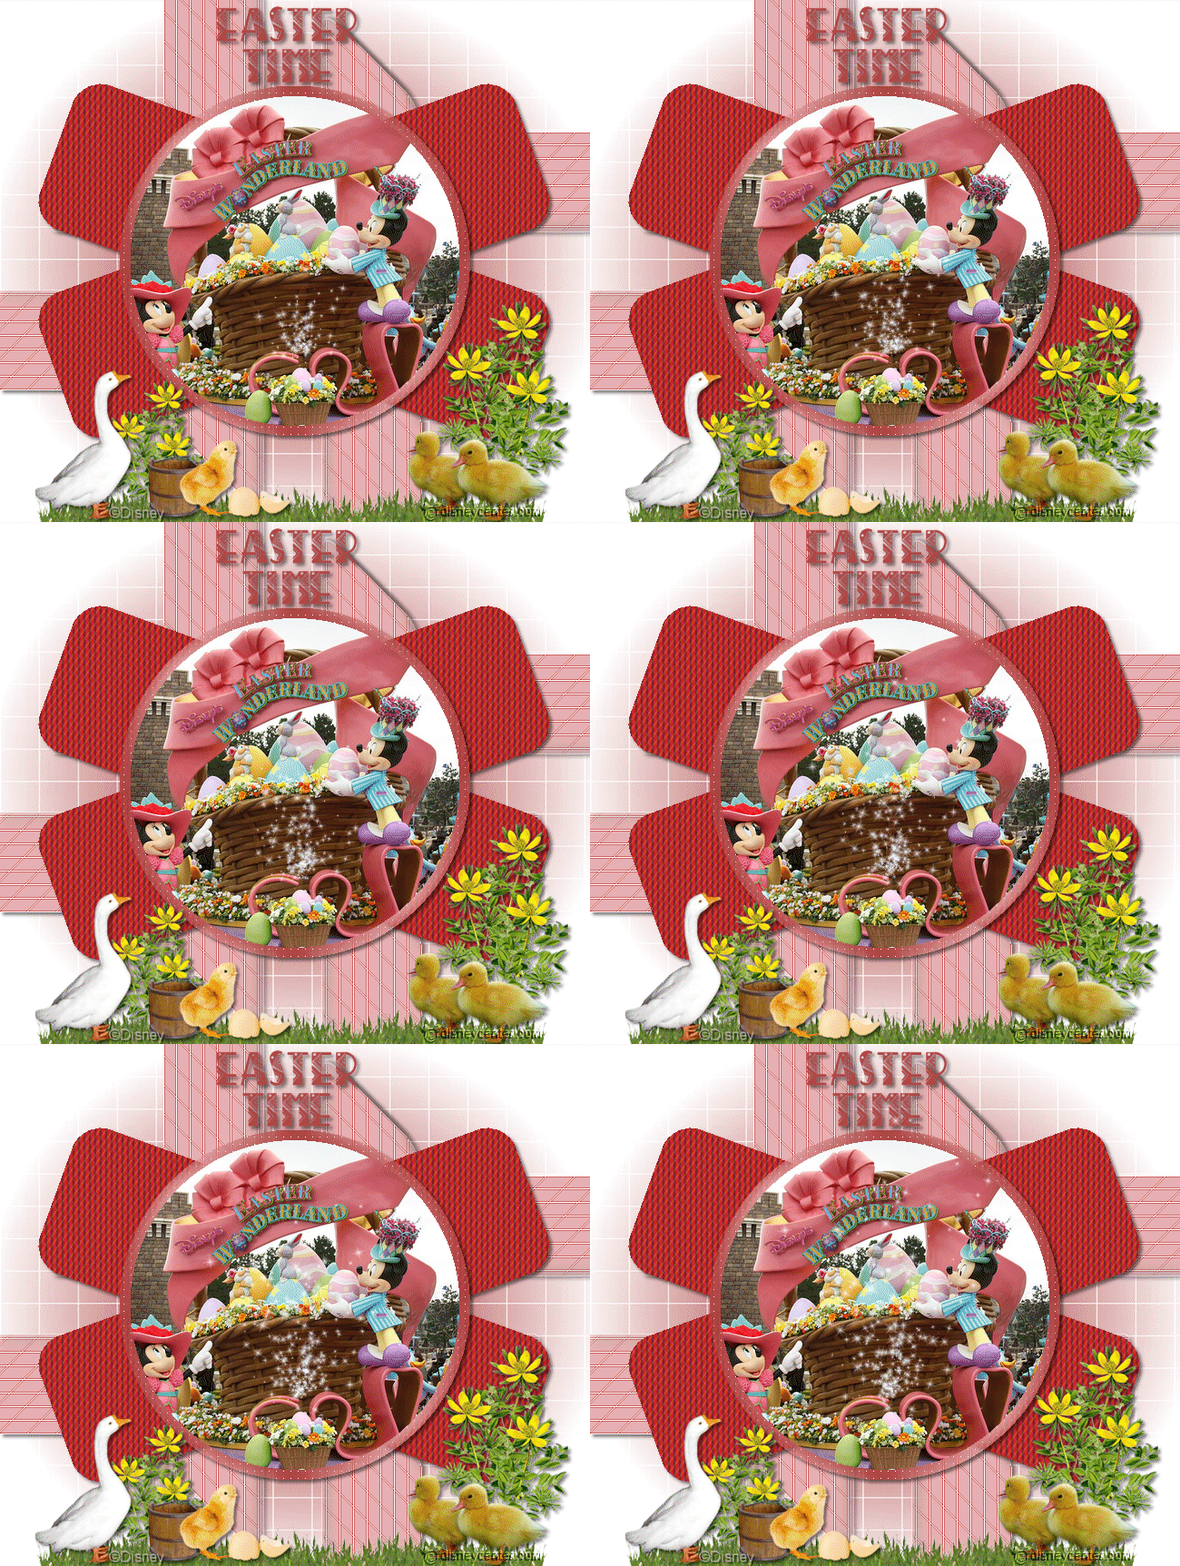
1. Putt in the material palette the foreground at
a light color from the image and the background at a dark color from
the image.
2. Open the template Lin_WildOnes1.
3. Make a copy Shift+D and close the original.
4. Delete in the layers palette the top 3 layers.
5. Delete the text layers who are closed – see below.
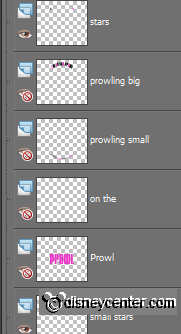
6. Close all layers by clicking
in the layers palette at the eye, except the bottom layer.
Make
the bottom layer active.
7. Layers – new raster layer.
8. Activate Flood Fill Tool – fill the layer with the background
color.
9. Layers – arrange– move down.
10. Make the layer above active.
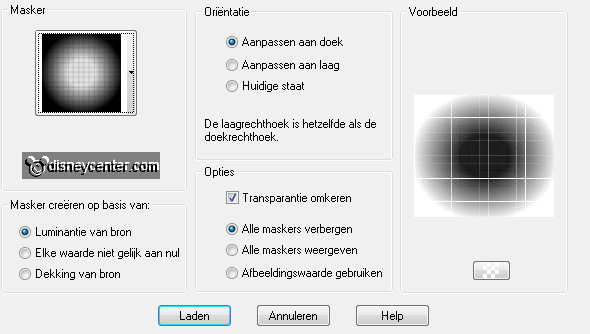
11. Layers – Load/Save mask – load mask from disk – look Julesmsk14
– with this settings.
12. Layers – merge – merge group.
13. Effects – Edge Effects – enhance.
14. Activate in the layer palette the layer Black shapes and open
this layer.
15. Activate the magic wand – with this setting – and select the
black shapes.

16. Make in the material palette
from the foreground color a gradient linear – with this settings.
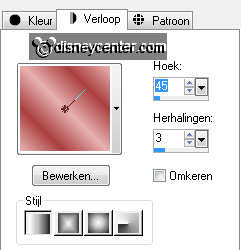
17. Activate Flood Fill Tool –
fill thee selection with the foreground gradient.
18. Adjust – blur – Gaussians blur – radius at 10.
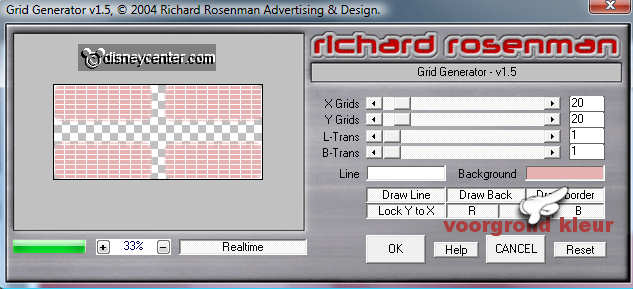
19. Effects – plug-ins – Richard Rosenman – Grid Generator –
with this settings.
20. Effects – Edge effects –
enhance.
21. Selections – select none.
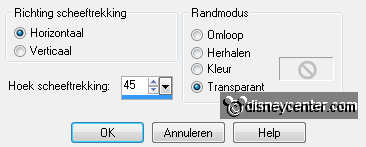
22. Effects – Geometric effects – Spherize - with this
settings.
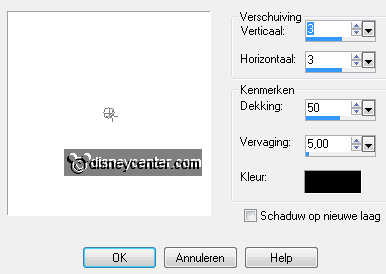
23. Effects – 3D Effects – drop
shadow
– with this settings.
24. Layers – duplicate.
25. Image – free rotate – 90 left.
26. Layers – merge – merge down.
27. Activate in the layer palette the layer Pink shapes and open
this layer.
28. Activate the magic wand – settings are right – and select the pink shapes
29. Activate Flood Fill Tool – fill the layer with the background
color.
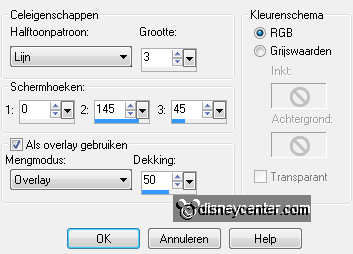
30. Effects – Artistic effects – Halftone – with this settings.
31. Selections – select none.
32. Effects – 3D Effects – drop shadow – settings are right.
33. Activate in the layers palette Pink circle and open this layer.
34. Select with the magic wand the pink circle – fill the circle
with the foreground gradient – settings are right.
35. Adjust – blur – Gaussians blur – settings are right.
36. Effects – texture effects – Weave – with this settings.
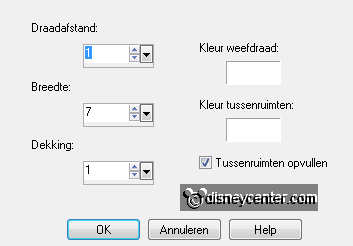
37. Selections – select none.
38. Effects – 3D Effects – drop shadow – settings are right.
39. Activate in the layers palette Black circle.
40. Select with the magic wand the black circle and open this layer.
41. Activate the image – edit – copy.
42. Edit – paste as a new layer on the image.
43. Selections – flip.
44. Click at thee delete Key.
45. Selections – select none.
46. Layers – new raster layer.
47. Take your brush tool - with this settings.

48. Look the brush emmy-eastertime.
49. Change in the material palette the foreground gradient – by
clicking at the 2 little arrows - see below.
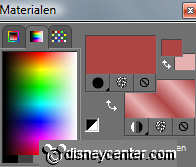
50. Stamp 2 times in the middle
top-with the left mouse button.
51. Effects – 3D Effects – drop shadow – settings are right.
52. Activate cluster-eastertime – edit – copy.
53. Edit – paste as a new layer on the image.
54. Set the cluster with the move tool at the bottom in the middle.
55. Layers – new raster layer.
56. Put the watermark into the image.
57. Layers – merge – merge all.
58. Edit – copy.
59. Open animation shop .
60. Edit – paste as a new animation.
61. Animation – Insert frames – Empty – with this settings.
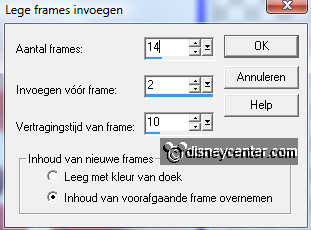
62. Edit – select all.
63. Open animation smtwinks- delete the first frame (black
frame)
64. Edit – select all.
65. Edit – copy.
66. Go to the image - edit – paste into selected frame.
67. Place this in the circle on the basket – see example.
68. File – save as – give name – click 3 times at next and than at
finish.
Ready is the tag
I hope you like this tutorial.
greetings Emmy
Tested
by Cobie

Tutorial written 02-03-2012
|