|

This
Tutorial is copyrighted to the Tut Writer, © Emmy Kruyswijk 2008.
This tutorial does not copied to your own server,
does not
used as your own material or linked without my permission.
Even not in groups
Would you use my tutorials?
Please give
me a mail.
Materials:
download
here
masker cat005, font, tube, floatie, present shape,
You can
download here
filters Xero
en Graphics Plus,
You can
download here.
Happy Valentine

Open a new image 500x500 transparent.
Foreground on a light color #f88ba3 and background
on a dark color #8874bb
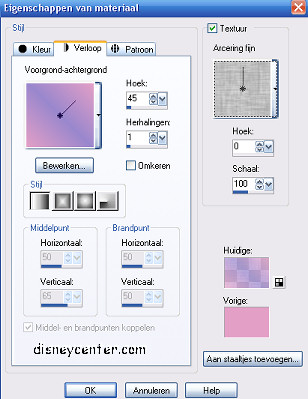
Make from the foreground a gradient.
Fill the image with this gradient Linear. (see screen this is in the Dutch
language, but it all the same place))
Open a new raster layer and fill this with the light color.
Layers - Load/Save Mask - Load mask from disk.

Layers - Merge - Merge group.
Effects - Edge Effects - Enhance more.
New raster layer, put your light color back to foreground and your
dark color is still in the background.

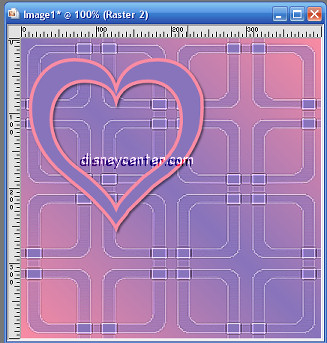
Go to the Present Shape tool and find the heartline3TBC and draw a
heart in your image.
Put this in the top left corner
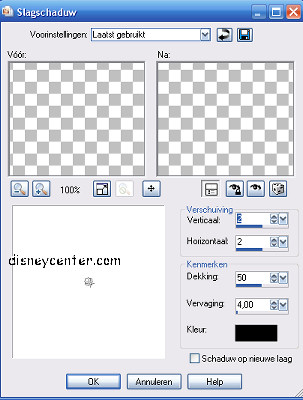
Go to Effects - 3D Effects - Drop Shadow.
Click with the magic wand tool in the purple color of the heart and
select.
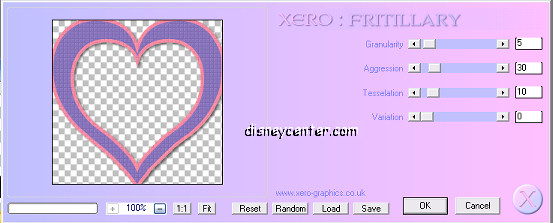
Go to Effects - - Xero - Fritillary
Select none.
Go with the magic wand tool in the little heart again and select.
Open a new raster layer.
Selections - Modify - Expand 5.
Fill this selection with the light color.
Go to Effects - Texture Effects - Blinds with this settings.
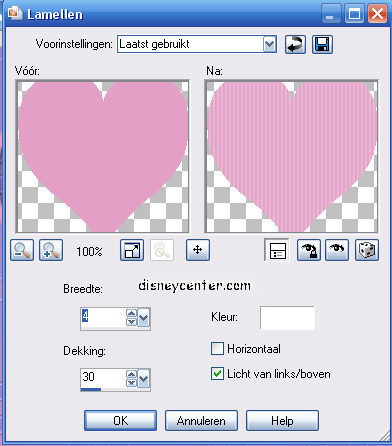
Repeat this, but than Horizontal checked.
Layers - Arrange - Move down. Select none.
Go to the top layer - click right - Merge - Merge down.
Copy your tube and paste as a new later at your image.
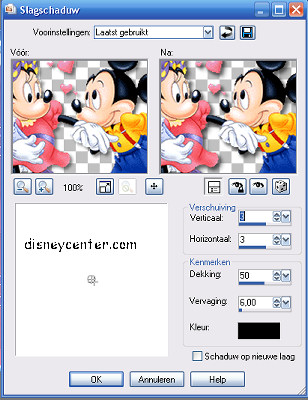
Go to Effects - 3D Effects and give this Drop Shadow.
Go to the text tool and find a nice font. I took Victorian TEL (in
the zip file) size 48 vector created.
Foreground closed, background is still dark.
Write first Happy and put this in the right top corner.
Give a Drop
Shadow H & V 2, Opacity 50, Blur 5,00, write now Valentine and put
this in the left bottom corner and rotate this a little.
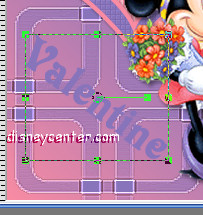
Give the same Drop Shadow as by Happy.
Add your watermark - Merge all flatten.
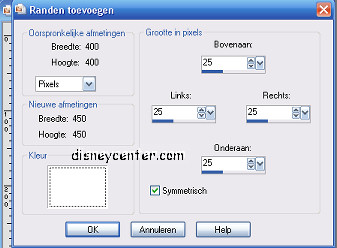
Go to Image - Add borders 25 color white
Select this border with the Magic wand and fill this with the
gradient, but with repeat at 0
Go to Effects - Graphics Plus - Cross Shadow - standard.
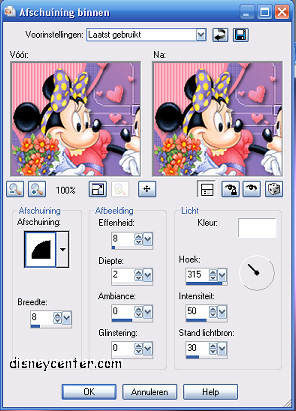
Go to Effects - 3D Effects - Inner Bevel
Edit - copy
Open animation shop
Paste as a new image.
Open je floatie image , this has 24 images.
Copy your tag 23 times. You have now also 24 images.
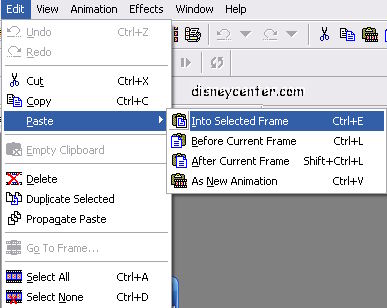
Activate your tag - Edit - Select all
Activate your gif image Edit - Select all.
Go back to your gif image, right click at the first image - copy -
than to your tag (all is still selected) right click at the first
image paste into the selected frame.
View animation purple arrow.

If you like it save. Go to file - save as - Give the animation a
name.
And ready is your animation Valentine tag.
I hope you like this tutorial
greetings Emmy.

Tutorial written
09-11-2008
|