|

This
Tutorial is copyrighted to the Tutorial Writer, © Emmy Kruyswijk 2010.
This Tutorial
may
not be forwarded, shared or otherwise placed on any Web Site or group without written
permission from
Emmy Kruyswijk
Do you want to link my lessons?
Please send
me a mail.
Materials
download hier
2
tubes, masker, font,
filters: Graphics Plus - Cross Shadow, Cybia -
Screenworks,
Zet de filters in de map plug-ins.
This lesson is translated in
 by
Hélène by
Hélène
Fantasia
1. Open new image 500x500.
2. Flood fill this with the color #7b8db3.
3. Copy Fantasia 7 and paste as a new animation.
4. Move this left.
5. Go to selection tool. Selection - rectangle.
6. Make a rectangle of 250x500 down.
7. New raster layer.
8. Flood fill this with white.
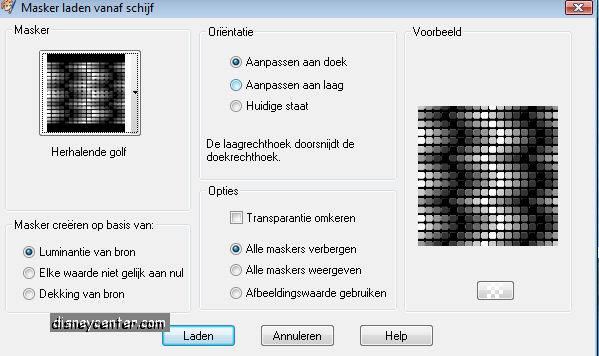
8. Layers - Load/Save Mask - Load mask from disk.
9. Look for herhalende golf.
10. Layers - merge - merge group.
11. Effects- 3D Effects - drop shadow vert. and horz2, opacity 5,
blur 5.00, color black.
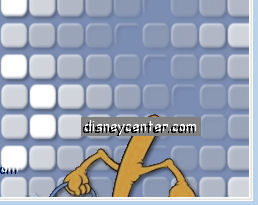
12. Copy fantasia 20 and paste as a new layer.
13. Move this to the top. (see image below)
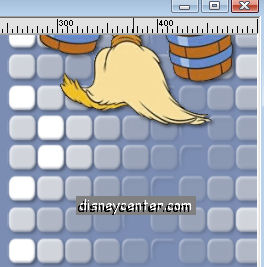
14. Duplicate this layer and place these with the bucket exactly
under the other bucket. (see image below)
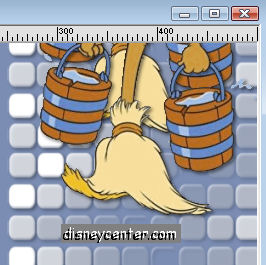
15. Duplicate and place it as point 14.
16. Duplicate and place it as point 14.
17. Duplicate and place it as point 14.
18. Duplicate and place it as point 14.
19. Duplicate and place it as point 14.
20. Duplicate and place it as point 14. The broomstick stand now
entirely downstairs
21. Go to text tool and look for the font Old English Text M. size 72
and type Magic.
22. Effects - 3D Effects- drop shadow same as point 11.
23. Put your watermark in the image.
24. Open new image 500x500 color #7b8db3.
25. Image - Add border 10 color white Selected the border and flood
fill with #7b8db3.
26. Effects - Graphics Plus - Cross Shadow, all on 50 except the
bottom 128.
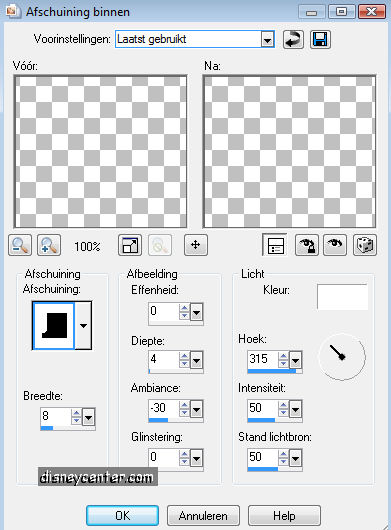
27. Effects - 3D Effects - Inner Bevel.
28. Select none.
29. Image - Add border 25 color white.
30. Select the border. Flood fill with #7b8db3.
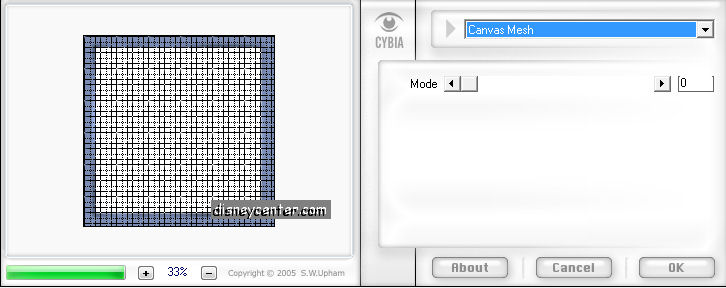
31. Effects - Cybia - Screenworks.
32. Image - Add border 10 color white.
34. Select border. Flood fill with #7b8db3
35. Effects - Graphics Plus - Cross Shadow.
36 Effects - 3D Effects - Inner Bevel as point 27.
37. Select none.
38. Selections - Select all.
39. Selections - modify - contract 45.
40. Layers - Promote background layer.
41. Select none.
42. Make your first image active.
43. Lock copy, (2), (3), (4), (5), (6), (7) of raster3.
44. Stay at the bottom layer.
45. Click at the border of the image - Copy merged.
Open animation shop.
46. Paste as a new animation.
47. Back to PSP.
48. Lock raster3 and open copy of raster3.
49. Repeat45 and paste after current frame.
50. Lock copy of raster3 and open copy2 of raster3.
51. Repeat45 and paste after current frame.
52. .Lock copy 2of raster3 and open copy3 of raster3.
53. Repeat45 and paste after current frame.
54. .Lock copy3 of raster3 and open copy4 of raster3.
55. Repeat45 and paste after current frame.
56. .Lock copy4 of raster3 and open copy5 of raster3.
57.Repeat45 and paste after current frame.
58. .Lock copy 5of raster3 and open copy6 of raster3.
59. Repeat45 and paste after current frame.
60. .Lock copy6 of raster3 and open copy7 of raster3.
61. Repeat45 and paste after current frame.
62. Back to PSP. Copy the border.
63. Back to animation shop, paste as a new animation.
64. Edit- Duplicate this 7 times (8 total)
65. Edit- Select all.
66. Go to the other animation. Edit - Select all.
67. Click at the border of this animation - copy
68. Click in the border and paste in selected frame.
69. Go to animation- Resize animation with 75%.
70. Go again to animation - Frame properties and put this at
40.
71. File- Save as....give a name - next - next -
next - complete.
Ready is the tag
I hope that you like this tutorial.
greetings Emmy,

Tutorial written
09-10-2009
| |