|

This
Tutorial is copyrighted to the Tutorial Writer, © Emmy Kruyswijk 2012.
This Tutorial
may
not be forwarded, shared or otherwise placed on any Web Site or group without written
permission from
Emmy Kruyswijk
At all Disney creations must be copyrighted.
Do you want to link my lessons?
Please send
me a mail.
Needing:
1 image, 2 selections, 2 tubes, 1 preset Alien
Skin, all made by me.
font, is by the material.
Plug-ins: CPK Design - CP Pegs, FM Tile Tools - Blend Emboss,
Alien Skin Eye Candy 5 Impact - Gradient Glow
and Graphics Plus - Cross Shadow.
Download here
Before you begins.......
Minimize the font,
Open the image and tubes in PSP,
Put the plug-ins in the folder plug-ins and set the selections in the folder selections.
Materials

Fiesta
1.
Set in
the material palette the foreground at #e88100 and the background at #730845
File - new - open transparent - raster background - image
600x450
2.
Selections - select all.
Activate image fiesta - edit - copy.
Edit - paste into selection.
Selections - select none.
3.
Adjust - blur - Gaussian blur - radius at 20.
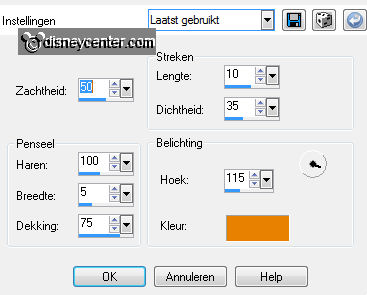
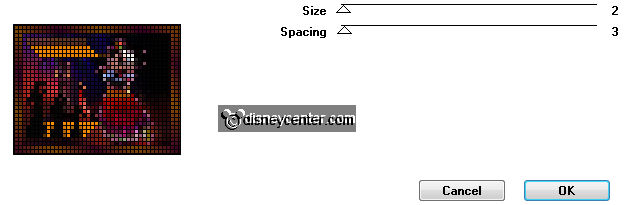
Effects - Art Media effects - Brush Strokes - with this setting.
Effects - plug-ins
- FM Tile Tools - Blend Emboss - default setting - click OK.
4.
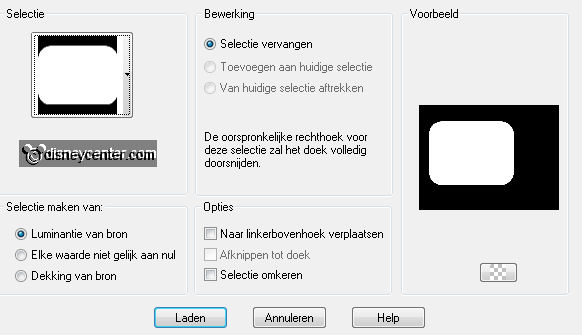
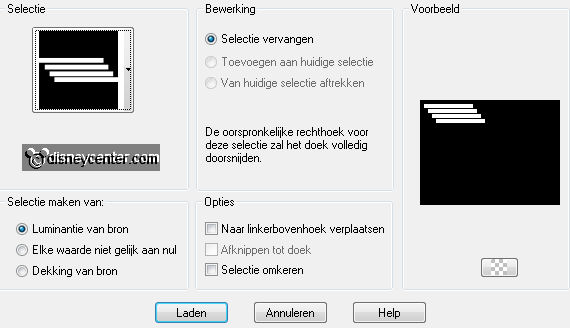
Selections - Load/save selection - load selection from disk
- look Emmyfiesta1 - with this setting.
Layers - new
raster layer.
Activate image fiesta - edit - copy.
Edit - paste into selection.
5.
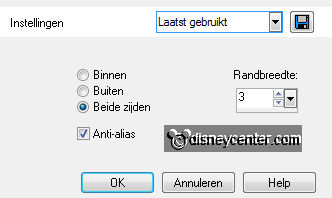
Selections – modify – select selection borders – with this
setting.
Layers - new
raster layer.
Fill with the flood fill - the selection with the foreground
color.
6.
Effects – plug-ins – Graphics Plus – Cross Shadow –
default setting - click OK.
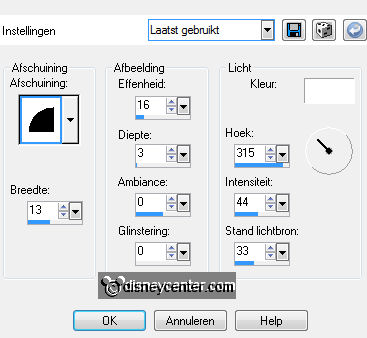
Effects – 3D Effects – Inner Bevel – with this setting.
Selections – select none.
Layers – merge – merge down.
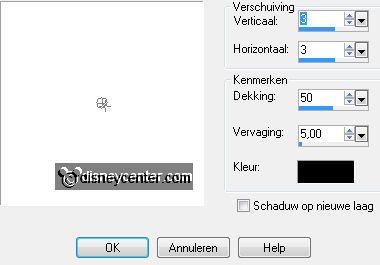
Effects - 3D Effects - drop shadow - with this setting.
7.
Selections - load/save selection - load selection
from disk - look Emmyfiesta - with this setting.
Layers - new
raster layer.
Activate flood fill tool - fill the selection with the
foreground color.
Selections - select nonen.
8.
Effects - 3D Effects – drop shadow – settings are right.
Layers – duplicate.
Image – flip.
9.
Activate the tube minniefiesta – edit – copy.
Edit – paste as a new layer on the image.
Image – mirror.
10.
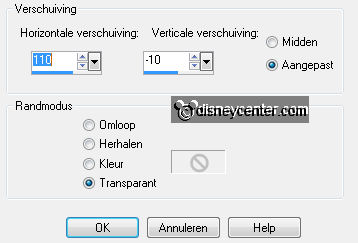
Effects – Image effects- offset - with this setting.
Effects –
plug-ins - Alien Skin Eye Candy 5 Impact – Gradient Glow – click on settings – User Settings –
click on Emmyfiesta.
11.
Activate flamenco-silhouette – edit – copy.
Edit – paste as a new layer on the image.
Activate move tool and move the tube left on the yellow
stripes at the bottom.
12.
Effects – 3D Effects – drop shadow – settings are right.
Layers – duplicate.
13.
Image – resize – 75% - all layers not checked.
Move the tube with the move tool near the other tube – see
example.
Layers – duplicate.
14.
Image – resize – 75% - all layers not checked.
Move the tube with the move tool near the other 2 tubes.
15.
Make in the material palette from the foreground color a
foreground gradient linear - with this setting.
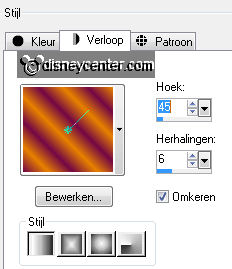
Image – add border – symmetric 3 pixels –
foreground color.
Image – add border – symmetric 30 pixels – background
color.
16.
Activate the magic wand – with this setting – select the
border.

Activate flood fill
tool –
fill the selection with the gradient.
Effects – plug-ins - CPK Designs – CK Pegs – with this setting
- click OK.
17.
Image – add border – symmetric 3 pixels – foreground color.
Effects – 3D Effects – Inner Bevel –settings are right.
Selections – select none. 18.
Layers – new raster layer – put your watermark into the image.
Layers – merge – merge all.
19.
Set in the material palette the background color at #ff0000
and close the foreground color.
Activate text tool – with this setting – write
FIESTA.

NOT convert to raster layer.
Layers – duplicate - one more time.
20.
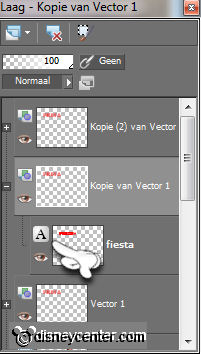
Click now on the + of the copy of vector 1, this became a –
(min).
Double click at the layer below, with the A – see below.
Click in the material palette at the
background color and change this in #0000ff.
21.
Repeat point 20 for the copy(2) of vector
1, change only the background color in #008000
If you see in the layer palette the text in 3 colors, than it
is right.
Click now on the - (minus), this became + again.
22.
Activate vector 1 – convert to raster layer.
Do this also with the 2 other layers.
23.
Lock in the layer palette the top 2 layers and activate the bottom
layer.
Edit – copy special – copy merged.
24.
Open Animation Shop – edit – paste as a new animation.
Back in PSP – lock in the layer palette raster 1 and open copy
of vector 1
Edit – copy special – copy merged.
25.
In AS – edit – paste after active frame.
Back in PSP – lock in the layer palette copy of vector 1 and open
copy(2) of vector 1
Edit – copy special – copy merged.
26.
In AS – edit – paste after active frame. Be sure the last
frame is selected.
Edit – select all.
27.
Animation – Frame properties – at 110.
File – save as – give name – click 3 times at next and than at
finish.
Ready is the tag
I hope you like this tutorial.
greetings Emmy
Tested by Cobie.

Tutorial written
16-04-2012
|