1. Open new image 700x700
2. Selections - Select all.
3. Copy the SE_Sentiments_Paper2 and paste into the selection.
4. Selections - select none.
5. Copy the SE_Sentiments_Frame and paste as a new layer.
6. Place this about 50 pix. from the top and left side.
7. Select inside the frame
8. Selections -Modify- Expand 5 pixels.
9. New raster layer - Flood fill this with #868487
10. Let selection stay.
11. Copy the Mickey and Minnie tube and paste as a new layer.
12. Selections - Flip - Click at the delete key of your keyboard.
13. Selections - select none.
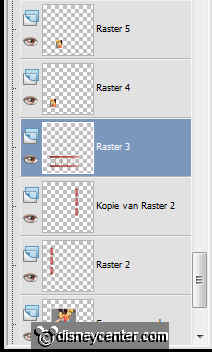
14. Lock the bottom layer and stay at 1 of the other layers.
15. Layers - Merge - Merge visible.
16. Copy the EyeletRibbon and paste as a new layer.
17. Place this left at the frame.
18. Duplicate this layer and place this at right side of the
frame.
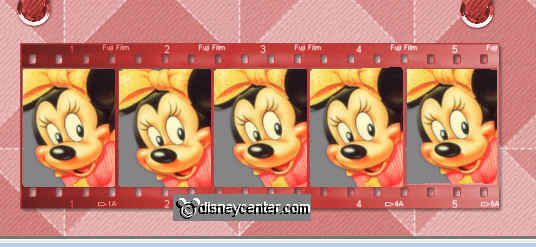
19. Copy the Filmstrip and paste as a new layer.
20. Place this at the bottom left. see example
Now just watch, we make five frames with the
same picture in it.
We do this five times with five different images.
Always stay at raster 3 for select (filmstrip)
21. Select the first box in the filmstrip
22. Selections - Modify - Expand 3.
23. Copy picture1 and paste as a new layer. Layers - Arrange -
Bring to the top.
24. Place this ON the selection.
25. Selections - Invert - Click at the delete key of your
keyboard.
26. Selections - select none.
27. Select the second box in the filmstrip
28. Repeat 22 t/m 26.(No need to copy, is still in memory, so
just paste)
29. Select the third box in the filmstrip
30. Repeat 22 t/m 26.(No need to copy, is still in memory, so
just paste)
31. Select the fourth box in the filmstrip
32. Repeat 22 t/m 26.(No need to copy, is still in memory, so
just paste)
33. Select the fifth box in the filmstrip This box does
not expand, selection is good.
34. Repeat 23 t/m 26.(No need to copy, is still in memory, so
just paste)
35. Repeat 21 t/m 34. Now with picture2.
36. Repeat 21 t/m 34. Now with picture3.
37. Repeat 21 t/m 34. Now with picture4.
38. Repeat 21 t/m 34. Now with picture5.
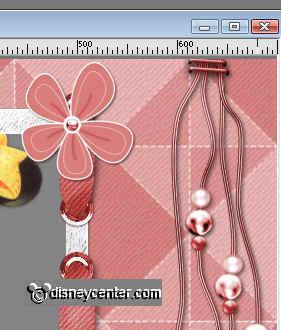
39. Copy the Flower tube and paste as a new layer.
40. Place this right under at the frame.
41. Duplicate this layer.
42. Image - Resize 50% - all layers not checked.
43. Duplicate this smaller layer 2 more times.
44. Place them on the other corners of the frame.
45. Copy the Nachtamazone_element and paste as a new layer.
46. Effects - 3D Effects - Drop Shadow.

47. Place this right at the top.
48. Go to text tool.

49. And write Vertical PHOTO'S.
50.Place it under the Nachtamazone_element.
51. Give the same drop shadow as in 46.
52. Put your watermark into the image.
53. Image - Resize 65%
54. Image - Canvas Size 505x505
55. Select the transparent part.
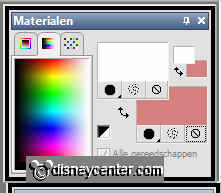
56. New raster layer- Flood fill with #d3807e
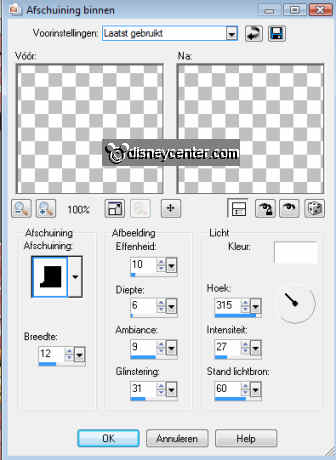
57. Effect - 3D Effect - Inner Bevel
58. Selections - select none
59. Image - Canvas Size 520x520
60. Select the transparent part - flood fill with#d3807e
61. Selections - select none.
62. Image - Canvas Size 570x570
63. Select the transparent part - flood fill with #d3807e
64. Selections - select none.
65. Close all layers of the photo's (25)
66. Stay at the bottom layer.
67. Open now from the first 5 images the first layer,
68. Open now from the second 5 images the second layer,
69. Open now from the third 5 image the third layer,
70. Open now from the fourth 5 images the fourth layer,
71. Open now from the fifth 5 images the fifth layer,
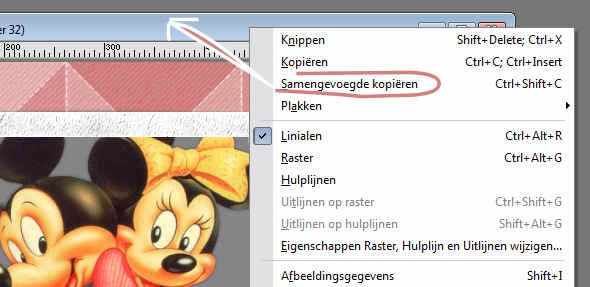
72. Click at the border of the image - Merge Copy.
73. Open animation shop.
74. Paste as a new animation
75. Back in PSP.
76. Close all layers of the photo's.
77. Stay at the bottom layer.
78. Open now from the first 5 images the second layer,
79. Open now from the second 5 images the third layer,
80. Open now from the third 5 image the fourth layer,
81. Open now from the fourth 5 images the fifth layer,
82. Open now from the fifth 5 images the first layer,
93. Click at the border of the image - Merge Copy.
84. Back in animation shop
85. Paste after current frame. (always click on the last frame)
86. Back in PSP
87. Close all layers of the photo's.
88. Stay at the bottom layer.
89. Open now from the first 5 images the third layer,
90. Open now from the second 5 images the fourth layer,
91. Open now from the third 5 image the fifth layer,
92. Open now from the fourth 5 images the first layer,
93. Open now from the fifth 5 images the second layer,
94. Click at the border of the image - Merge Copy.
95. Back in animation shop
96. Paste after current frame. (always click on the last frame)
97. Back in PSP
98. Close all layers of the photo's.
99. Stay at the bottom layer.
100. Open now from the first 5 images the fourth layer,
101. Open now from the second 5 images the fifth layer,
102. Open now from the third 5 image the first layer,
103. Open now from the fourth 5 images the second layer,
104. Open now from the fifth 5 images the third layer,
105. Click at the border of the image - Merge Copy.
106. Back in animation shop
107. Paste after current frame. (always click on the last frame)
108. Back in PSP
109. Close all layers of the photo's.
110. Stay at the bottom layer.
111. Open now from the first 5 images the fifth layer,
112. Open now from the second 5 images the first layer,
113. Open now from the third 5 image the second layer,
114. Open now from the fourth 5 images the third layer,
115. Open now from the fifth 5 images the fourth layer,
116. Click at the border of the image - Merge Copy.
117. Back in animation shop
118. Paste after current frame. (always click on the last frame)
119.
Edit - Select Al
120. Animation - Resize format animation 90%
121. Animation - Properties of Frame 100
122. File - save as - Give the animation a name.