Before you begins……
Open image and texture in PSP
Put the plug-in in the folder plug-ins.
The mask in the folder mask
Put
the selection in the folder selections
Minimize the font
Kisses
1. Set in je material palette the foreground at a dark color from
the tube and set the background at a light color from the tube.
2. File - new - open a new transparent image 650x250.
3. Selections – select all.
4. Activate the texture7 – edit – copy.
5. Edit – paste into selection.
6. Selections – select none.
7. Layers – new raster layer
8. Activate Flood Fill tool and fill the layer with the foreground
color.
9. Set in the layer palette the opacity of this layer at 57.
10. Layers – merge - merge down.
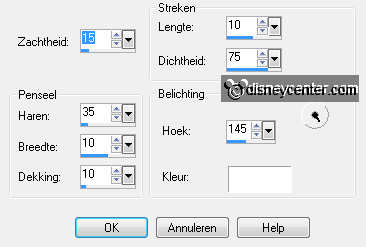
11. Effects – artistic effects – brush strokes – with this settings.
12. Activate the tube -edit – copy.
13. Edit – paste as a new layer on the image.
14. Activate Move tool – move the tube to the left.
15. Layers – duplicate.
16. Layers – duplicate.
17. Effects – Distortion Effects – Wind – from left 100.
18. Activat the layer below – Effects - Distortion Effects – wind –
from right 100.
Activate in
the layer palette the top layer.
19.
Layers – merge - merge down.
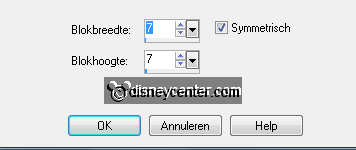
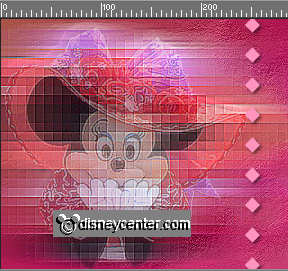
20. Effects – Distortion
Effects – Pixelate –
with this settings.
21. Effects – Edge Effects – enhance more.
22. Layers – arrange – move down.
23. Layers – merge - merge down.
24. Make the top layer active.
25. Set in the layer palette the opacity of this layer at 30.
26. Effects – Edge Effects – enhance more.
27. Edit – paste as a new layer on the image. (is still in memory).
28. Image – mirror.
29. Activate Move Tool – move this tube to the right.
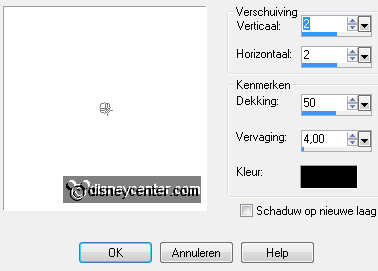
30. Effects – 3D Effects – drop shadow – with this settings.
31. Effects – plug-ins – Xero – Porcelain – with this settings.
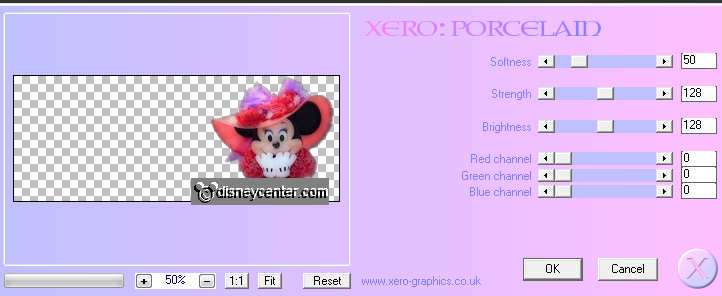
Change in the material palette the
colors by clicking at the little arrows.
32. Activate Pencil Tool –
with this settings.

33. Make a line from top to bottom - see below.
34. Layers – convert to raster layer.
35. Layers – duplicate.
36. Place this with the move tool – against the other tube to the
right.
37. Layers – merge – merge down.
38. Effects – 3D Effects – drop shadow – settings are right.
39. Activate the bottom layer.
40. Layers – new raster layer.
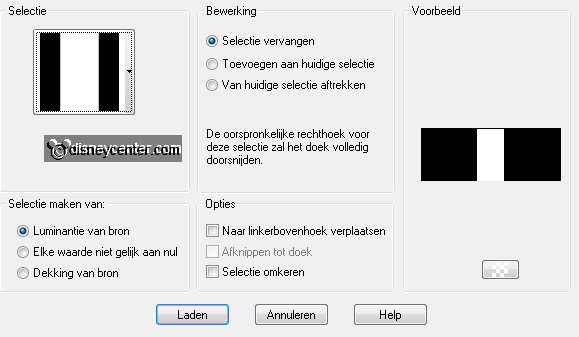
41. Selections – Load/save selection – load selection from disk –
look Emmykisses – with this settings.
42. Activate the tube – edit - copy.
43. Edit - paste into selection.
44. Selections – select none.
45. Adjust - blur - Gaussians Blur - radius at 30
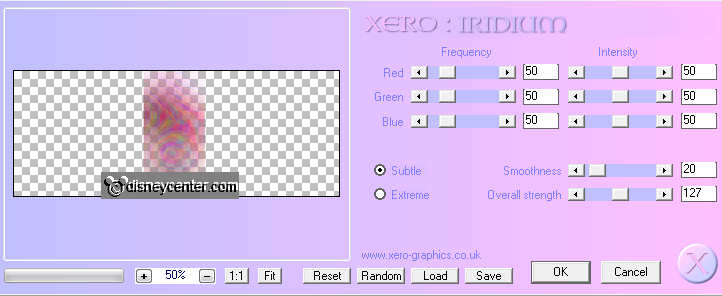
46. Effects – plug-in – Xero – Iridium –
with this settings.
47.Activate in the layer palette the top layer.
48.
Layers – merge - merge down.
49. Activate text tool –
with this settings
- the size of the font depends on
your name.

50. Write your name – click at apply .
51. Layers – convert to raster layer.
52. Effects – 3D Effects – drop shadow – settings are right.
53. Set the text with the move tool in the middle at the bottom.
Change in the
material palette the colors
54. Layers – new raster layer.
55. Put the copyright on the image.
56. Layers – new raster layer.
57.Fill with Flood Fill tool the layer with the foreground color.
58. Selections – select all.
59. Selections - modify – contract 4
60. Click at the delete key of
your keyboard.
61. Selections – invert.
62. Effects – 3D Effects – drop
shadow – settings are right.
63. Selections – select none.
64. Lock the bottom layer by clicking at the eye in the layer
palette.
65. Activate 1 of the other layers.
66. Layers – merge – merge all visible
67. Open the top layer again and activate this layer.
68. Edit copy.
69. Open Animation Shop – edit – paste as a new animation.
70. Open animation
Softpinkhearts - edit – select all
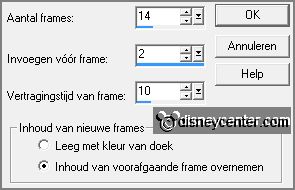
71. Activate the image – Animation – Insert Frames – Empty –
with this settings.
72. Edit - select all.
73. Activate the animation
Softpinkhearts – edit - copy.
74. Edit – paste into selected frame of the image.
75. Place this in the middle at the top.
76. Go back to PSP – activate the merge layer.
77. Edit - copy.
78. In AS – edit – paste as a new animation.
79. Animation – Insert Frames – Empty – with this settings.
80. Edit - select all
81. Edit - copy.
82 Edit – pate into selected frame of the image.
Avatar to make
84. Open new transparent image 130x130.
85. Selections – select all.
86. Activate texture7 – edit – copy.
87. Edit – paste into selection.
88. Layers – new raster layer
89. Activate Flood Fill tool and fill the layer with the foreground
color.
90. Set in the layer palette the opacity of this layer at 57.
91.
Layers – merge - merge down.
92. Effects – artistic effects – brush strokes – settings are right.
93. Selections – select all.
94. Activate the tube -edit - copy.
95. Edit – paste into selection.
96. Layers – new raster layer.
97. Fill the layer with the foreground color.
98. Selections – modify – contract 4.
99. Click at the delete key of your keyboard.
100. Selections –
invert.
101. Effects – 3D Effects –
drop shadow – settings are right.
102. Selections - select none.
103.
Layers – merge - merge all.
104. File – export – JPEG Optimizer.
Ready is the tag
I hope you like this tutorial.
greetings Emmy
Tested
by Cobie
