Use a nice tube and 2 colors from the tube.
I took as foreground color #7fbf82 and the background color
#1450be.
1.
Open new transparent image 600x250.
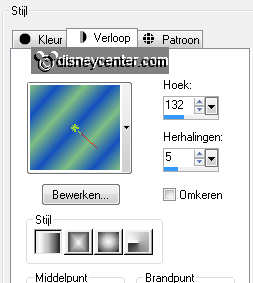
Fill this with gradient linear - with this setting.
Duplicate this layer - image - mirror.
Set the opacity of this layer at 50.
Layers - merge - merge down.
2.
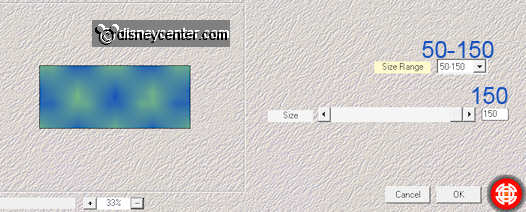
Effects - plug-ins - Mehdi - Weaver - with this setting.
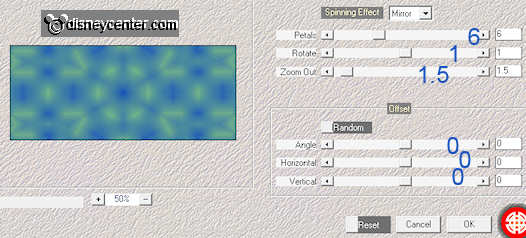
Effects - Plug-ins - Mehdi - Kaleidoscope 2.1 - with this setting.
Copy schip and paste as a new layer on the image.
Move this to the top.
Set the Blend Modus of this layer at soft light and the opacity at 65.
3.
Copy piraatmickey (or your own tube) and paste as a new layer on
the image.
Duplicate this layer - layers - arrange - move down.
Stay at this layer - Effects - Distortion Effects - Wind - with this
setting.

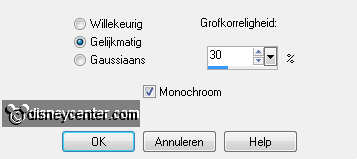
Adjust - Add/Remove Noise -
add noise - with this setting.
4.
Duplicate this layer - image - mirror.
Go to the original tube layer.
Duplicate this layer - image - mirror.
Lock the bottom layer - make 1 of the other layers active.
Layers - merge - merge all visible.
Open the bottom layer.
5.
Make the top layer active.
Go to text tool - font of choice, or use mine - I use Countryhouse -
size 60 - stroke width 2.0.

Write your name - convert to raster layer - place this in the middle
of the bottom.
Effects - 3D Effects - drop shadow - with this setting.
Duplicate this layer -
Layers - merge - merge down..
6.
New raster layer - selections - select all.
Fill this layer with the foreground color.
Selections - modify - contract 1.
Fill this with the background color .
Selections - modify - contract 5.
Fill this with the foreground color.
Selections - modify - contract 1 - click at the delete key.
7.
Selections - invert.
Adjust - Add/Remove Noise -
add noise - with the same setting as in point 3.
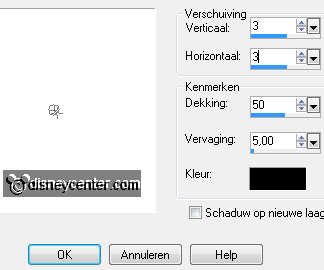
Effects - 3D Effects - drop shadow - with the same setting as in
point 5 .
Repeat the drop shadow now with vert. and horz. at -3.
Selections - select none.
Layers - merge - merge down. - and 1 more time.
8.
Make the bottom layer active.
Edit - copy - and open Animation shop.
In AS - paste as a new animation.
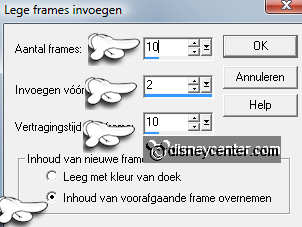
Animation - Insert Frames - Empty - with this setting.
Edit - select all.
9.
Back in PSP - make the top layer active.
Edit - copy - in AS -
In AS - paste as a new animation.
Animation - Insert Frames - Empty - with the same setting as in
point 8.
Edit - select all.
10.
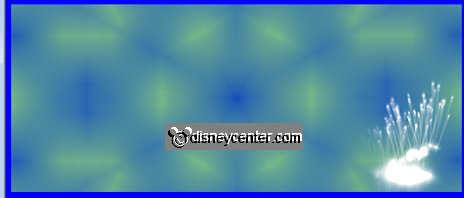
Open animation linesparks.
Edit - select all - edit - copy
Paste into selected frame - paste this at the background frames
right.
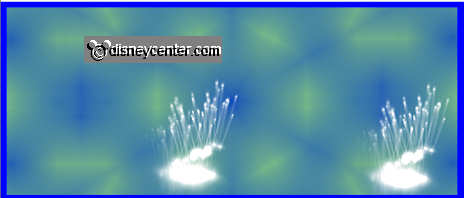
Move now this background animation a little to the right.
Paste into selected frame (is still in memory) and paste as below.
11.
Go back to the merged animation - edit - copy.
Paste into selected frame - on the background with animation.
File - save as - give name - click 3 times at next and than at
finish.
12.
Back to PSP to make the avatar.
Back to the 2 layers - Layers - merge - merge all.
Go to selection tool - rectangle - make a selection as below.
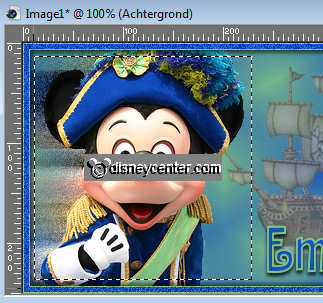
Image - crop to selection.
13.
New raster layer - selections - select all.
Fill this layer with the foreground color.
Selections - modify - contract 1.
Fill this with the background color .
Selections - modify - contract 5.
Fill this with the foreground color.
Selections - modify - contract 1 - click at the delete key.
14.
Selections - invert.
Adjust - Add/Remove Noise -
add noise - with the same setting as in point 3.
Effects - 3D Effects - drop shadow - with the same setting as in
point 5 .
Repeat the drop shadow now with vert. and horz. at -3.
Selections - select none.
15.
Go to text tool with the same setting as in point 5.
Write your name - convert to raster layer - place this at the bottom
right.
Effects - 3D Effects - drop shadow - with the same setting as in
point 5.
Duplicate this layer - layers - merge - merge all.
File - export - JPEG optimizer.

