1 tube unknown
1 image, 2
selections, 1
word-art, and 1 silver pattern made by me.
Plug-ins:
Penta.com - Dot and Cross, Tramages - Tow the Line,
Eye Candy 4000 - Jiggle,
BorderMania - Frame#2,
download
here
Before you begins.......
Open the image, the tube and the word-art in PSP.
Set the plug-ins in the
folder plug-ins, the pattern in the folder patterns and the selections in the
folder selections.
Material

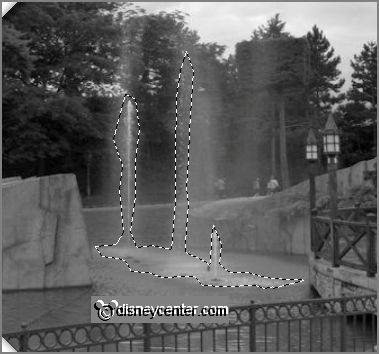
Fountains

1.
File - open new transparent image 770x700.
Set in the material palette the foreground color on
black
and the background color on white.
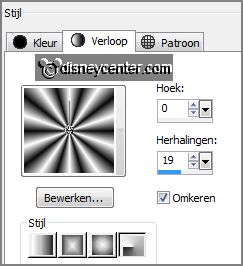
Make of the background a gradient radial – with this setting.
2.
Activate flood fill tool and fill the layer with the gradient.
Set the background back to the color white.
3.
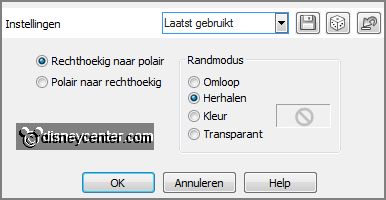
Effects - Distortion effects - Polar Coordinates - with this setting.
Effects - Image effects - seamless tiling -
default setting.
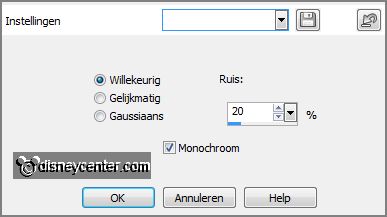
Adjust - blur - Gaussian blur - radius 20.
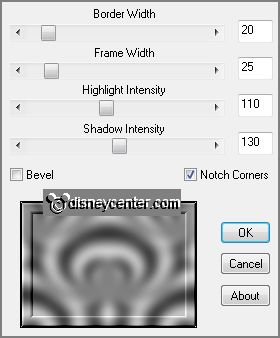
Effects - plug-ins - BorderMania - Frame#2 - with this setting - click
OK.
4.
Selections - select all.
Selections - modify - contract 42 pixels.
Layers - new raster layer.
5.
Set in the layer palette the foreground on pattern - zilverEmmy - angle 0 - scale 100.
Fill the selection with the silver pattern.
Selections - modify - contract 3 pixels - click at the delete key.
Layers - merge - merge down.
6.
Selections - select all.
Selections - modify - contract 45 pixels.
Selections - invert .
Promote selection layer to.
Selections - select none.
7.
Layers - new raster layer.
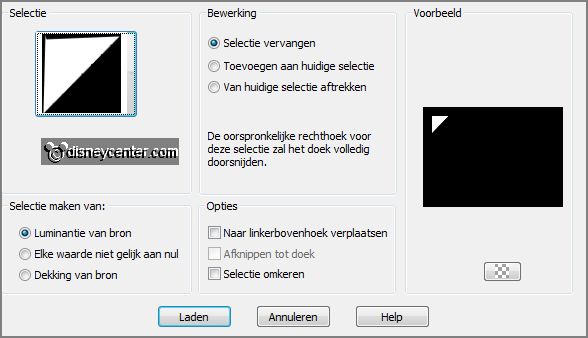
Selections - load/save selection - load selection from disk - look Emmyfountains
-
with this setting.

Fill the selection with the background color.
Selections - select none.
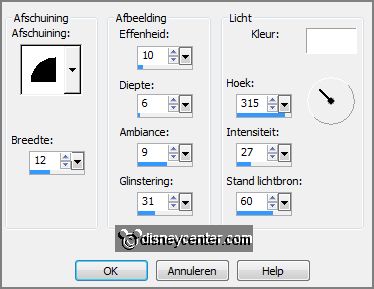
Effects - 3D Effects - Inner Bevel - with this setting.
8.
Layers - arrange - move down.
Layers - duplicate.
Image - mirror.
Layers - merge - merge down.
9.
Layers - duplicate.
Image - flip.
Layers - merge - merge down.
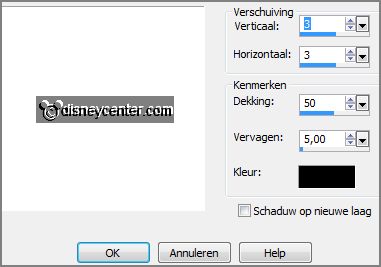
Effects - 3D Effects - drop shadow -
with this setting.
10.
Layers - new raster layer.
Selections - load/save selection - load selection from disk - look
Emmyfountains -
with this setting.
Set in the layer palette the background at #737373 -
fill the selection with this color.
Selections - select none.
11.
Effects - plug-ins - Simple - Top Left Mirror - click OK.
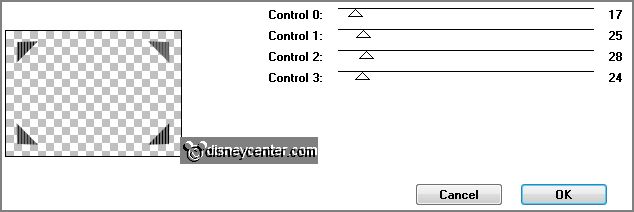
Effects - plug-ins - Tramages - Tow the
Line -
with this setting -
click
OK.
Layers - arrange - move down.
12.
Activate the top layer.
Activate the magic wand - with settings below- and select in the middle.

Actives the bottom layer.
13.
Layers - new raster layer.
Activate the image fonteinen - edit - copy.
Edit - paste into selection.
Selections - select none.
Set in the layer palette the blend mode at Luminance (legacy).
14.
Activate free hand selection tool- and make a selection - as below.
Layers - duplicate and 1 more time.
15.
Activate raster4.
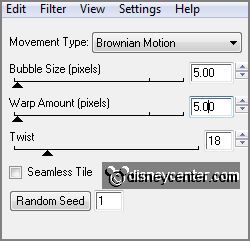
Effects - plug-ins - Eye Candy 4000 - Jiggle -
with this setting -
click
OK.
16.
Activate copy of raster4.
Effects - plug-ins - Eye Candy 4000 - Jiggle -
click at Random Seed - click
OK.
17.
Activate copy(2) of raster4.
Effects - plug-ins - Eye Candy 4000 - Jiggle -
click at Random Seed - click
OK.
Selections - select none.
Lock in the layer palette the 2 copy layers.
18.
Activate the top layer.
Activate the tube Mickey Mouse Black & White - edit - copy.
Edit - paste as a new layer on the image.
Activate move tool - and move this to the left side - see example.
19.
Selections - select all.
Selections - float - selections - defloat.
Selections - modify - expand 3 pixels.
Layers - new raster layer.
Fill the selection with the silver pattern - setting is right.