1.
File – open new transparent image 700x700.
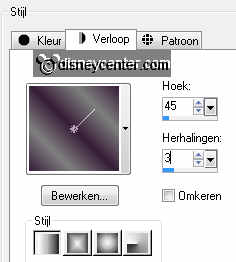
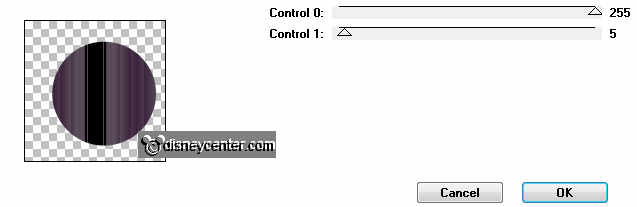
Set in the material palette the foreground onp #361d37 and the background on #808080.
Make from the foreground a gradient linear - with this setting.
2.
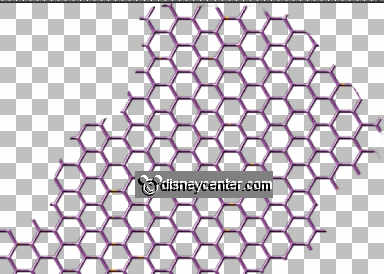
Activate the tube gaasraster – edit - copy.
Edit - paste as a new layer on the image.
Activate move tool – and move the gaasraster as below.
3.
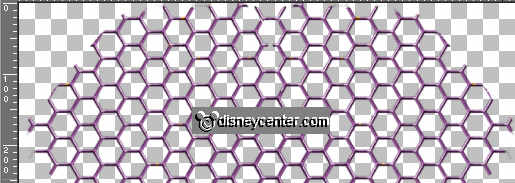
Layers – duplicate.
Image – mirror.
Put the copy exactly on each other – see below.
4.
Layers – merge – merge down.
Layers – duplicate.
Image – flip.
Layers – merge – merge down.
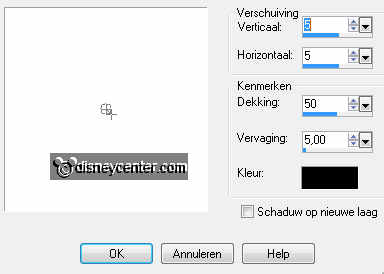
Effects – 3D Effects – drop shadow –with this setting.
5.
Activate halwmin&micframe – edit - copy.
Edit - paste as a new layer on the image.
Effects – 3D Effects – drop shadow – setting is right.
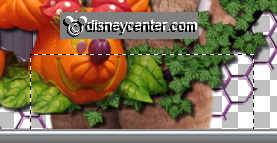
6.
Activate selection tool – selecton – circle – and make a selection as below.
Layers – new raster layer.
Activate flood fill tool – fill the selection with the gradient linear.
7.
Layers duplicate.
Image - mirror.
Selections – select none.
8.
Put in the layer palette of the opacity of this layer on 50.
Layers – merge – merge down.
Layers – arrange – merge down.
9.
Effects – plug-ins – L and K Landsiteofwonders – Raisa – with this setting.
Effects – Edge effects - enhance.
10.
Activate the tube duffyhalw – edit - copy.
Edit - paste as a new layer on the image.
Layers – duplicate.
Layers – arrange - Bring to the top.
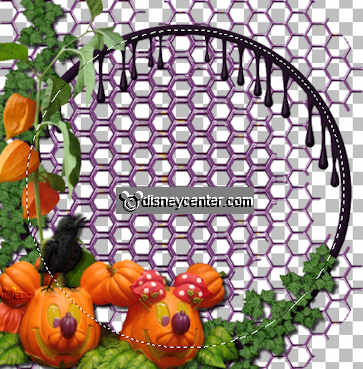
11.
This is what you should have now.
12.
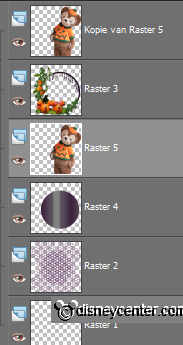
Lock in the layer palette raster 5.
Make copy of raster 5 active.
Go to selection tool – selections- rectangle – and make a selection as below.
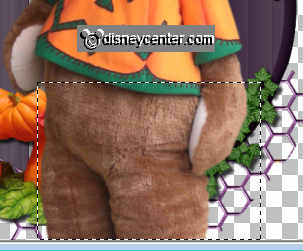
Click on the delete key.
13.
Move the selection a little down, see below- that you do so – go in the
selection and then right clicking on your mouse.
Open raster 5 and make this active.
Click on the delete key.
Selections – select none.
14.
Make the tube duffyhalw activef and make with selections using tools – a
selection as shown below.
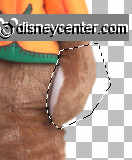
Edit - copy.
Edit - paste as a new image.
15.
Now this image – edit - copy.
Go to the image – Edit - paste as a new layer on the image.
16.
Make the top layer active.
Move this with the move tool this piece on the right arm. Be careful that this
exactly closed.
17.
Layers – merge – merge down.
Layers – new raster layer – put your watermark into the image.
Layers – merge – merge all visible.
18.
Image – resize 85% - all layers checked.
File – export – PNG Optimizer.