Fore ground color #b8daf2 and background color #2086d0
1.
Open new transparent image 800x650
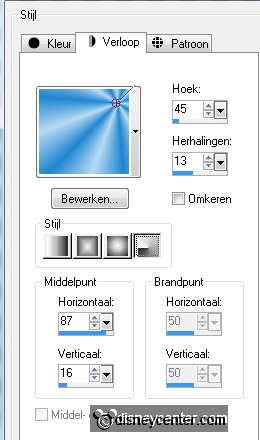
Fill this with gradient radial - with this setting.
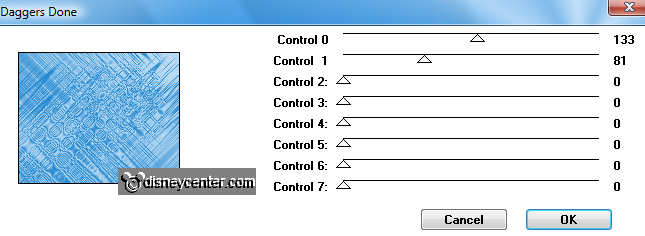
Effects - Bkg Designer sf10 II - Daggers Done - with this setting.
2.
Selections - selections Load/Save - load selections from disk -
look emmy1 - click OK.
New raster layer - fill this with gradient - settings stays good.
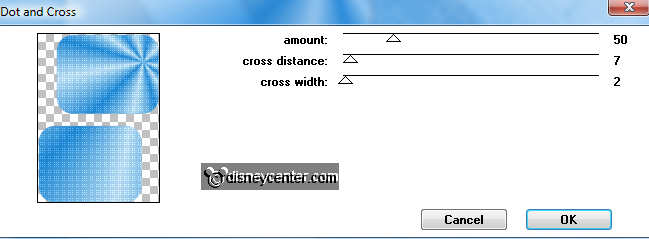
Effects - Penta.com- Dot and Cross - with this setting.
3.
Selections - modify - select selection borders- with this
setting.
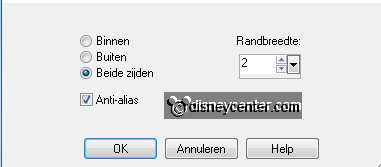
Fill this with silver pattern - angle 0 - scale 100.
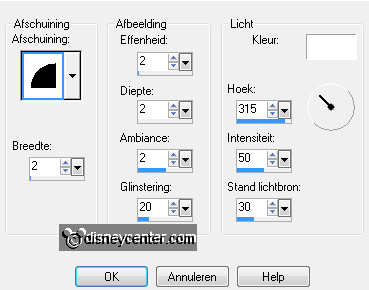
Effects - 3D Effects - Inner Bevel - with this setting.
Selections - select none.
4.
Selections - selections Load/Save - load selections from disk -
look emmy2 - click OK.
Fill this with the foreground color.
Selections - modify - select selection borders - with the same
setting as in point 3.
Fill this with silver pattern - setting is right.
Effects - 3D Effects - Inner Bevel - same setting as in point 3.
Selections - select none.
5.
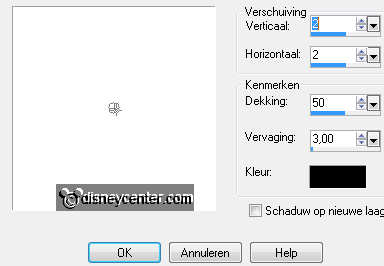
Effects - 3D Effects - drop shadow - with this setting.
Duplicate this layer - Image - mirror.
Place this right of the bottom rounded rectangle. see example.
6.
Copy The Princess and the Frog 17 and paste as a new layer on
the image.
Place this in the bottom rectangle.
Give the same drop shadow as in point 5.
7.
Copy The Princess and the Frog 41 and paste as a new layer on
the image.
Place this in the top rectangle.
Give the same drop shadow as in point 5.
8.
Copy princess-tiana and paste as a new layer on the image.
Place this right at the bottom - 200 pixels of the side.
Effects - Alien Skin Eye Candy 5 Impact- Perspective Shadow -
settings at Drop Shadow Blurry Basic - with this setting.

9.
Copy word-art and paste as a new layer on the image.
Place this at the top right.
Give the same drop shadow as in point 5.
10.
Copy frog and paste as a new layer on the image.
Place this at the bottom right.
Effects - Alien Skin Eye Candy 5 Impact - Perspective Shadow - with
the same setting as in point 8.
11.
Copy prince-nauveen and paste as a new layer on the image.
Place this right at the bottom.
Effects - Alien Skin Eye Candy 5 Impact - Perspective Shadow - with
the same setting as in point 8.
12.
New raster layer - put your watermark into the image.
Selections - select all - selections - modify - contract 4.
Selections - invert - fill this with the silver pattern - setting is
right.
Give the same Inner Bevel as in point 4.
13.
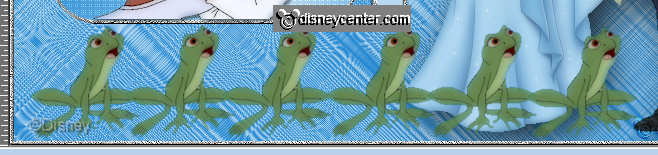
Copy frog and paste as a new layer on the image.
Image - mirror - image - resize 75% - all layers not checked.
Place this left at the bottom.
Duplicate this layer 5 times and place them as below.
14.
Lock the raster 8(frog) and 9(nauveen) and all copy layers of raster
13(frog).
Make the bottom layer active.
Edit - copy merged.
15.
Open animation shop - paste as a new animation.
Back in PSP - lock raster 13 and open copy of raster 13.
Edit - copy merged.
Back in AS - paste after active frame.
16.
Back in PSP - Lock copy of raster 13 and open copy(2) of
raster 13.
Edit - copy merged.
Back in AS - paste after active frame. Be sure the last frame is
always selected.
17.
Back in PSP - Lock copy(2) of raster 13 and open copy(3)
of raster 13.
Edit - copy merged.
Back in AS - paste after active frame.
18
Back in PSP - Lock copy(3) of raster 13 and open copy(4) of raster 13.
Edit - copy merged.
Back in AS - paste after active frame.
19.
Back in PSP - Lock copy(4) of raster 13 and open copy(5) of raster 13.
Edit - copy merged.
Back in AS - paste after active frame.
20.
Back in PSP - Lock copy(5) of raster 13 and open raster 8.
Edit - copy merged.
Back in AS - paste after active frame.
21.
Back in PSP - Lock raster 8 and open raster 9.
Edit - copy merged.
Back in AS - paste after active frame.
22.
Edit - select all - animation - Frame properties at 25.
Change now the last 2 frames. Frame 7 in 125 and frame 8 in 200.
Animation - resize format of animation 85% -
Maintain aspect ratio of checked.
File - save as - give name - click 3 times at next and than at
finish.