1. Open new image 800x600
2. Fill this with the background color.
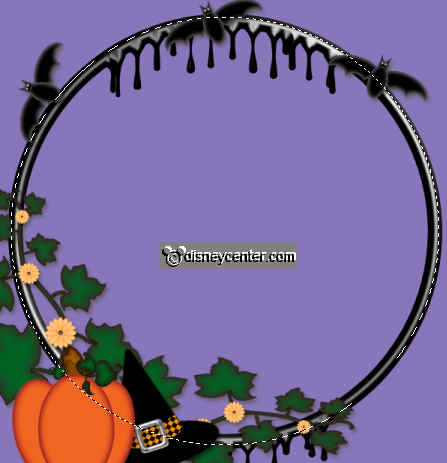
3. Copy the tube frame chuster and paste as a new layer.
4. Place this at the bottom left.
5. Go to selection tool - selection - circle.
6. Start in the middle and make a circle in the frame.
7. New raster layer - fill this with the foreground color.
8. Layers - Arrange - Move Down.
9. Effects - MuRa's Meister - Cloud- with this setting.
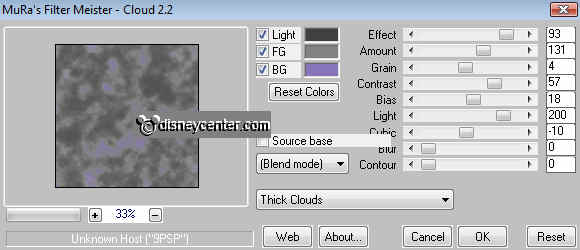
10. Selections - select none.
11. Open the tube blooddripframe - select inside the frame.
12. Selections - Modify - Expand 4.
13. Fill this with the foreground color.
14. Layers - Arrange - Move Down.
15. Layers - Merge - Merge visible.
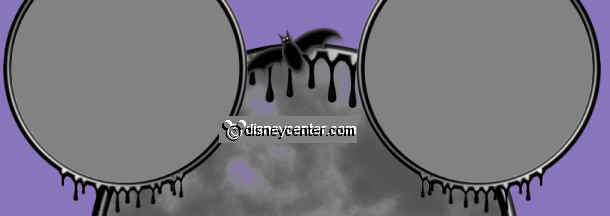
16. Copy this image and paste as a new layer.
17. Place this at the top left.
18. Duplicate this - Image - Mirror.
19. Place this in the middle at the top.
20. Copy the tube halloween01 and paste as a new layer.
21. Place this right at the top.
22. Effects - 3D Effects - Drop shadow.
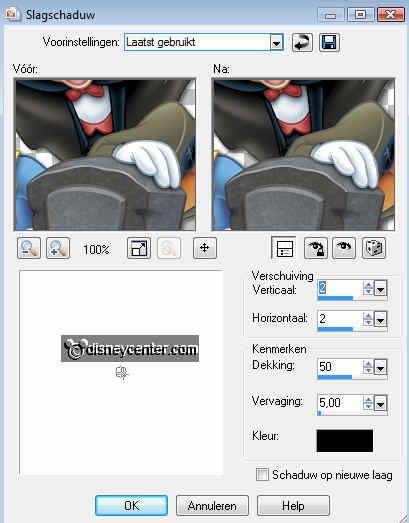
23. Copy thee tube kcs_spiderweb and paste as a new layer.
24. Place this at the little right circle.
25. Give the same drop shadow as in point 22.
26. Copy thee tube halwminnie and paste as a new layer.
27. Place this in the left little circle.
28. Image - Resize 90%.
29. Give the same drop shadow as in point 22.
30. Copy the tube Bats & Moon and paste as a new layer.
31. Place this right at the top.
32. Duplicate this layer .
33. Image - mirror and place this below the other one.
34. Stay at the bottom layer.
35. Copy the tube Wire mesh and paste as a new layer.
36. Place this at the left side.
37. Duplicate this layer.
38. Image - mirror and place this to the right side.
See for yourself just what you like best.
39. Put your watermark into the image.
40. Layers - Merge - Merge all.
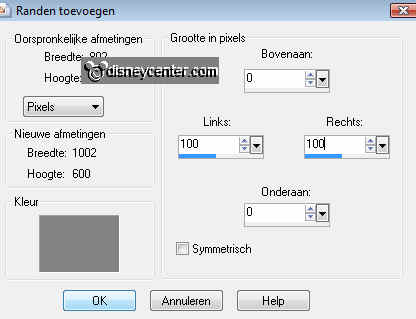
41. Image - Add border color #828282, symmetric not checked.
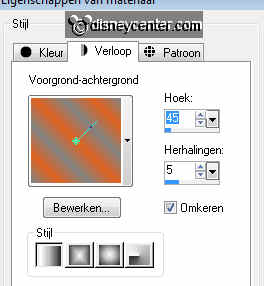
42. Select the 2 borders and fill the left side with this gradient radial.
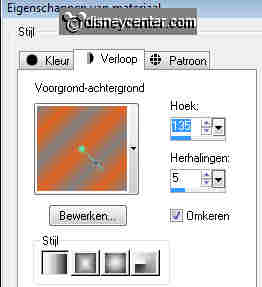
43. Fill the right side with this gradient radial, but now corner 135.
44. Let selection stay.
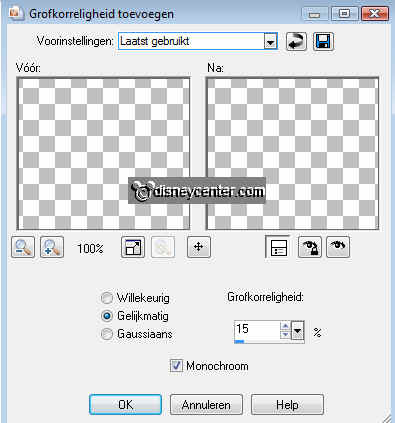
45. Adjust - Add /remove Noise - Add noise.
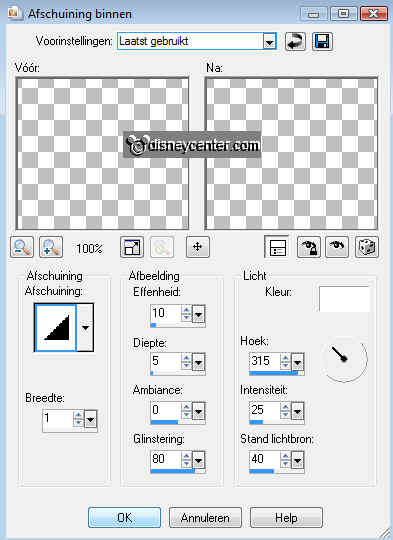
46. Effects - 3D Effects - Inner Bevel.
47. Selections - select none.
48. Image - Resize 60%
49. Make a new image 280x175.
40. Put the foreground color on #e06321 and the background color on #828282
41. Go to text tool size 72 font Shlop. Write Happy Halloween.

42. Give the same drop shadow as in point 22.
43. Copy the big image
44. Open Animation Shop
45. Paste as a new animation.
46. Edit - duplicate selection - duplicate selection - duplicate selection.
47. If all goes well you now have 5 frames.
48. Go back to PSP.
49. Copy the text image
50. Paste as a new animation
51. Edit - duplicate selection - duplicate selection - duplicate selection. Also
5 frames
52. Animation - Resize animation - 2 times 75%.
53. Open animation bliksem. (lightning)
54. Edit - select all- copy
55. Big image - Edit - select all.
56. Click inside the big image - paste in selected frame.
57. Paste it in the middle at the top. Or where you like it..
58. The text image. - Edit - select all- copy
59. Click inside the big image - paste in selected frame.
60. Place it on the lightning.
61. File - save as.....click 3 times at next and than finish.