1.
File - open new transparent image 700x700.
Set in the material palette the foreground
color at #8f4038 and the background color
at
#3e2f5f.
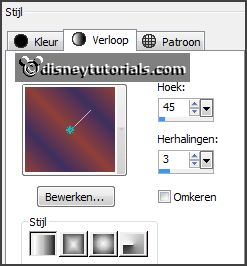
Make from the foreground a gradient linear -
with this setting.
2.
Activate flood fill tool - fill the layer with
the gradient.
Layers - duplicate.
Image - mirror.
Set in the layer palette the opacity to 50.
Layers - merge - merge down.
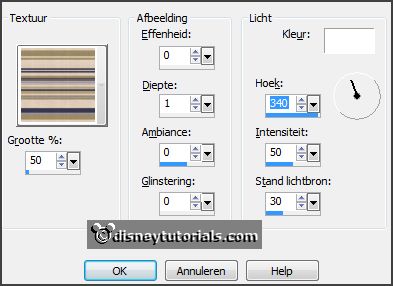
Effects - Texture effects - Texture - chtexturas_papelesdecoV2 - with this
setting.
3.
Activate the tube Emmyraster - edit - copy.
Edit - paste as a new layer on the image.
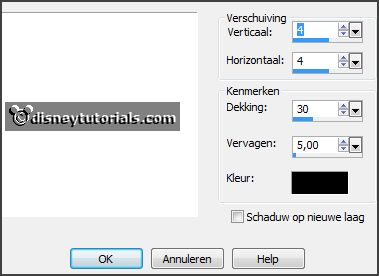
Effects - 3D Effects - drop shadow - with this
setting.
4.
Activate the tube SD AE LEAVE FRAME - edit - copy.
Edit - paste as a new layer on the image.
Effects - 3D Effects - drop shadow - setting
is right.
5.
Activate the tube SD AE WIRED FRAME - edit - copy.
Edit - paste as a new layer on the image.
Effects - 3D Effects - drop shadow - setting
is right.
6.
Activate the tube minniehalw1 - edit - copy.
Edit - paste as a new layer on the image.
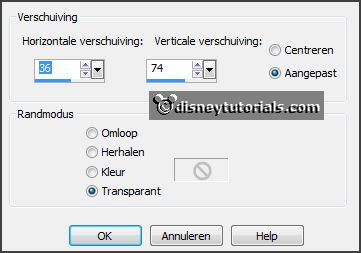
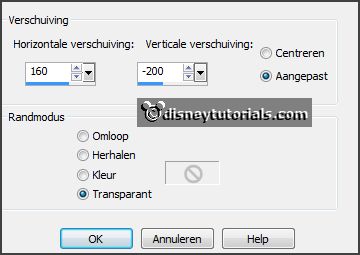
Effects - Image effects - offset - with this
setting.
7.
Layers - duplicate.
Activate raster5.
Layers - arrange - move down.
Activate copy of raster5- set thee opacity to 50.
Activate raster 4 (frame layer)
8.
Activate eraser tool - size 20 - erase the frame, what over minnie is
- see below.

Activate copy of raster 5 and make the frame visible by the left hand - by
going over there with the eraser.
Activate raster 5 - erase here the right hand below and under the frame.
Set the opacity of copy of raster 5 back to 100.
Activate the top layer.
Effects - 3D Effects - drop shadow - setting
is right.
9.
Activate the tube kaymeedesigns_sospooky(e06) - edit - copy.
Edit - paste as a new layer on the image.
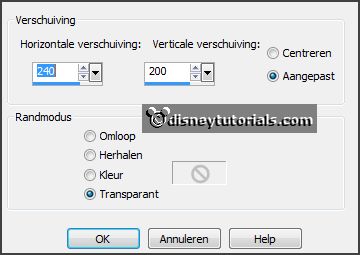
Effects - Image effects - offset -
with this setting.
Effects - 3D Effects - drop shadow - setting
is right.
Layers - arrange - move down.
Layers - duplicate.
Image - mirror.
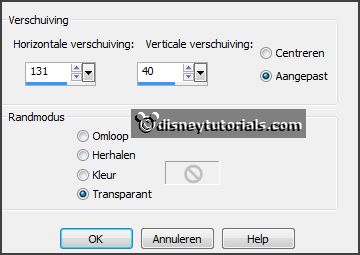
Effects - Image effects - offset -
with this setting.
10.
Activate the tube kaymeedesigns_sospooky(e08) - edit - copy.
Edit - paste as a new layer on the image.
Activate move tool - set this in the middle at the bottom - see example.
Effects - 3D Effects - drop shadow - setting
is right.
11.
Activate the tube rosomaha_element12 - - edit - copy.
Edit - paste as a new layer on the image.
Place this right near the pumpkins - see
example.
Effects - 3D Effects - drop shadow - setting is right.
12.
Activate the tube kaymeedesigns_sospooky(e29) - edit - copy.
Edit - paste as a new layer on the image.
Effects - Image effects - offset - with this
setting.
Activate selection tool - rectangle - and make a selection - as below - click at
the delete key.
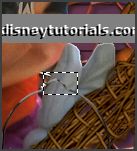
Selections - select none.
Effects - 3D Effects - drop shadow - setting
is right.
12a
Activate the tube gras - edit - copy.
Edit - paste as a new layer on the image.
Place this left near the pumpkins.
Effects - 3D Effects - drop shadow - setting
is right.
13.
Activate the tube LottaDesigns_OldWorld_plant_1 - edit - copy.
Edit - paste as a new layer on the image.
Place this on the grass - see example.
Effects - 3D Effects - drop shadow - setting
is right.
14.
Activate the tube rosomaha_element60 - edit - copy.
Edit - paste as a new layer on the image.
Image - mirror
Place this left near the plant - see example.
Effects - 3D Effects - drop shadow - setting
is right.
15.
Activate the tube marthadesigns_AutumnTreasures_el(5) - edit - copy.
Edit - paste as a new layer on the image.
Place this left before the candles and the plant -
see example.
Effects - 3D Effects - drop shadow - setting
is right.
16.
Layers - new raster layer - put your watermark into the image.
Image - add borders 2 pixels -.foreground color.
Effects - plug-ins - AAA Frame - Foto Frame -
with this setting - click OK.
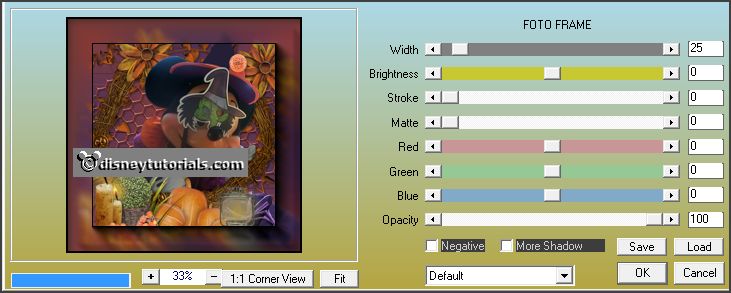
Image - add borders 2 pixels -.foreground
color.
17.
Activate selection tool - freehand selection - point to point - and make a selection -
as below.
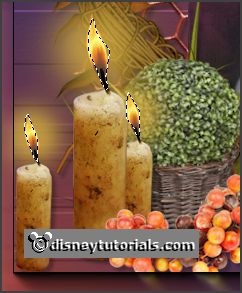
Selections - select none.
18.
Activate the bottom layer.
Effects - plug-ins - Alien Skin Eye Candy5 Nature - Fire - click at
Settings - User Settings - click at Emmyhalloween -
click OK.
Activate copy of background.
Repeat Eye Candy Nature - Fire - click at basic -
click at Random Seed - click OK.
Activate copy 1 of background.
Repeat Eye Candy Nature - Fire - click at basic -
click at Random Seed - click OK.
19.
Loch the top 2 layers.
Edit - copy merged.
Open Animatie Shop - paste as a new animation.
20.
Back in PSP.
Lock background and open copy of background.
Edit - copy merged.
In AS - paste after active frame.
21.
Back in PSP.
Lock copy of background and open
copy 1 of background.
Edit - copy merged.
In AS - paste after active frame.
22.
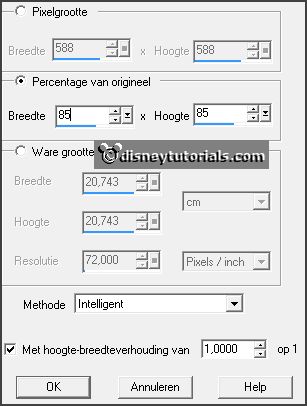
Animation - resize format animation - with this setting.