Halloween
Night
Foreground color #808080 and background color #202020.
1.
Open new transparent image 700x600.
Fill this with the background color.
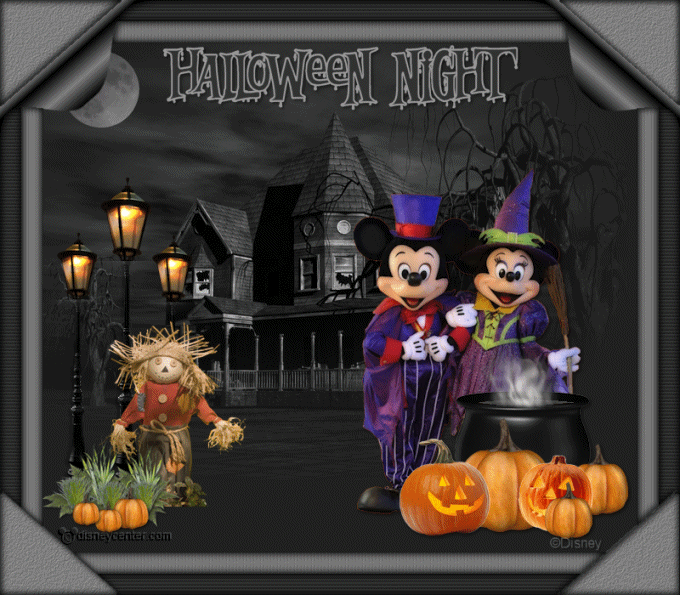
Copy scary halloweenhouse and paste as a new layer on the image.
Place this in the left upper corner. So the Moon is about 50 pixels from the
side.
2.
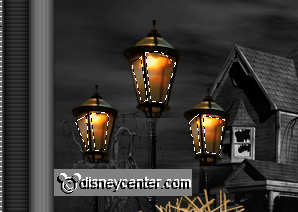
Copy lantaarn (lamppost) and paste as a new layer on the image.
Place this at the left side.
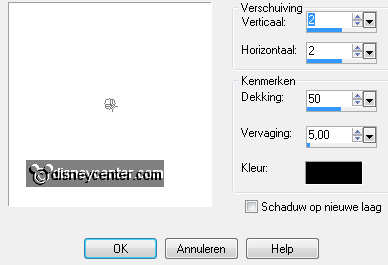
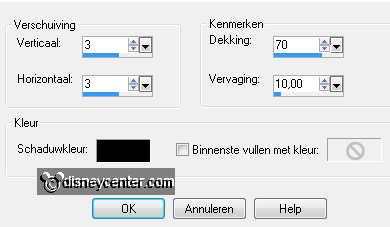
Effects - 3D Effects - drop shadow - with this setting.
3.
Duplicate this layer - image - resize format 80% - all layers not checked.
Place this left from the lamppost.
Duplicate this layer - place this right from the lamppost.
4.
Copy graspompoen and paste as a new layer on the image.
Place for the lampposts.
Image - resize format 75% an 1 time 85% - all layers not checked.
Adjust - Sharpness - Sharpen.
5.
Copy scarecrow and paste as a new layer on the image.
Image - resize format twice 75% - all layers not checked.
Adjust - Sharpness - Sharpen.
Layers - arrange - move down - move this a little to the left.
Give the same drop shadow as in point 2.
6.
Copy mmhalw3 and paste as a new layer on the image.
Image - resize format 85% - all layers not checked.
Place this at the right side. see example.
Give the same drop shadow as in point 2.
7.
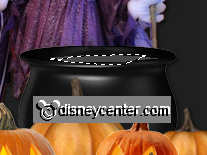
Copy ketelmpp and paste as a new layer on the image.
Place this for the tube - at the right side.
Give the same drop shadow as in point 2.
8.
Layers - merge - merge all.
Image - ad border 25 - foreground color.
Image - ad border 25 - background color.
9.
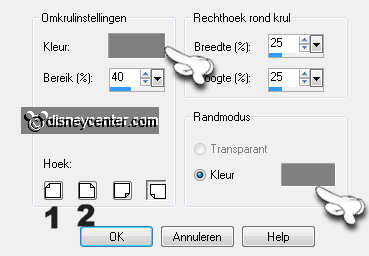
Effects - Image Effects - Page Curl - with this setting.
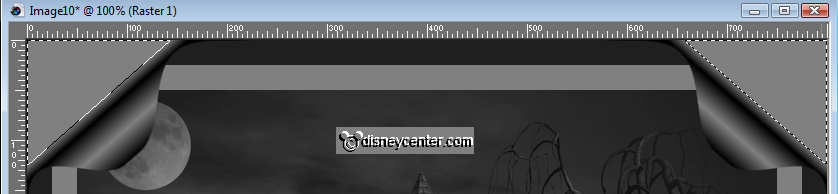
Click at corner 1.
Repeat page curl - Click at corner 2.
10.
Select the 2 grey corners with the magic wand with this setting.

Hold down the shift key.
Copy this - and paste as a new layer on the image.
Selections - select none.
Image - flip - place this at the bottom. see example.
Layers - merge - merge down.
11.
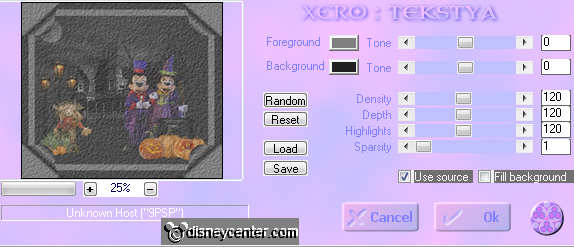
Select now the 4 grey corner with the magic wand - setting is right.
Effects - Xero - Tekstya - with this setting.
Effects - 3D Effects - cutout - with this setting.
Repeat cutout - now with -3, -3.
Selections - select none.
12.
Select now the 4 black border - Effects - Texture Effects - Blinds -
with this setting.
Effects - 3D Effects - cutout - with the same setting as in point 11.
Repeat cutout - now with -3, -3.
Select now the 4 grey borders - Effects - Texture Effects - Blinds - with
this setting.
Effects - 3D Effects - cutout - with the same setting as in point 11.
Repeat cutout - now with -3, -3.
Selections - select none.
13.
Go to selection tool - freehand selection - free hand - and select this area.
see below.
Duplicate this layer and lock the duplicated layer.
Stay at the first layer.
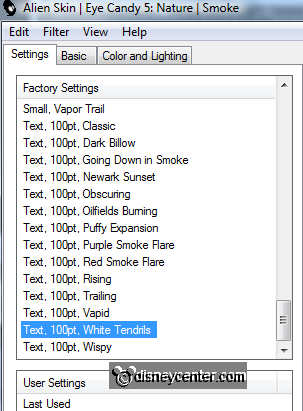
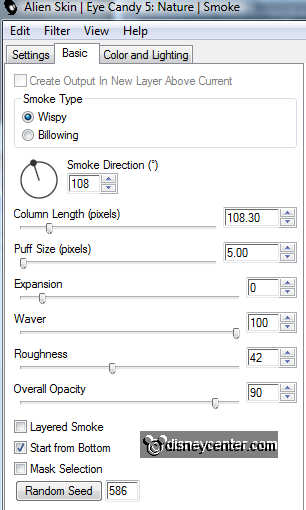
Effects - Alien Skin Eye Candy - Nature - Smoke - with this settings.
Lock the first layer and open the duplicated layer - make this active.
Repeat Alien Skin Eye Candy - Nature - Smoke - click at Random Seed.
Selections - select none.
14.
Go to selection tool - freehand selection - point to point - and select
these areas. see below.
Duplicate this layer and lock the duplicated layer
Stay at the first layer.
Adjust - Brightness and Contrast - brightness/contrast - with this setting.
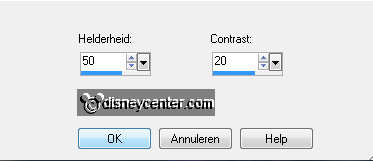
Lock the first layer and open the duplicated layer.
Repeat brightness/contrast now with brightness at 75 - contrast is the same.
Selections - select none.
15.
Go to text tool - font Bleeding Freaks Demo - size 60 - stroke width 2.

Write - halloween night - Do not use uppercase
Convert to raster layer - place this at the top in the middle.
Selections - select all - selections - float - selections - defloat.
Duplicate this layer twice. Lock the 2 top text layers.
16.
Adjust - Brightness and Contrast - brightness/contrast - with this setting.
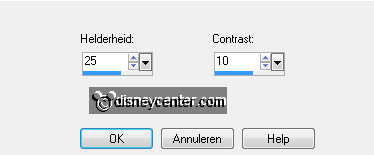
Lock the first text layer and open the second text layer.
Repeat brightness/contrast now with brightness at 50 - contrast is the same.
Lock the second text layer and open the third text layer.
Repeat brightness/contrast now with brightness at 75 - contrast is the same.
Selections - select none.
17.
New raster layer - put your watermark into the image.
Lock now all copy layers.
Edit - copy merged - Open Animation Shop.
Paste as a new animation.
Back in PSP - Lock the first image and the first text layer and open the second
image and the second text layer.
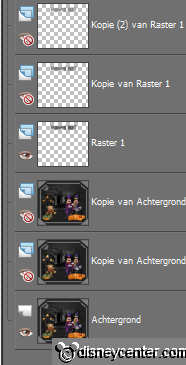
Edit - copy merged - paste in AS - after active frame.
Back in PSP - Lock the second image and the second text layer and open the third
image and the third text layer..
Edit - copy merged - paste in AS - after active frame. Make sure the last frame
is selected.
18.
File - save as - give name - click 3 times at next and then finish.
Ready is the tag
I hope you like this tutorial.
greetings Emmy
Tested by Bep

Tutorial written
23-09-2011

