1.
File - open new transparent image 700x500.
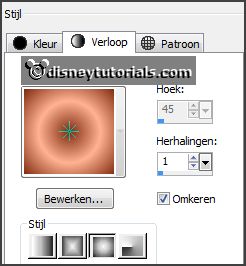
Set in the material palette the foreground
color at #ffb292
and the background color
at
#812b10.
Make from the foreground a gradient sunburst -
with this setting.
2.
Activate flood fill tool - fill the layer with the gradient.
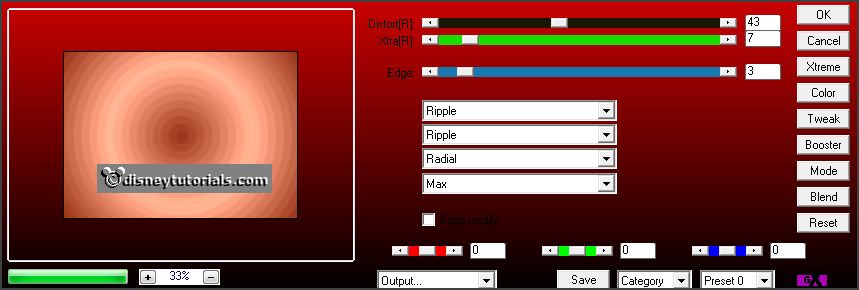
Effects - plug-ins - AP16 - Distort Gridedge -
with this setting - click
OK.
Effects - Edge effects - enhance.
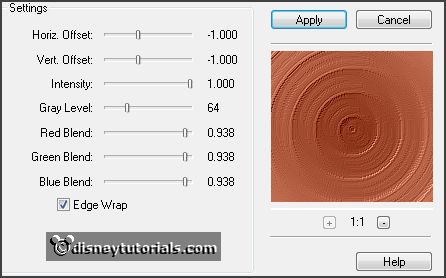
Effects - plug-ins - FM Tile Tools - Blend Emboss -
with this setting -
click Apply.
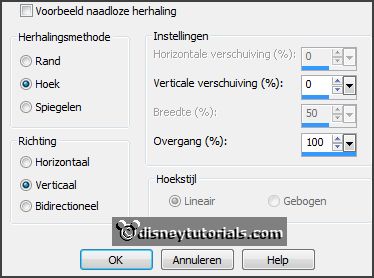
Effects - Image effects - Seamless tiling -
with this setting.
3.
Layers - new raster layer.
Fill the layer with the background color.
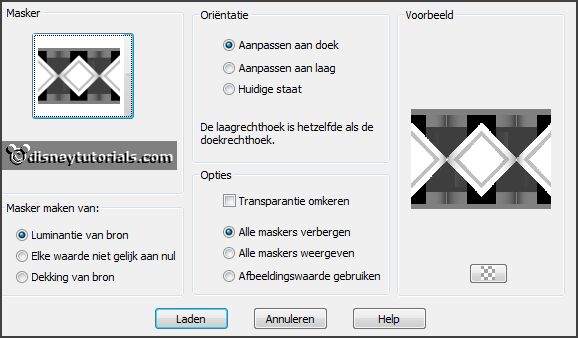
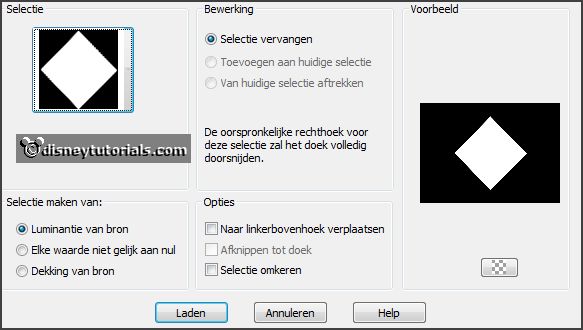
Layers - load/save mask - load mask from disk - look Emmymask18 -
with this setting.
Layers - merge - merge group.
4.
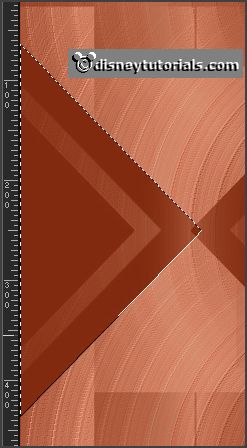
Activate free hand selection tool - from point to point - and make a
selection - as below.
Promote layer to selection.
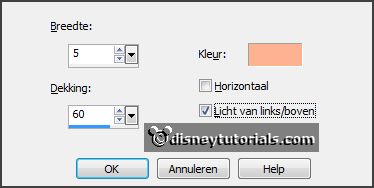
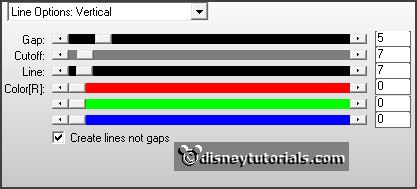
Effects - Texture effects - Blinds -
with this setting.
Selections - select none.
5.
Activate the layer group-raster2.
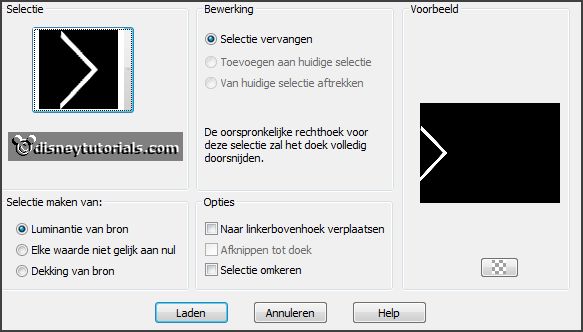
Selections - load/save selection - load selection from disk - look
emmyhappychristmas -
with this setting.
Promote layer to selection.
Layers - arrange - move up.
Effects - plug-ins - AP (lines) - SilverLining -
with this setting - click OK.
Selections - select none.
Layers - merge - merge down.
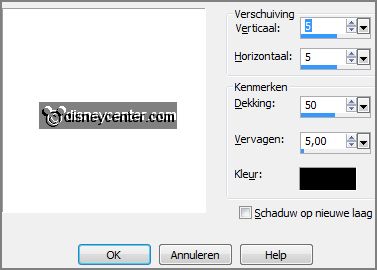
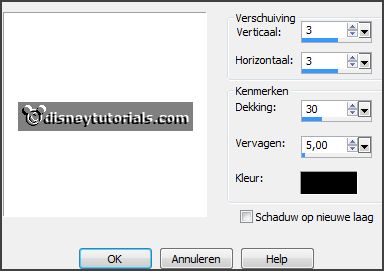
Effects - 3D Effects - drop shadow -
with this setting.
6.
Layers - duplicate.
Image - mirror.
Layers - merge - merge down.
7.
Selections - load/save selection - load selection from disk - look
emmyhappychristmas1 -
with this setting.
Promote layer to selection.
Activate the tube kerstcluster3 -
edit - copy.
Edit - paste in selection.
Selections - select none.
Set in the layer palette the opacity of this layer to 24.
8.
Activate the top layer.
Edit - paste as a new layer on the image - (stays in memory).
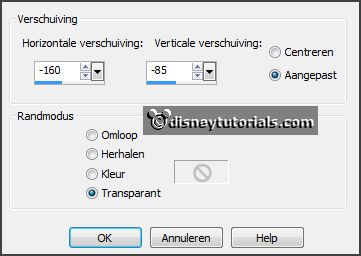
Effects - Image effects - offset -
with this setting.
9.
Activate the tube minniekerst5 -
edit - copy.
Edit - paste as a new layer on the image.
Activate move tool - place this at the right side.
Effects - 3D Effects - drop shadow - setting is right.
10.
Activate the tube accent -
edit - copy.
Edit - paste as a new layer on the image.
Place this at the bottom - see example.
Layers duplicate.
Image - flip.
11.
Set the foreground back to color and turn the colors.
Activate text tool -
with this setting.

Write Happy - convert to raster layer.
Write Christmas -
convert to raster layer.
Place this as below (to the top left).

Effects - 3D Effects - drop shadow - setting is right.
Turn the colors.
12.
Layers - new raster layer - put your watermark into the image.
Image - add borders 2 pixels - symmetric - background color.
Image - add borders 40 pixels - symmetric - foreground color.
Image - add borders 2 pixels - symmetric - background color.
13.
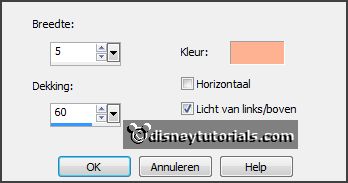
Activate the magic wand - with setting below - select the width border.

Effects - Texture effects - Blinds - with this setting.
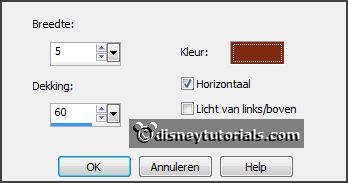
Effects - Texture effects - Blinds - with this setting.
14.
Selections - select all.
Selections - modify - contract 42 pixels.
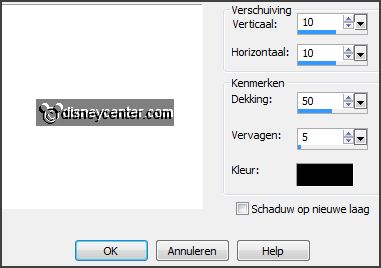
Effects - 3D Effects - drop shadow -
with this setting.
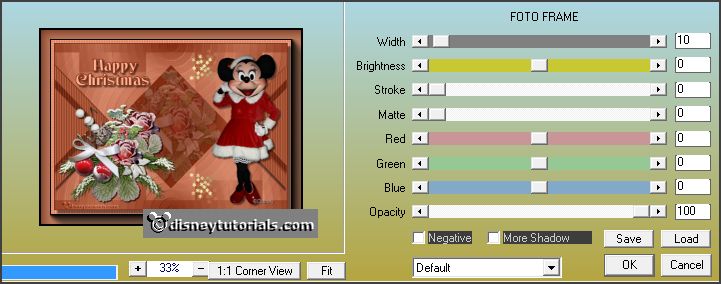
Effects - plug-ins - AAA Frames - Foto Frames -
with this setting - click OK.
15.
Activate the tube corner - edit - copy.
Edit - paste as a new layer on the image.
Place this left at the top - see example.
Effects - 3D Effects - drop shadow -
with this setting.
Layers - merge - merge all layers.
16.
Image - add borders 2 pixels - symmetric - foreground color.