Foreground color #3d4622 en background
color #d0e39f
1.
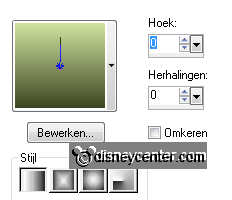
Open new image 650x650 - fill this with gradient linear.
Effects - Filters Unlimeted - Paper Textures - Japanese Paper - default setting.
2.
Go to selection tool - selection - rounded rectangle.
New raster layer - fill this with gradient linear - now convert checked.
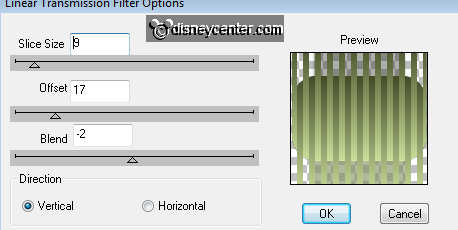
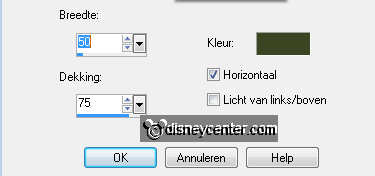
Effects - dbs flux - Linear Transmission - with this setting.
Effects - Edge Effects - Enhance more.
3.
Copy dashed circles and paste as a new layer.
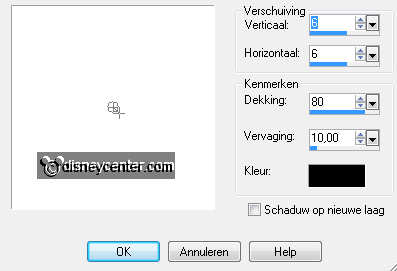
Effects - 3D Effects - drop shadow with this setting.
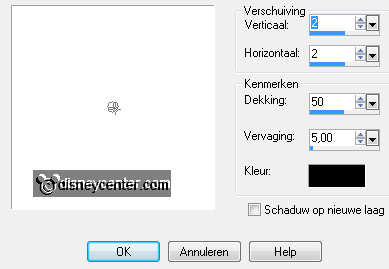
Place this with the top about 50 pixels from the right side.
4.
Copy Square and paste as a new layer.
Select the black square - fill this with the foreground color.
Place this at the dashed circles.
Give the same drop shadow as in point 3.
Copy ial_fb_tulips and paste as a new layer.
Place this on the green square -
Give the same drop shadow as in point 3.
5.
Copy Small Square I and paste as a new layer.
Select the square - fill this with color #6c7a46.
Give the same drop shadow as in point 3.
Place this right at the top of the large green square. see example.
6.
Open the chick.tub and select the chicken left below.
Copy this and paste as a new layer.
Place this at the top little square.
Set the Blend mode of this layer at soft light.
Layers - merge - merge down.
7.
Copy Small Square II and paste as a new layer.
Select the square - fill this with color #6c7a46.
Give the same drop shadow as in point 3.
Place this left at the below on the large green square. see example.
8.
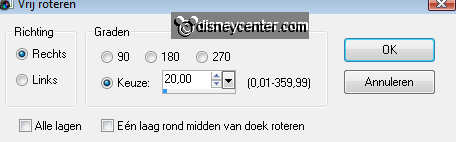
Copy chick.tub again - Image - free rotate - right 20.
Place this at the bottom little square.
Set the Blend mode of this layer at soft light.
Give the same drop shadow as in point 3.
Layers - merge - merge down.
9.
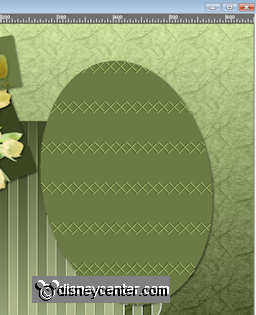
Copy Ellipse and paste as a new layer.
Select the Ellipse - fill this with color #6c7a46.
Effects - Tramage - Quilt - with this setting - horz.61 - vert.199 - transp.0
Give the same drop shadow as in point 3.
Place this right at the rounded rectangle.
10.
Copy stars and paste as a new layer.
Select thee stars - fill this with color #6c7a46.
Give the same drop shadow as in point 3.
Place the above the Ellipse.
11.
Copy Lines Circles and paste as a new layer.
Give the same drop shadow as in point 3.
Place this near the Ellipse at the right side. see example.
12.
Copy Bunny and paste as a new layer.
Give the same drop shadow as in point 3.
Place this left at the bottom of the rounded rectangle.
13.
Copy rectangle and paste as a new layer.
Image - free rotate - Left 2.
Select the rectangle - fill this with color #b3be90.
Copy Frame and paste as a new layer.
Select the frame and fill this with #3d4622
Give the same drop shadow as in point 3.
Layers - merge - merge down.
Place this at the right side of the Ellipse. see exampled.
Give the same drop shadow as in point 3.
14.
Copy easterbu and paste as a new layer.
Place this at the large rectangle at the bottom.
Give the same drop shadow as in point 3.
Set the Blend mode of this layer at - luminance (Legacy).
15.
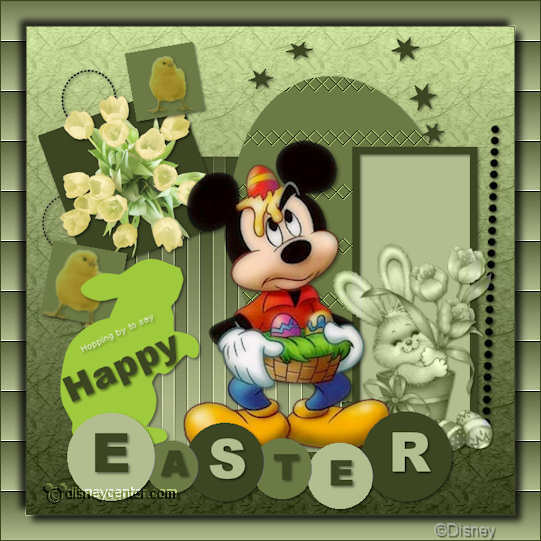
Copy Mickeaster and paste as a new layer.
Image - Resize 125% - resize all layers not checked.
Place this at the bottom at the rounded rectangle.
Effects - Xero - Porcelain - with this setting.
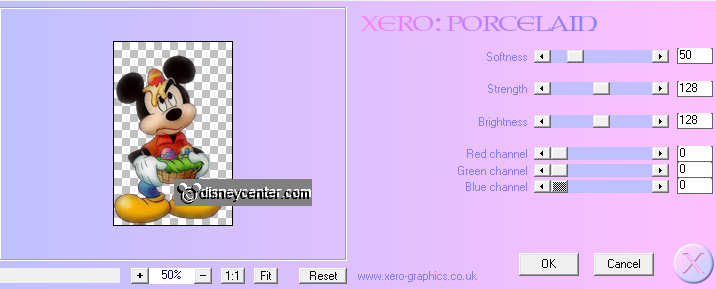
Give the same drop shadow as in point 3.
16.
Copy circles and paste as a new layer.
Place this almost below in the middle.
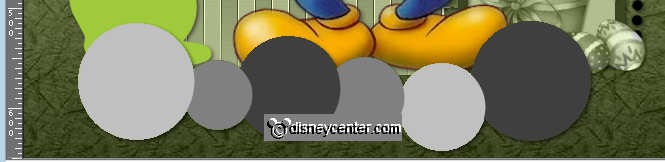
Now we color the circles. Select each two circles of the same color
Light grey - fill with color #b3be90
middle grey - fill with color #6c7a46
dark grey - fill with color #3d4622
Selections - select none.
Give the same drop shadow as in point 3.
17.
Go to text tool - Font Arial Black - size 75. Fore ground locked. Background #3d4622.
This changes each time.
Write- E - convert to raster layer - place at the first circle -
Give the same drop shadow as in point 3.
size 48 - Write - A - convert to raster layer - place at the second circle -
Give the same drop shadow as in point 3.
size 72 - background #b3be90 - Write - S - convert to raster layer -
place at the third circle -
Give the same drop shadow as in point 3.
size 48 - background #3d4622 - Write - T - convert to raster layer -
place at the fourth circle -
Give the same drop shadow as in point 3.
size 48 - background #3d4622 - Write - E - convert to raster layer -
place at the fifth circle -
Give the same drop shadow as in point 3.
size 72 - background #b3be90 - Write - R - convert to raster layer -
place at the sixth circle -
Give the same drop shadow as in point 3.
size 48 - backgroundr #3d4622 - Write - Happy - convert to raster layer - turn
this - place on the bunny -
Give the same drop shadow as in point 3.

18.
Copy Hopping by to Say and paste as a new layer.
Place this above Happy.
Give the same drop shadow as in point 3.
19.
Image - add border 1 - color #3d4622
Image - Resize 75% - resize all layers checked.
New raster layer - put your watermark into the image.
Layers - merge - merge all.
20.
Image - add border 25 - color #b3be90
Select the border - 3D Effects - Texture effects - Blinds with this settling.
Effects - Edge Effects - Enhance.
Selections - select none.
21.
Selections - select all - selections - modify - contract 25.
Effects - 3D Effects - Drop shadow with this setting.
Repeat drop shadow, but now with -6.
Image - add border 1 - color #3d4622
File - export - jpeg optimizer.