Foreground color #8c1e23
and background color white.
1. Open new image 600x600
2. Fill this with the foreground color.
3. New raster layer - fill this with the background layer.
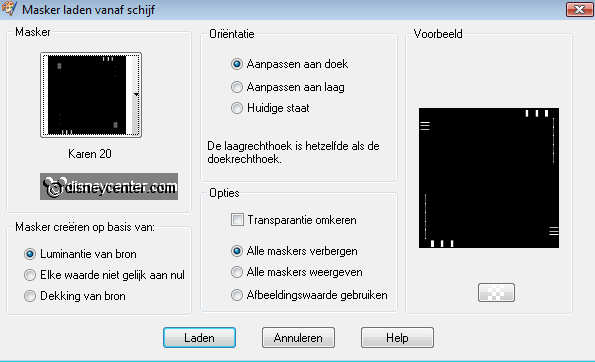
4. Layers - Load/Save mask - load mask from disk - find Karen 20.
5. Layers - merge - merge group.
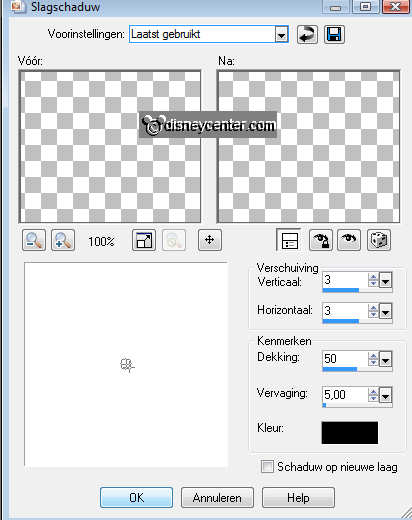
6. Effects - 3D Effects - drop shadow.
7. Duplicate this layer.
8. Image - Resize 75% - Resize all layers not checked.
9. Copy the tube SE_Recreation Doodle2 and paste as a new layer.
10. Give the same drop shadow as in point 6.
11. Layers - Arrange - move down.
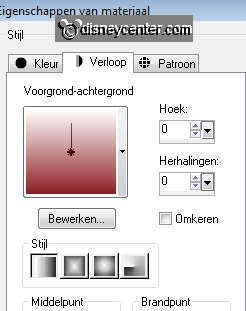
11. Selections - select all - new raster layer.
12. Selections - modify - contract 125.
13. Fill this with gradient linear.
14. Selections - select none.
15. Give the same drop shadow as in point 6.
16. Repeat the drop shadow, but now horz. and vert. at -3.
17. Copy the tube 02@Kitten and paste as a new layer.
18. Give the same drop shadow as in point 6.
19. Copy the tube Mickey 56 and paste as a new layer.
20. Give the same drop shadow as in point 6.
21. Place this in the middle at the bottom. About 50 pixels from the bottom.
22. Copy the tube kersttak and paste as a new layer.
23. Copy the tube HollyJollySet4 and paste as a new layer.
24. Give the same drop shadow as in point 6.
25. Copy the tube FM Magical Chr. Element 45 and paste as a new layer.
26. Give the same drop shadow as in point 6.
27. Place this left of the holly branch.
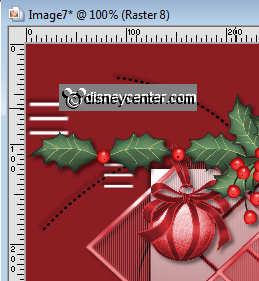
28. Copy the tube FM Winter Impressions Element 62 and paste as a new layer.
29. Give the same drop shadow as in point 6.
30. Place this in the middle in of the holly branch.

31. Copy the tube FM Magical Chr. Element 78 and paste as a new layer.
32. Give the same drop shadow as in point 6.
33. Place this right of the holly branch.