|

This
Tutorial is copyrighted to the Tutorial Writer, © Emmy Kruyswijk 23-02-2012.
This Tutorial
may
not be forwarded, shared or otherwise placed on any Web Site or group without written
permission from
Emmy Kruyswijk
At all Disney creations must be copyrighted.
Do you want to link my lessons?
Please send
me a mail.
Needing:
2 tubes,
1 scrap kit Happy Winter from Eileen, her site is
here.
2 tubes and 1 frame -
made by me.
3 tubes from Gold Team Design.
1 texture.
Open the tube and frame in PSP,
put the plug-in in the folder plug-ins
and the
texture in the folder texture.
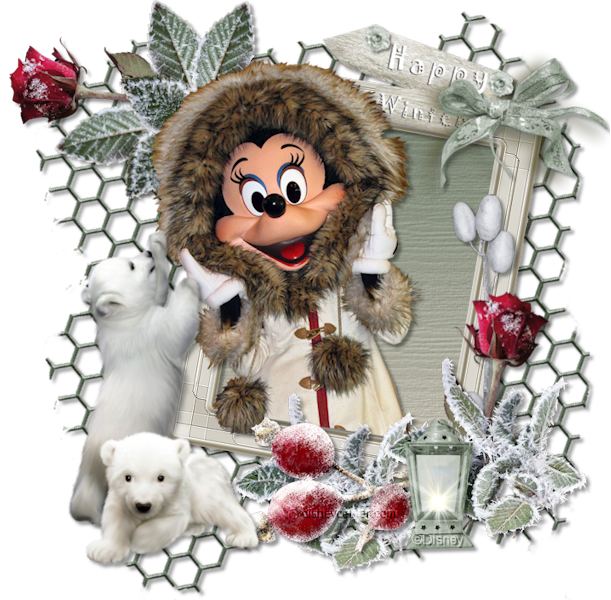
Material

Happy Winter
1.
File – open new
transparent image
750x750.
Put in the material palette the foreground
on
#74816f and
the background on
#c4bfb2.
2.
Activate Emmyraster - edit - copy.
Edit - paste as a new layer on the image.
Activate move tool - move a little up - about 35 pixels from the upper side.
3.
Layers - duplicate.
Image - flip - or move it down.
Scroll the grid exactly over each other - see below.

Layers - merge - merge down.
4.
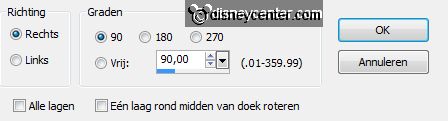
Activate Emmyframe -
edit - copy.
Edit - paste as a new layer on the image.
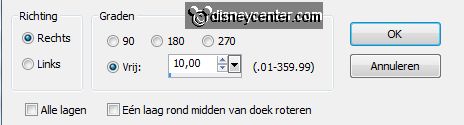
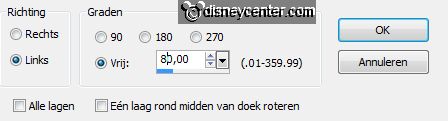
Image - free rotate - with this setting.
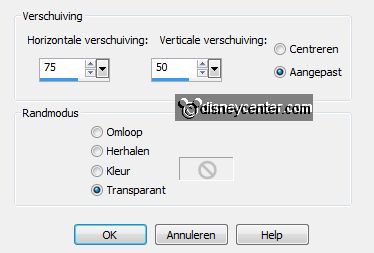
Effects - Image effects - off set -
with this setting.
5.
Activate the magic wand - with setting below - select inside the
frame.

Selections - modify - expand 10 pixels.
Layers - new raster layer.
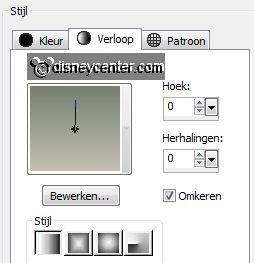
Make in the material palette from the foreground a gradient linear - with this
setting.
6.
Activate flood fill tool - fill the selection with the gradient.
Layers - arrange - move down.
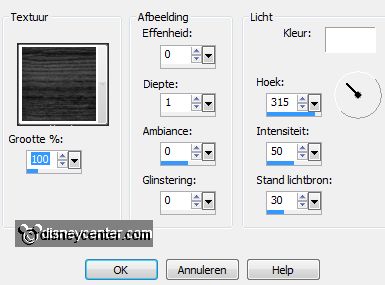
Effects - Texture effects - texture - Woodgrain - with this setting.
7.
Activate raster 2.
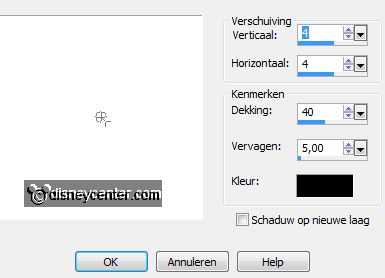
Effects - 3D Effects - drop shadow - with this setting.
8.
Activate the tube minnieeskimo -
edit - copy.
Edit - paste as a new layer on the image.
Activate free hans selection tool - from point to point - and make a selection
as below.
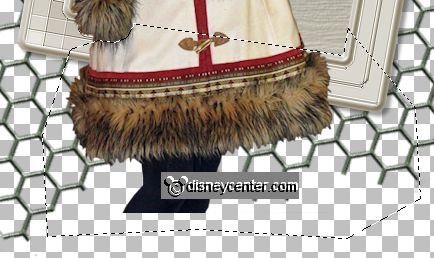
Click at the delete
key.
Selections - select none.
Effects - 3D Effects - drop shadow - setting is right.
9.
Activate Element4 - edit -
copy.
Edit - paste as a new layer on the image.
Put the tube right on the top of the frame - see example.
Image - free rotate - setting is right.
Effects - 3D Effects - drop shadow - setting is right.
Layers - arrange - move down.
Activate the top layer.
10.
Activate Element16 - edit -
copy.
Edit - paste as a new layer on the image.
Put the tube right on the bottom of the frame.
Activate eraser tool - and erase the stem.
Effects - 3D Effects - drop shadow - setting is right.
Layers - duplicate.
Move the tube near the other.
11.
Activate Element18 - edit -
copy.
Edit - paste as a new layer on the image.
Put the tube to the right side of the frame - see example.
Layers - arrange - move down.
Effects - 3D Effects - drop shadow - setting is right.
12.
Activate Element11 - edit -
copy.
Edit - paste as a new layer on the image.
Put the tube right at the bottom - see example.
Put the tube under raster 6 (leave without stem).
Effects - 3D Effects - drop shadow - setting is right.
13.
Activate Element31 - edit -
copy.
Edit - paste as a new layer on the image.
Put the tube right at the bottom - see example.
Effects - 3D Effects - drop shadow - setting is right.
14.
Activate Element17 -
edit - copy.
Edit - paste as a new layer on the image.
Put the tube left at the top of the frame.
Image - free rotate - with this setting.
Edit - paste (stays
in memory) as a new layer on the image.
15.
Layers - duplicate.
Image - mirror.
Move them together.
Layers - merge - merge down - and 1 more time.
Layers - arrange - move down. Move it under raster 4 (minnieeskimo).
Effects - 3D Effects - drop shadow - setting is right.
16.
Activate (el15) - edit - copy.
Edit - paste as a new layer on the image.
Put the tube left against the frame - see example.
Effects - 3D Effects - drop shadow - setting is right.
17.
Activate (el17) - edit - copy.
Edit - paste as a new layer on the image.
Put the tube right at the other ice bear - see example.
Effects - 3D Effects - drop shadow - setting is right.
18.
Activate Element3 - edit -
copy.
Edit - paste as a new layer on the image.
Put the tube at the top left. move it under raster 10 (leaves)
Effects - 3D Effects - drop shadow - setting is right.
19.
Layers - duplicate.
Image - free rotate - with this setting.
Put the tube at the bottom right. Move it under
raster 6.
Erase the piece of stem what became under the image.
20.
Activate the top layer.
Layers - new raster layer - put your watermark into the image.
Layers - merge - merge all visible layers.
Image - resize 85% - all layers checked.
File - export - PNG Optimizer.
Ready is the tag
I hope you like this tutorial.
greetings Emmy
Tested by Nelly

tutorial written23-11-2012
| 