Foreground color white and background clor #f6c1d3
1.
Open new transparent image 800x600.
Selections - select all.
Open from the scrapkit cajoline_kissme_15 - copy and paste into selection.
Selections - select none.
2.
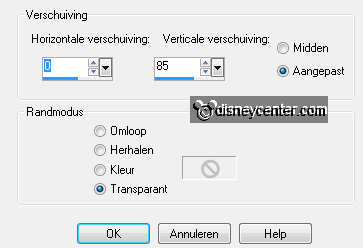
Adjust - blur - radial blur - with this setting.
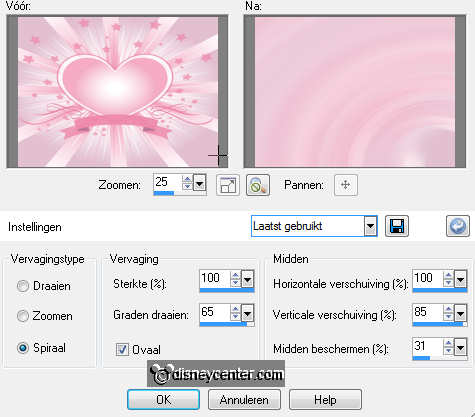
Duplicate this layer - image - mirror - image - flip.
Set the opacity of this layer at 50.
Layers - merge - merge down.
3.
Duplicate this layer - image - resize 75% - all layers not
checked.
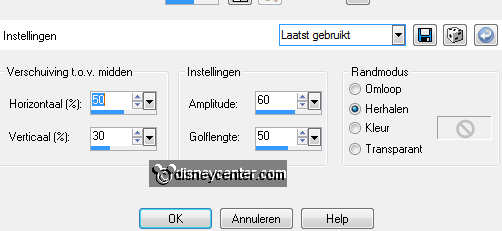
Effects - Distortion Effects - Ripple - with this setting.
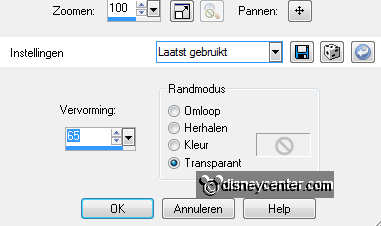
Effects - Geometrics Effects - Perspective-vertical - with this
setting.
Effects - Edge Effects - enhance.
Make raster 1 active - Effects - Edge Effects - enhance more.
- repeat this.
4.
Open cajoline_kissme_8 - copy and paste as a new layer on the image.
Image - resize - 3 times 75% - all layers not checked.
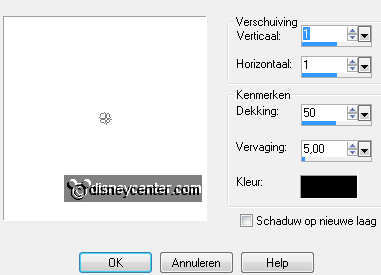
Effects - Image Effects - Offset - with this setting.
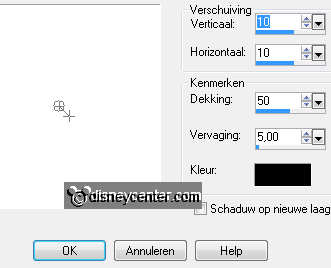
Effects - 3D Effects - drop shadow - with this setting.
5.
Make the top layer active
Copy cajoline_kissme_9 and paste as a new layer on the image.
Image - resize 50% - all layers not checked.
Place this at the left side at the bottom.
Give the same drop shadow as in point 4.
Duplicate this layer - image - mirror - move them together.
Layers - merge - merge down.
6.
Copy cajoline_kissme_16 and paste as a new layer on the image.
Image - resize 20% - all layers not checked.
Adjust - sharpness - sharpen.
Give the same drop shadow as in point 4.
Place this as you can see in the example.
Duplicate this layer and place this down - see example.
Layers - merge - merge down.
7.
Go to text tool - font Arial - size 30 - stroke width 1
- vector.
Write - LOVE - convert to raster layer - place this in the top heart.
Give the same drop shadow as in point 4.
Write - ME - convert to raster layer - place this in the bottom heart.
Give the same drop shadow as in point 4.
8.
Make copy of raster 1 active.
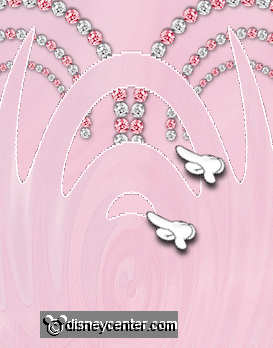
New raster layer - Fill in the 2 curved pieces with the brush - size
25 - this color #efccda.
see below.
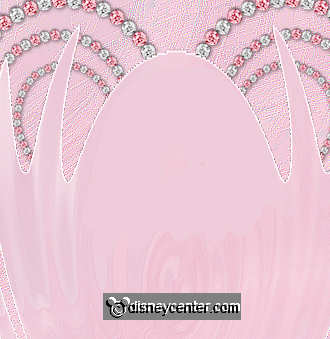
Layers - merge - merge down. Stay at this layer.
Selections - select all - selections - float - selections - defloat.
Copy mickey and paste as a new layer on the image.
Move this exactly over the selection.
If it stays right - selections - invert - click at the delete key.
Selections - select none
9.
Set the blend mode of this layer at Luminance (Legacy) and the
opacity at
87.
Give the same drop shadow as in point 4.
Layers - merge - merge down.
Duplicate this layer - we work with this later.
10.
Make the top layer active.
Copy minrose and paste as a new layer on the image.
Place this at the left side - see example.
Give the same drop shadow as in point 4.
11.
Copy cajoline_mix3cu and paste as a new layer on the image.
Image - resize 20% - all layers not checked.
Place this under the little heart.
Set the Blend Mode at luminance (Legacy)
Give the same drop shadow as in point 4.
Duplicate this layer twice.
Place them among themselves.
Layers - merge - merge down - and one more time.
12.
Make raster 1 active.
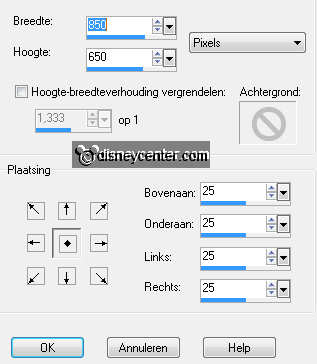
Image - canvas - with this setting.
Turn the colors and change the background (white) in #7d4a5e
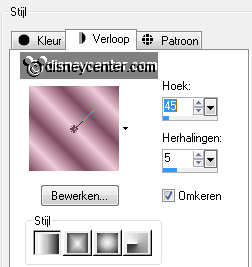
New raster layer - fill this with gradient linear - with this setting.
Layers - arrange - move down.
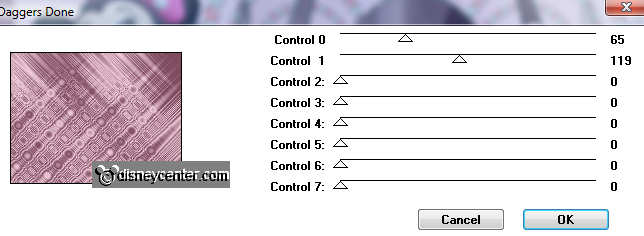
Effects - <Bkg Designer sf10 II - Daggers Done - with this setting.
13.
Make raster 1 active again.
Effect - 3D Effect - drop shadow - with this setting.
Repeat the drop shadow with -10.
Image - resize 75% - all layers checked.
14.
Make copy of raster 1 active - and lock copy(2) of raster 1 -
see below.

Effects - Alien Skin Xenoflex 2.0 - Constellation - with this
setting.
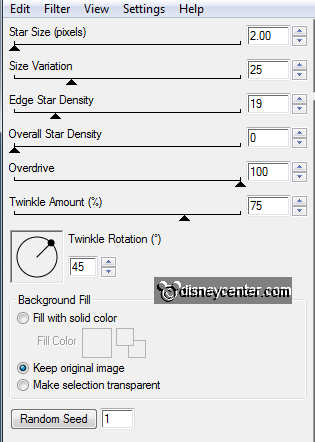
Lock copy of raster 1 and open copy2) of raster 1.
Repeat the Constellation - click only at random seed.
15.
New raster layer - put your watermark into the image.
Edit - copy merged.
Open animation shop
In AS - paste as a new animation.
Back in PSP - lock copy(2) of raster 1 and open copy of
raster 1.
Edit - copy merged.
In AS - paste after active frame.
File - save as - give name - click 3 times at next and than at
finish.