Foreground color #7a88b0 and background color black.
1
Open new transparent image 700x550.
Fill this with the foreground color.
New raster layer - fill this with the background color.
2.
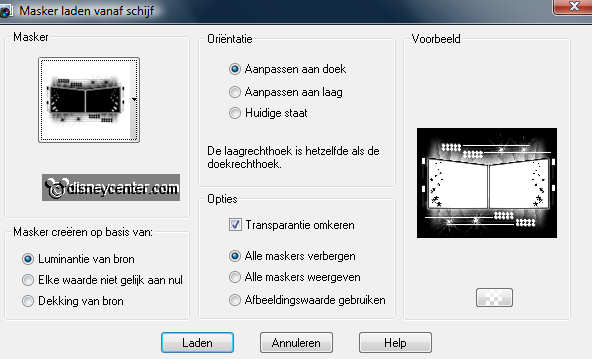
Layers - Load/save from mask - load mask from disk - look
zuz-mask4p - with this setting.
Layers - merge - merge group.
Make raster 1 active - Effects - Penta.com - Jeans - with this
setting.

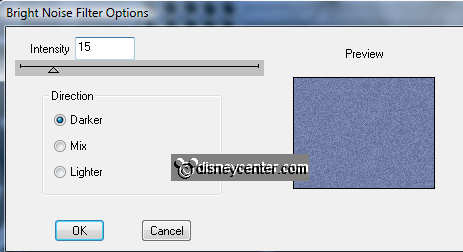
Effects - dsb-flux - Bright Noise - with this setting.
3.
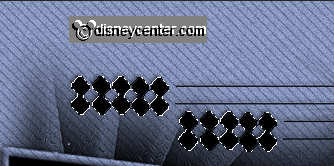
Go to the magic wand - with this setting.

Select all little squares - keep shift. Do this also with the
squares below.
New raster layer - fill this with the silver pattern - angle 0 -
scale
100.
Selections - modify - contract 3 - fill this with black.
Selections - select none.
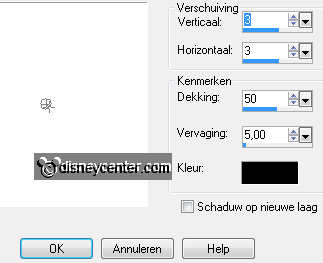
Effects - 3D Effects - drop shadow - with this setting.
4.
Go to selection tool - free hand selection - point to point.
And draw a selection into the left rectangle.
I have remove the stars, you can do this so: set the paint brush at
15 - color black and go over the stars.
New raster layer.
Copy frozentree and paste into selection.
5.
Duplicate this layer - image - mirror.
Copy micminshow and paste as a new layer on the image.
Place this at the right side. So that the stars are away.
Give the same drop shadow as in point 3.
6.
Open 1219072649_scrap and copy raster 12.
Paste as a new layer on the image.
Place this left at the bottom.
Copy raster 13 and paste as a new image.
7.
Go to selection tool - free hand selection - point to point.
And select the glass with champagne.
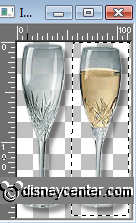
Copy paste as a new layer on the image.
Place this near the champagne.
Duplicate this layer and place near the other glass. see example.
8.
Copy word-art 2012 as a new layer on the image.
Place this at the top in the middle.
Give the same drop shadow as in point 3.
9.
Layers - merge - merge all.
Selections - select all - selections - modify - contract 3
Selections - invert - fill this with the silver pattern.
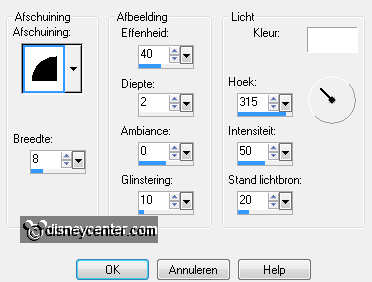
Effects - 3D Effects - Inner Bevel - with this setting.
Selections - select none.
10.
New raster layer - layers - arrange - move down.
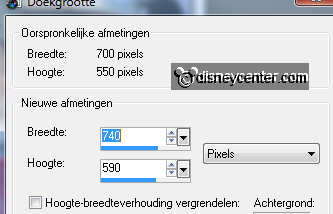
Image - Canvas size - with this setting.
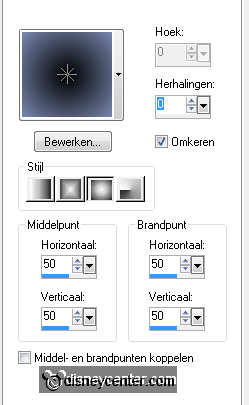
Fill this with gradient - rectangular - with this setting.
11.
Effects - AAA Frames - Foto Frames - with this setting.

New raster layer - put your watermark into the image.
Layers - merge - merge all.
12.
Selections - select all - selections - modify - contract 3
Selections - invert - fill this with the silver pattern.
Give the same Inner Bevel as in point 9.
Selections - select none.
Copy the image
13.
Open Animation Shop.
Open the animations silver and bubbelswit.
Edit - select all - both animations.
14.
Paste as a new animation (your image)
Duplicate this till you have 8 frames.
Edit - select all.
15.
Copy first the silver animation - paste into selected frames.
Place this left of 2012.
Paste into selected frames (stays in memory) again left of the animation.
16.
Go to animation - invert.
Copy again silver animation - paste into selected frames.
Place this right of 2012.
Paste into selected frames (stays in memory) again right of the
animation.
17.
Copy bubbelswit and paste into selected frames.
Place this in the first glass.
Paste (stays in memory) into selected frames - place this in the
second glass.
18.
Animations - resize format of animation 85% - maintain aspect
ratio of checked.
File - save as - give name - click 3 times at next and than at
finish.

