File - open new transparent image 700x550.
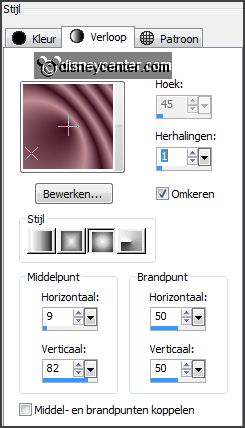
Set in the material palette the foreground color at #c18e97
and the background color at #3a0e1d.
Make from the foreground a gradient
sunburst - with this setting.
2.
Activate flood fill tool - fill the layer with
the gradient.
Adjust – blur – Gaussian blur – radius 25.
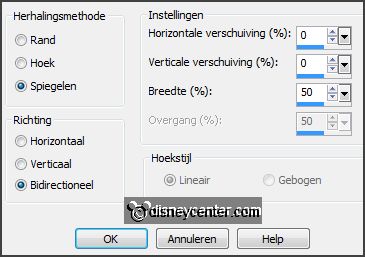
Effects – Image effects – seamless tiling –
with this setting.
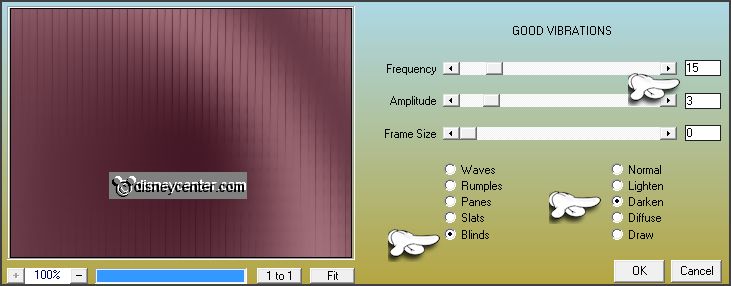
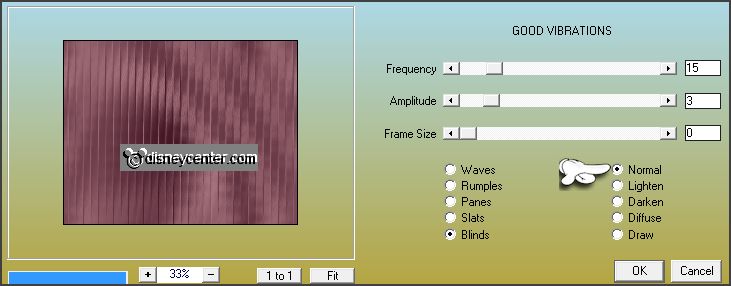
Effects – plug-ins – AAA Filters – Good Vibrations –
with this setting
– click OK.
Repeat this filter –
with this setting - click OK.
3.
Activate the tube pagode – edit - copy.
Edit - paste as a new layer on the image.
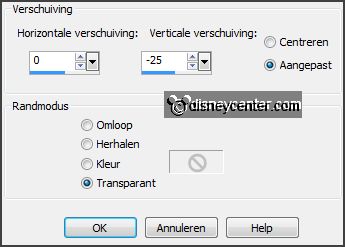
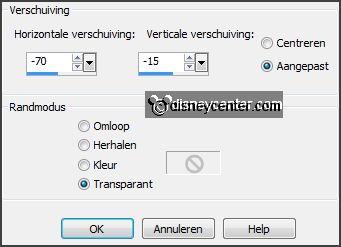
Effects – Image effects – offset –
with this setting.
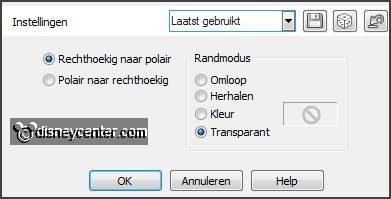
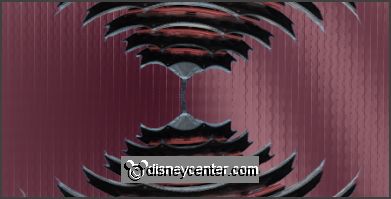
Effects – Distortion effects – Polar coordinates –
with this setting.
4.
Layers – duplicate.
Image – flip.
Slide the layers against each other – see below.
Layers – merge – merge down.
Objects – Align – center in canvas.
5.
Effects – Image effects – seamless tiling –
with this setting -
(default).
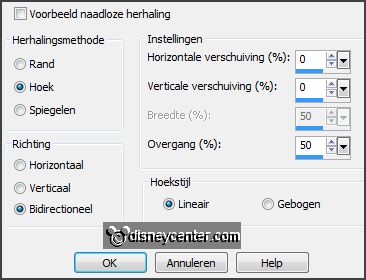
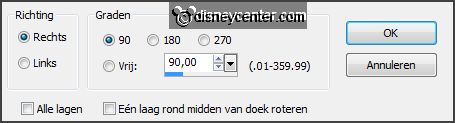
Image – free rotate –
with this setting.
Set in the layer palette the opacity to 35.
6.
Edit – paste as a new layer on the image (is still in memory).
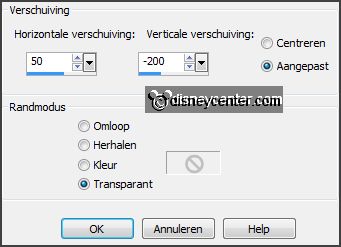
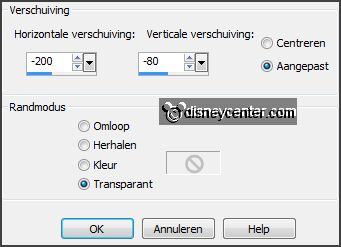
Effects – Image effects – offset –
with this setting.
Set in the layer palette the opacity to 67.
7.
Activate the tube bambus – edit - copy.
Edit - paste as a new layer on the image.
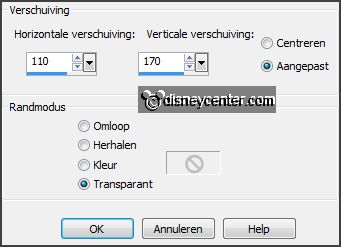
Effects – Image effects – offset –
with this setting.
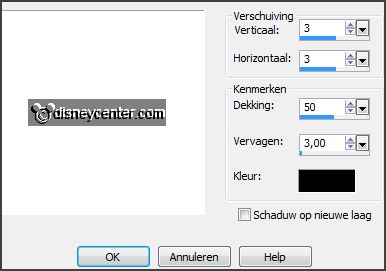
Effects – 3D Effects – drop shadow –
with this setting.
8.
Activate word-art-EmmyNuaMulan – edit - copy.
Edit - paste as a new layer on the image.
Effects – Image effects – offset –
with this setting.
9.
Activate the tube FF_Mulan – edit - copy.
Edit - paste as a new layer on the image.
Effects – Image effects – offset –
with this setting.
Set the blend mode to Luminance.
10.
Point 36 and 37 is an option. I did so, but it doesn't have.
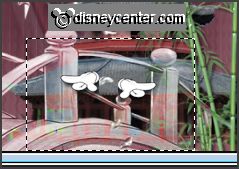
Activate raster 3.
Activate eraser tool – and erase the green color (bambus) from a part of the
Bridge – see below.
11.
Image – add borders 2 pixels – background
color.
Image – add borders 10 pixels – foreground color.
Image – add borders 2 pixels – background color.
Image – add borders 40 pixels – foreground
color.
12.
Activate the magic wand – and select the width border.
Fill the selection with the gradient.
Promote layer to selection.
Selections – select none.
13.
Layers – duplicate.
Image – flip.
Image – mirror.
Set in the layer palette the opacity to 50.
Layers – merge – merge down.
14.
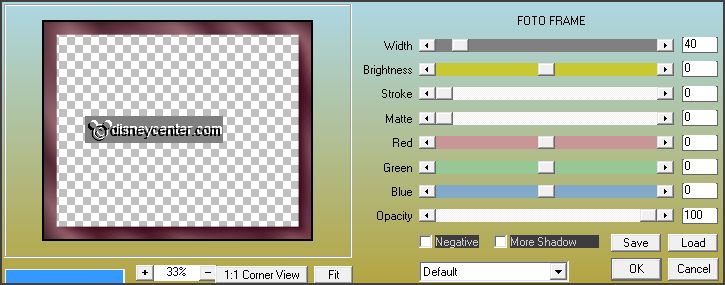
Effects – plug-ins – AAA Frames – Foto
Frame –
with this setting – click
OK.
Effects – Texture effects – Blinds –
with this setting.
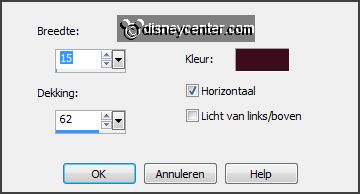
Image – add borders 2 pixels – background color.
Image – add borders 10 pixels – foreground
color.
Image – add borders 2 pixels – background
color.
15.
Layers – new raster layer – pt your watermark into the image.
Activate the tube mulan3 – edit - copy.
Edit - paste as a new layer on the image.
16.
Image – mirror.
Effects – Image effects – offset –
with this setting.

Effects – 3D Effects – drop shadow – setting is right.
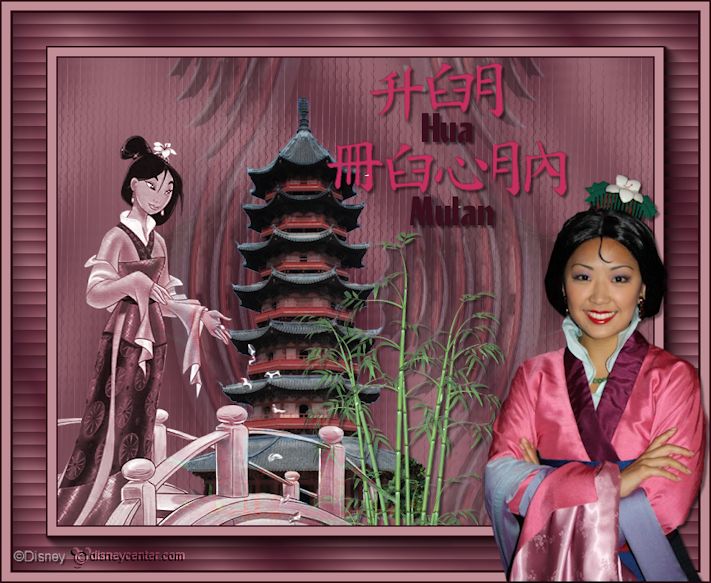
Layers – merge – merge all layers.
17.
Image – resize 85% - all layers checked.
File – export – JPEG Optimizer