foreground color #737373 - background color black.
1. Open a new image 600x600 - Convert to raster layer
2. Selections - select all.
3. Open image Halloween_07-Copy
4. Paste into selection.
5. Selections - select none.
6. Image - Resize 60%
7. Put this picture aside, there we are going with that later.
8. Open new image 600x600.
9. Fill with foreground color.
10. New raster layer - fill with black
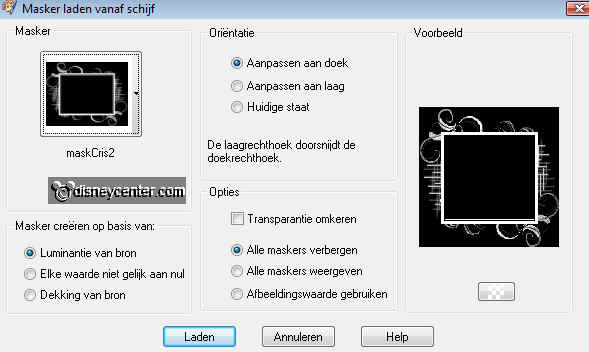
11. Layers- Load/Save Mask
12. Look for maskChris2 with this setting
13. Layers - Merge - Merge group.
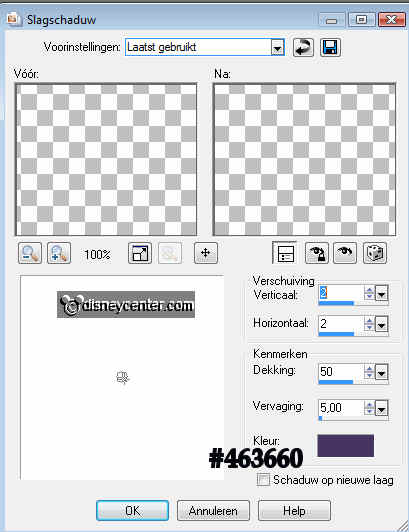
14. Effects- 3D Effects - Drop shadow. Observe the color.
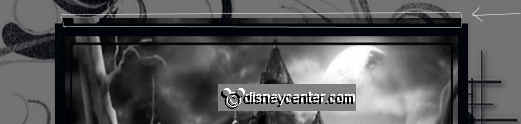
15. Go to the other image - Image - Resize to
400x400
16. Copy this image and paste as a new layer.
17. Layers - Arrange - Move down
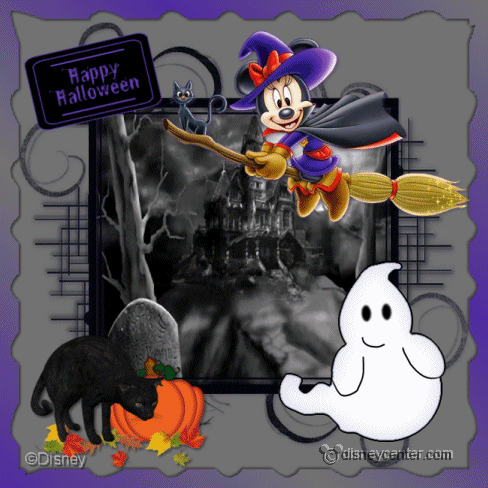
18. Remove the excess from the image, by staying on raster 2 and than erasers.
19. Copy the tube BewitchingMinnie and paste as a new layer.
20. Place it at the top right.
21. Give the same drops shadow as in point 14.
22. Copy the tube spooked and paste as a new layer.
23. Place it at the bottom left.
24. Give the same drops shadow as in point 14., but now with the color black.
25. Copy the tube MontiHalloweenGhost and paste as a new layer.
25. Place it at the bottom right.
26. Duplicate this 4 more times.
27. Put the opacity of the copy on75, for copy 2 on 50, for copy 3 on 25, for
copy 4 on 0
28. Copy the tube Happy Halloween and paste as a new layer.
29. Image free rotate

30. Image - Canvas Size. Put height and width on 650
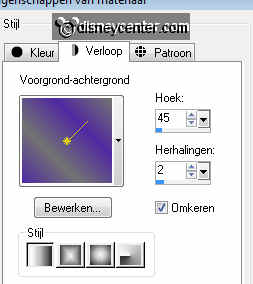
31. Stay on the bottom layer and fill this with the foreground color.
32. Selections - select all - Modify - Contract 25
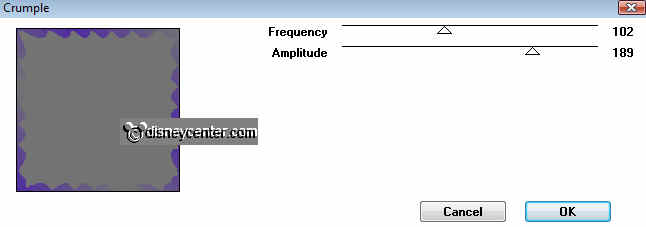
33. Selections - Invert.
34. New raster layer - Fill with gradient radial.
35. Let selection stay.
36. Effects - Distortion Filters - Crumple.
37. Give the same drop shadow as in point 14. Color again black.
38. Give the same drop shadow again, but now with vert. en horz. at -2
39. Image - Resize 75%.
40. Put your watermark into the image.
41. Lock the 4 upper layers of the copies. (Ghost)
42. Edit - Copy Merge
43. Open animation shop - paste as a new animation.
44. Back in PSP - lock raster 5 - open the copy
45. Edit - Copy Merge
46. Back in animation shop - paste after current frame. Make sure the last frame
is always selected.
47. Back in PSP - lock the copy and open the copy (2)
48. Edit - Copy Merge
49. Back in animation shop - paste after current frame. Make sure the last frame
is always selected.
50. Back in PSP - lock the copy (2)and open the copy (3)
51. Edit - Copy Merge
52. Back in animation shop - paste after current frame. Make sure the last frame
is always selected.
53. Edit - Copy Merge