1.
File- open new transparent image 950x500.
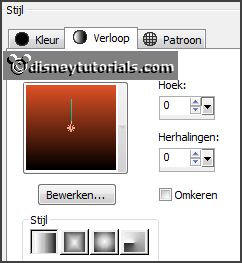
Set in the material palette the foreground
color at black and the background color
at
#de5126.
Make from the foreground a gradient linear - with this setting.
2.
Activate flood fill tool - fill the layer with the gradient.
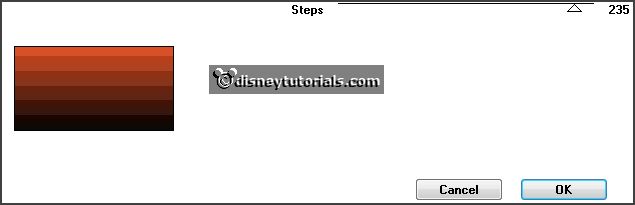
Effects - plug-ins - Toadies - Posterize -
with this setting - click OK.
Effects - plug-ins - Simple - Blintz.
3.
Layers - duplicate.
Image - flip.
Set in the layer palette the opacity to 50.
Layers - merge - merge down.
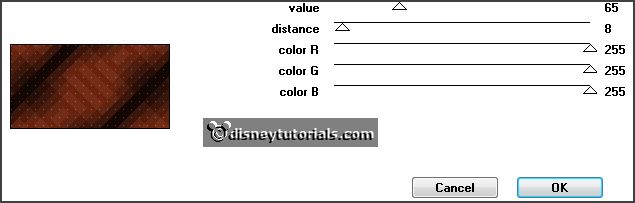
Effects - Edge effects - enhance more.
Effects - plug-ins - Simple - Diamonds.
Effects - plug-ins - Penta.com - Color
Dot - with this setting - click OK.
4.
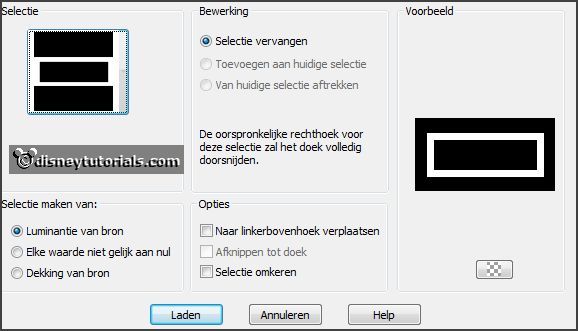
Layers - new raster layer.
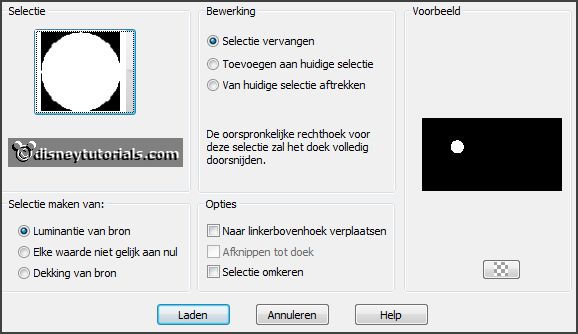
Selections - load/save selection - load selection from disk - look emmyhalloween
- with this setting.
Set the gradient to sunburst - further stays the same.
Fill the selection with the gradient.
Selections - select none.
5.
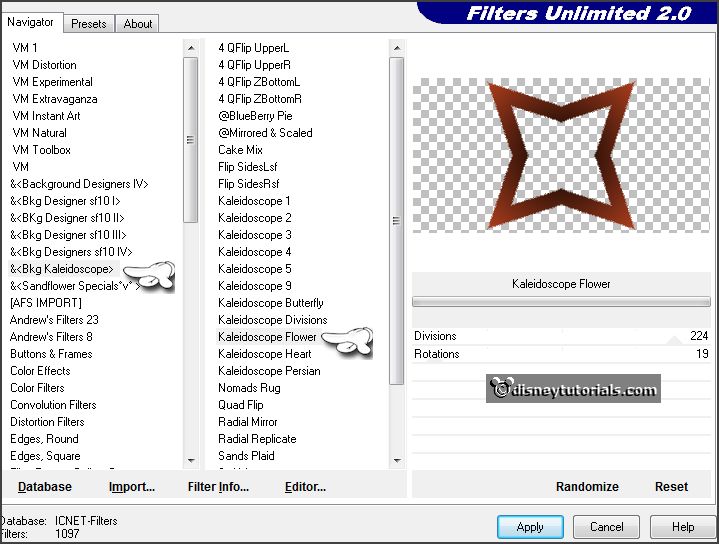
Effects - plug-ins - I.C.NET Software -
Filters Unlimited 2.0 - & Bkg Kaleidoscope - Kaleidoscope Flowers -
with this setting - click Apply.
Selections - select all.
Selections - float - selections - defloat.
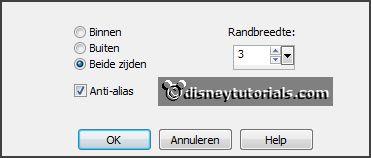
Selections - modify - select selected borders
- with this setting.
6.
Layers - new raster layer.
Set the foreground back to color.
Fill the selection with the foreground color.
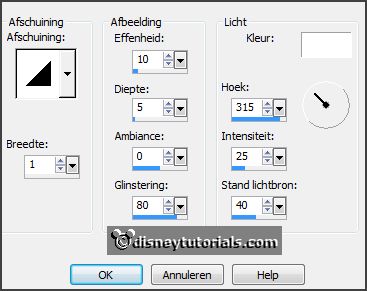
Effects - 3D Effects - Inner Bevel - with this
setting.
Selections - select none.
Layers - merge - merge down.
Effects - 3D Effects - drop shadow - with this
setting.
7.
Layers - duplicate.
Image - resize 90% - all layers nor checked.
Layers - duplicate.
Image - resize 90% - all layers nor checked.
Layers - merge - merge down and 1 more
time.
8.
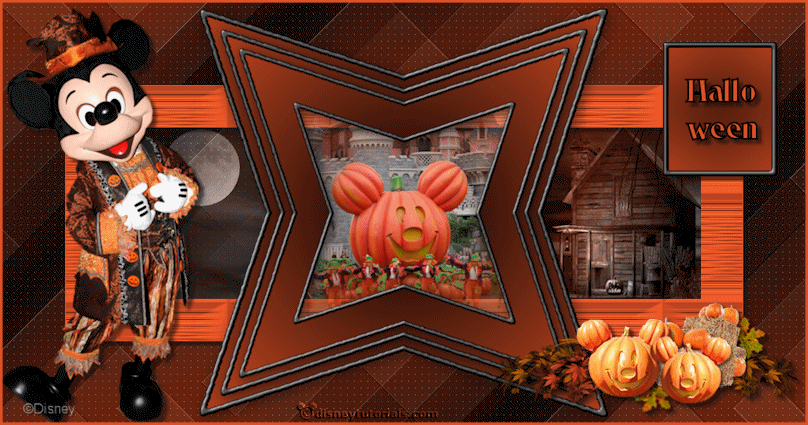
Activate the tube disneyhalloween - edit - copy.
Edit - paste as a new layer on the image.
Layers - arrange - move down.
Activate eraser tool and erase the side of the tube - see below.
9.
Activate the top layer.
Selections - load/save selection - load
selection from disk - look
emmyhalloween - setting is right.
Layers - new raster layer.
Fill the selection with the background color.
Effects - Texture effects - Texture - l&K2 -
with this setting.
Selections - select none.
10.
Effects - 3D Effects - drop shadow - with this
setting.
Layers - arrange - move down and 1 more time.
Lock the top 2 layers.
11.
Activate the tube haunted-house - edit - copy.
Edit - paste as a new layer on the image.
Activate move tool - place this right - at the big frame - see example.
Set in the layer palette the blend mode to Luminance (Legacy).
Layers - arrange - move down.
12.
Activate the tube misted-moon - edit - copy.
Edit - paste as a new layer on the image.
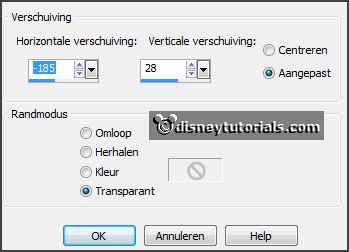
Effects - Image effects - offset - with this
setting.
If all is well, it is already under the frame layer - if not - layers - arrange
- move down.
Open the top 2 layers.
13.
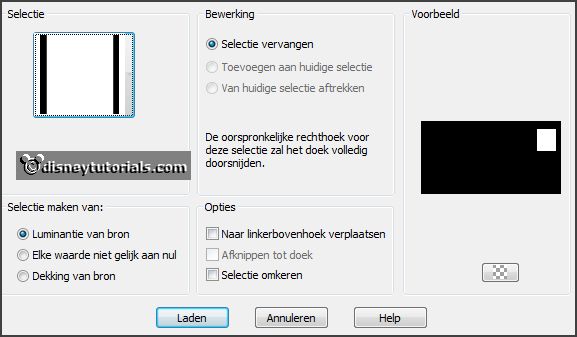
Selections - load/save selection - load
selection from disk - look emmyhalloween2 -
with this setting.
Layers - duplicate.
Stay at raster 6.
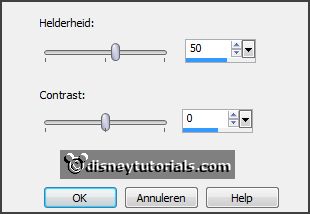
Adjust - Brightness and Contrast - brightness/contrast -
with this setting.
Activate copy of raster 6.
Repeat brightness/contrast - now with
brightness at 100 - contrast stays right.
Selections - select none.
Lock this layer.
14.
Activate the top layer.
Activate the tube halwpompoen - edit - copy.
Edit - paste as a new layer on the image.
Place this left at the bottom - see example.
Effects - 3D Effects - drop shadow - setting
is right.
15.
Activate the tube michalloween3 - edit - copy.
Edit - paste as a new layer on the image.
Place this right - see example.
Effects - 3D Effects - drop shadow - setting
is right.
16.
Selections - load/save selection - load
selection from disk - look emmyhalloween1 -
with this setting.
Layers - new raster layer.
Set the foreground back to gradient - setting
is right.
Fill the selection with the gradient.
Adjust - blur - Gaussian blur - radius 35.
Selections - modify - select selected borders -
setting is right.
17.
Layers - new raster layer.
Set the foreground back to color.
Fill the selection with the foreground color.
Selections - select none.
Layers - merge - merge down.
Effects - 3D Effects - drop shadow - setting
is right.
18.
Activate text tool - with this setting.

Write Hallo - enter - write ween.
Convert to raster layer.
Place this in the middle of the rectangle.
Effects - 3D Effects - drop shadow - setting is right.
19.
Layers - new raster layer - put your
watermark into the image.
Selections - select all.
Layers - new raster layer.
Fill the selection with the background color.
Selections - modify - contract 3 pixels - click at the delete key.
20.
Activate the bottom layer.
Edit - copy merged.
Open Animatie Shop - paste as a new animation.
21.
Back in PSP.
Lock raster 6 and open copy of raster 6.
Edit - copy merged.
In AS - paste after active frame.
22.
File - save as - give name - click 3 times at next and than at finish.