Adjust - Blur - Gaussian Blur - Radius at 30.
2.
Copy epw-2005 and paste as a new layer.
Image - Resize 150% - resize all
layers not checked.
Place this in middle at the top. You can always move it.
Set the Blend mode of this layer - Soft Light.
Set the opacity at 62.
3.
Copy epw-2015 and paste as a new layer.
Place this left at the top.
Set the Blend mode of this layer - luminance (Legacy)
Set the opacity at 28.
4.
Copy epw-2010 and paste as a new layer.
Place this right at the top.
Set the Blend mode of this layer - luminance (Legacy)
Set the opacity at 32.
5.
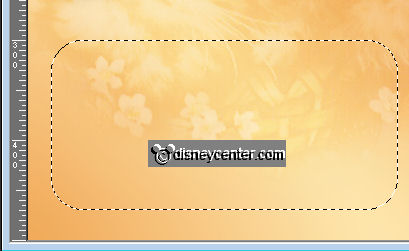
Go to selection tool- selection - rounded rectangle.

Pull a rectangle from about 350x150.
Place this as below
6.
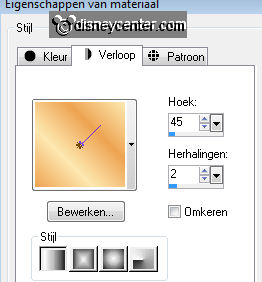
New raster layer - fill this with the gold pattern - Angle 1 - Scale 100.
Selections - modify - contract 5.
New raster layer - fill this with the background color.
7.
Let selection stay.
Effects - 3D Effects - Cutout with this setting.
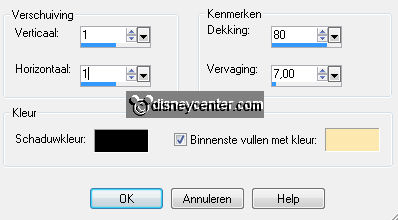
Repeat Cutout, but now witt -1.
Selections - select none.
8.
Layers - merge - merge down.
Duplicate this layer - Image - Resize 65% - resize all layers not checked.
Layers - Arrange - move down.
Move a little to the left.
9.
Go to text tool - font Tourist Trap - size 48 - color #eea453
- Lock the foreground color.

And write- I Love - Convert to raster layer.
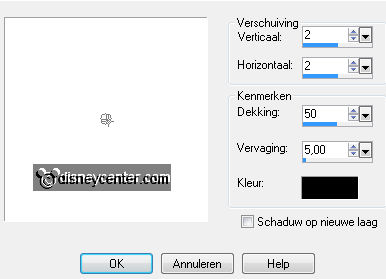
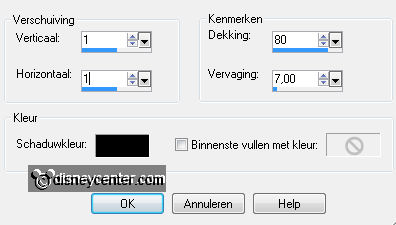
Effects - 3D Effects - drop shadow with this setting.
10.
Stay on the large rectangle.
Go to text tool again - size 100 - and write - Cats -
Convert to raster layer and give the same drop shadow as in point 9.
Place this in the middle of the rectangle.
Layers - merge - merge down.
11.
Copy MM_0000_Character Art and paste as a new layer.
Place this right - see example.
Give the same drop shadow as in point 9.
12.
Copy cat and paste as a new layer.
Place this on the top of the large rectangle at the left side.
Give the same drop shadow as in point 9.
13.
New raster layer - Put your watermark into the image.
Layers - merge - merge all layers.
14.
Image - add border 1 - color black.
Image - add border 10 - background color #eea453.
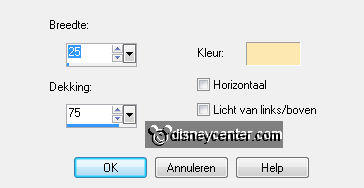
Select the border - Effects - Texture effects - Blinds - with this setting.
Effects - FM Tile Tools - Blend Emboss - default setting.
Repeat the Blend Emboss.
Selections - select none.
15.
Selections - select all - selections - modify - contract 1.
Effects - 3D Effects - Cutout with this setting. (Fill interior with color not
checked )
Repeat Cutout, but now with -1.
Selections - select none.
16.
Image - add border 20 - background color #eea453.
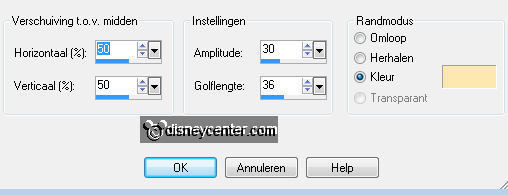
Select the border - Effects - Distortion Effects - Ripple - with this setting.
Effects - FM Tile Tools - default setting.
Selections - select none.
17.
Repeat point 14.
Selections - select all - selections - modify - contract 11.
Repeat Cutout of
point 15, and Cutout -1.
Selections - select none.
Image - add border 1 - color black.
Image - Resize 75% - Resize all layers checked.
File - export - jpeg optimizer.
Ready is the tag
I hope you like this tutorial.
greetings Emmy,