Set in the layer palette the opacity of this layer to 50.
Layers - merge - merge down.
3.
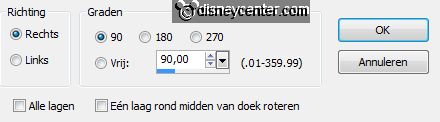
Effects - plug-ins - dsb flux - Linear Transmission - with this setting -
c;lick OK.
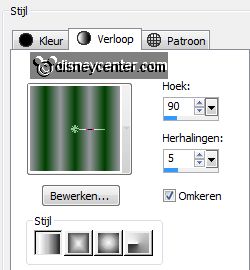
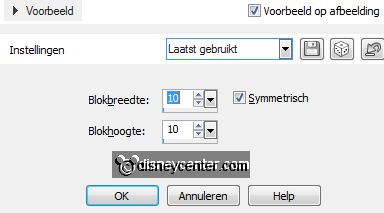
Effects - plug-ins - I.C.NET Software - Filter Unlimited 2.0 - Tile Mirror
- Mirrored & Scaled - click Apply.
4.
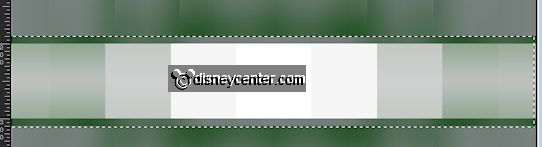
Activate selection tool - rectangle - and make a selection as below.
New raster layer.
Edit - cut - edit - paste in selection.
Selections - select none.
5.
Activate word-art It's Christmas Time - edit - copy.
Edit - paste as a new layer on the image.
Layers - duplicate.
6.
Stay at the original layer.
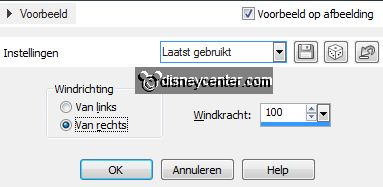
Effects - Distortion Effects - Wind - with this setting.
Activate move tool - move this layer a little to the left and down.
So that he stays against the green border - see example.
7.
Layers - duplicate.
Image - flip - Move this layer a little to the right and up against the border.
Layers - merge - merge down.
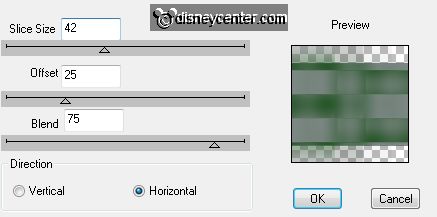
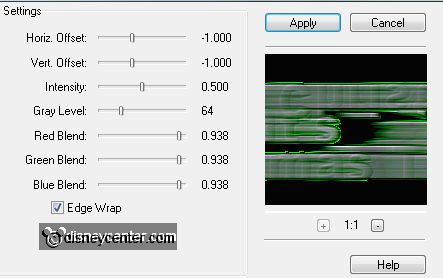
Effects - plug-ins - FM Tile Tools - Blend Emboss - with this setting -
click OK.
8.
Activate the top layer.
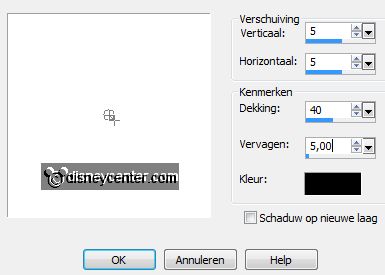
Effects - 3D Effects - drop shadow - with this setting.
9.
Activate the tube kerstboom - edit - copy.
Edit - paste as a new layer on the image.
Move the tree left.
Layers - arrange - move down - under raster 2.
Effects - 3D Effects - drop shadow - setting is right.
10.
Activate the tube mickeykerst3 - edit - copy.
Edit - paste as a new layer on the image.
Put the tube to the left side.
11.
Layers - duplicate.
Stay at the original tube layer.
Effects - Distortion Effects - pixelate - with this setting.
12.
Effects - Edge effects - enhance.
Effects - Distortion Effects - wind - setting is right.
Set the opacity of this layer in your layers palette at 75.
13.
Activate the top layer.
Image - resize - 90% - all layers not checked.
14.
Activate raster 1.
Activate the misted tube lunapaisagem1201 - edit - copy.
Edit - paste as a new layer on the image.
Slide the tube up till the orange air is away.
Set in the layer palette the blend mode to Luminance (Legacy).
15.
Activate elements (23) - edit - copy.
Edit - paste as a new layer on the image.
Put the tube right.
Effects - 3D Effects - drop shadow - setting is right.
16.
Activate the chr-cluster - edit - copy.
Edit - paste as a new layer on the image.
Set the tube to the right side at the bottom - see example.
Layers - merge - merge down.
17.
Lock in the layer palette this layer.
Layer - newe raster layer - put your watermark into the image.
18.
Make the bottom layer active.
Layers - merge - merge all visible layers.
19.
Layers - duplicate.
Image - resize 85% - all layers not checked.
Effects - 3D Effects - drop shadow - setting is right.
Repeat the drop shadow - now with vert. and horz. at -4.
20.
Make the bottom layer active.
Adjust - Blur - Gaussian Blur - radius 30
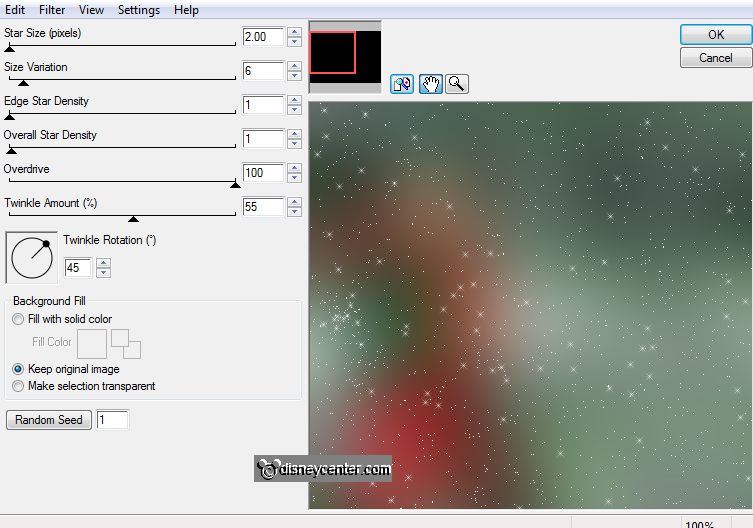
Effects - plug-ins - Alien Skin Xenoflex 2 - Constellation - with this
setting -Setting at Star Field - click OK.
21.
Make the top layer active.
Layers duplicate.
22.
Stay at the layer below.
Effects - plug-ins - Alien Skin Xenoflex 2 - Constellation - setting is
right - click at random seed - click OK.
23.
Stay at the top layer.
Effects - plug-ins - Alien Skin Xenoflex 2 - Constellation - setting is
right - click at random seed - click OK.
24.
Lock the top layer.
Make the bottom layer active.
Edit - copy merged.
25.
Open animation shop - edit - paste as a new animation.
Back to PSP - open the top layer and lock the layer below.
Edit - copy merged.
26.
In AS - paste after active frame.
File - save as - give name -click 3 times at next and than at finish.