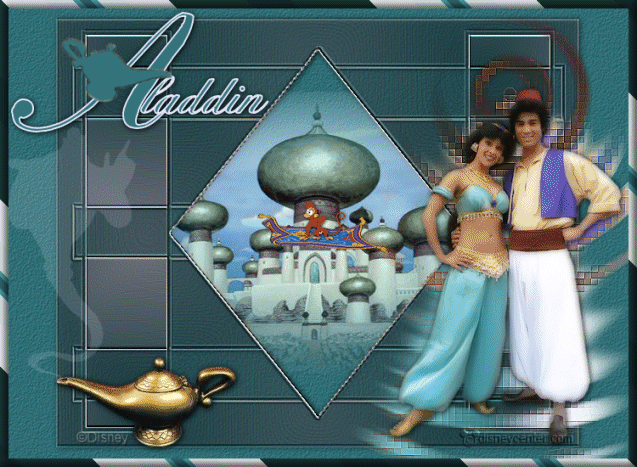
Aladdin and Jasmine
Foreground color#367980 and background color #e4e6fb
1.
Open new transparent image 650x550.
Fill this with the foreground color.
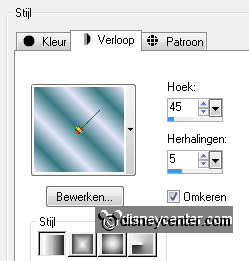
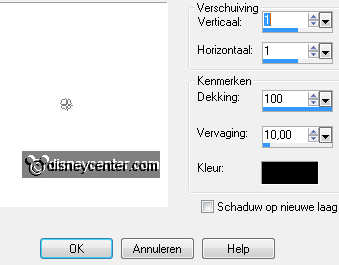
New raster layer - fill this with gradient linear - with this
setting.
2.
Duplicate this layer and put the opacity at 50.
Adjust - blur - Gaussian blur at 20.
Layers - merge - merge down.
3.
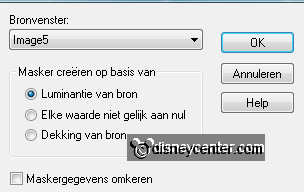
Layers - new mask layer - look - mask-emmy - with this setting.
Layers - merge - merge group.
Effects - Edge Effects - enhance more.
3.
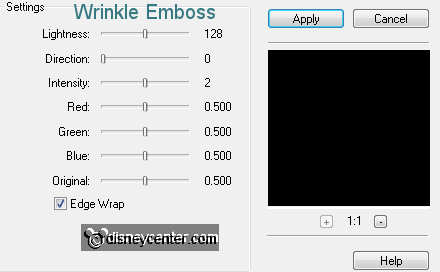
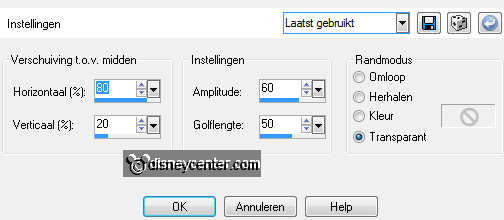
Effects - FM Tile Tools - Wrinkle Emboss - with this setting.
You can not get this, because a serial number is required.
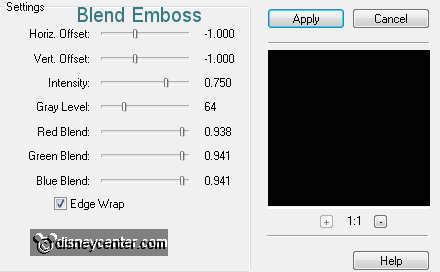
Take than FM Tile Tools - Blend Emboss- with this setting.
4.
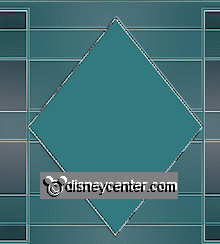
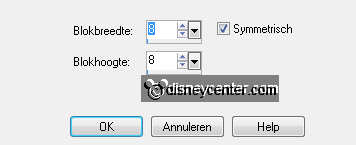
Select the square window, see below.
Copy paleis-aladdin and paste as a new layer on the image.
Selections - invert - click at the delete key.
Selections - select none.
5.
Set the blend mode of this at luminance (Legacy).
Duplicate this layer - set the blend mode back to normal.
Put the opacity of this layer at 47.
6.
Make the bottom layer active.
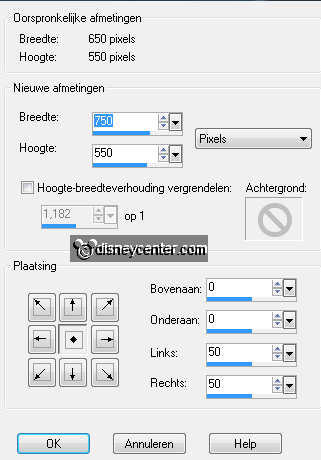
Image - canvas size 750x550 - with this setting.
Fill the transparent sides with the foreground color.
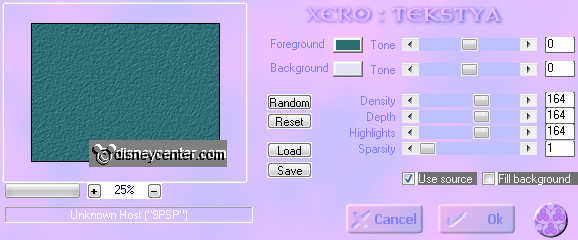
Effects - Xero - Tekstya - with this setting.
7.
Make the group-raster2 active. (The mask layer)
Effects - 3D Effects - drop shadow - with this setting.
Make the bottom layer active again.
8.
Copy aladdin-en-jasmine and paste as a new layer on the image.
Place this at the bottom right.
Duplicate this layer. Image - resize 90% - all layers not checked.
Lock this layer for this moment.
9.
Go back to the original tube layer.
Adjust - blur - Gaussian blur at 15.
Effects - Distortion effects - Ripple - with this setting.
Effects - Distortion effects - Pixelate - with this setting.
I have the pixels of the window removed, but that's what you want.
Open the top layer and put it well when necessary.
Give the same drop shadow as in point 7
10.
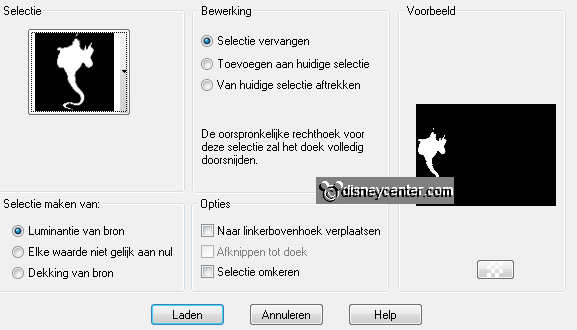
Selections - Loas/save selection - load selection from disk.
Look for emmyaladdin - with this setting.
New raster layer - fill this with the background color.
Set the opacity of this layer at 15.
Let selection stay.
11.
Copy genie and paste into selection.
Duplicate this layer 5 times.
Change the opacity in 30-45-60-75-90.
Selections - select none.
12.
Copy lamp-aladdin and paste as a new layer on the image.
Image - mirror.
Place this left, so that the genius comes out of the lamp.
Give the same drop shadow as in point 7.
13.
Copy word-art-aladdin and paste as a new layer on the image.
Place this left at the top. see example.
New raster layer - put your watermark into the image.
14.
Selections - select all - selections - contract 10.
Selections - invert - fill this with the gradient from point 1.
Effects - Crescent Moon - ColourSwitcher - with this setting.
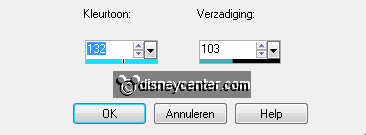
15.
Adjust - Hue and Saturation - with this setting.
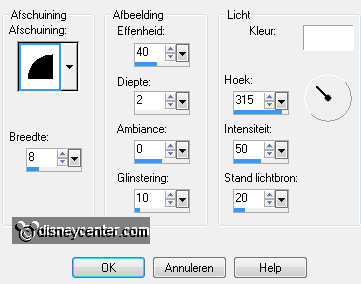
Effects - 3D Effects - Inner Bevel - with this setting.
Selections - select none.
16.
Lock the layers of the genius, except for the transparent layer.
see below.
Make the bottom layer active.
Edit - copy merged.
17.
Open animation shop - paste as a new animation.
Back in PSP - Lock the transparent layer and open the first genius
layer.
Edit - copy merged.
18.
Back in AS - paste after active frame.
Back in PSP - lock the first genius layer and open the second genius
layer.
Edit - copy merged.
19.
Back in AS - paste after active frame - make sure the last frame
is always selected.
Repeat this with all the genius layers .
Total 7 frames in animation shop.
20.
Edit- select all.
Open aladdin animation in AS.
Edit- select all - copy.
Click in the image - paste into selected frame.
The monkey should be just below the big sphere.
21.
Animati0n - Frame properties at 33.
Animation - resize format of animation 85% - maintain aspect ratio
of checked.
File - save as - give name - click 3 times at next and than at
finish.

