
This
Tutorial is copyrighted to the Tutorial Writer, © Emmy Kruyswijk 2011.
This Tutorial
may
not be forwarded, shared or otherwise placed on any Web Site or group without written
permission from
Emmy Kruyswijk
Do you want to link my lessons?
Please send
me a mail.
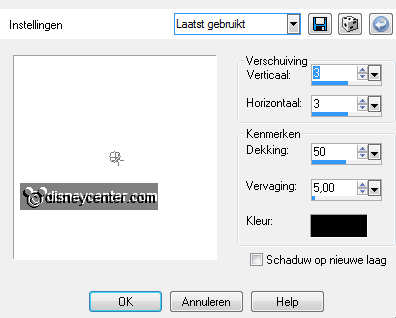
Material
s
download
here
1 Template from
Sissy
download here,
1 Disney Tube, 1 image.
Filters
download
here
Alien Skin Eye Candy 5 Impact - Gradient Glow.
Put the filters in the folder plug-ins.
Kiss
Me
Foreground
color #fcc4c5
1. Open new image 700x700
2. Fill this with the foreground color.
3. Open the Template of Sissi.
4. Copy masque and paste as a new layer.
5. Copy shape and paste as a new IMAGE.
6. Do shift + D.
7. Now divide each image into two. 1 the hearts and 2 the signs.

8. Copy the hearts and paste as a new layer.
9. Place this left at the top.
10. Effects - 3D Effects - drop shadow with this setting.
11. Copy rectangles files and paste as a new layer.
12. Place this right below.
13. Copy wordarts and paste as a new layer.
14. Place this right below on the rectangles files.
15. Copy the signs ( see point 7) and paste as a new layer.
16. Place this right below at the other 2.
17. Give the same drop shadow as in point 10.
18. Copy the image mickzw and paste as a new layer.
19. Place this on the oval (masque).
20. Effects - Photo-effects - Sepia Toning.
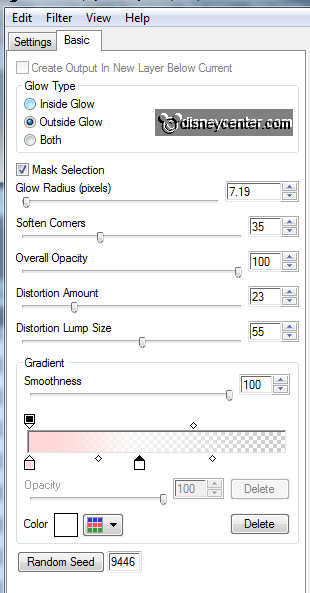
21. Effects - Alien Skin Eye Candy 5 Impact - Gradient Glow with
this setting.
22. Copy kiss me from the template and paste as a new layer.
23. Give the same drop shadow as in point 10.
24. Effects - Alien Skin Eye Candy 5 Impact - Gradient Glow with the
same setting as in point 21.
25. Place this right - just above the signs.

26. Copy the tube minnie and paste as a new layer.
27. Image - mirror - image - resize 125% - resize all layers not
checked.
28. Place this left below. see example.
29. Give the same drop shadow as in point 10.
30. Layers - merge - merge all.
31. Image - Resize 500x500 - resize all layers checked.
32. Put your watermark into the image.
33. Eventual merge all layers.
34. Edit - Copy.
35. Open animation shop - paste as a new animation.
36. Edit - Selection duplicate - Selection duplicate
37. Edit - select all. If it's right you have now 6 frames.
38. Open the Animation hearts.
39. Edit - select all - Edit - Copy
39. Go to the image - Edit - paste in selected frame.
40. Place this in the middle of the red heart.
41. File - save as - give name - click 3 times at next and than at
finish.
Ready is the tag
I hope you like this tutorial.
greetings Emmy,

Tutorial written
03-02-2011
