
This
Tutorial is copyrighted to the Tutorial Writer, © Emmy Kruyswijk 2009.
This Tutorial
may
not be forwarded, shared or otherwise placed on any Web Site or group without written
permission from
Emmy Kruyswijk
Do you want to link my lessons?
Please send
me a mail.
Materials
:
Download
here
5 tubes, The tubes blad, bladeren and eikels
are from Kreative-Expressionz
filters: Dsbflux - Linear Transmission, Alien Skin - Swirl 2.1
Put the filters in
the folder plug-ins.
Chip and Dale
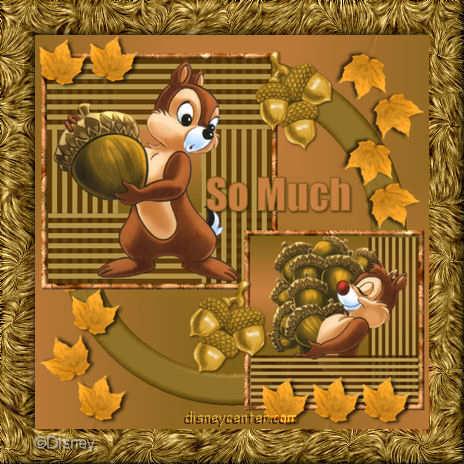
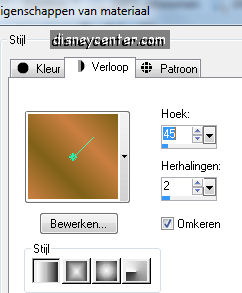
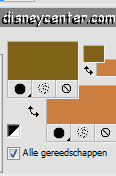
foreground color #7f6118 en backgrounds color #ca7f42
1. Open a new image 400x400
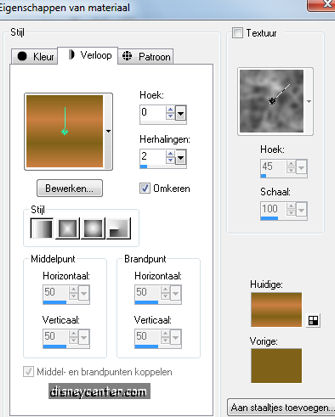
2. Flood fill this with the gradient linear.
3. Go to selection tool - selection - rectangle.
4. Make a rectangle at the right side 120x400
5. New raster layer - flood fill this with the foreground color.
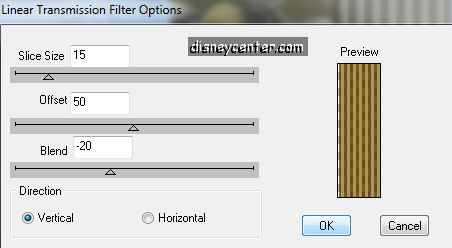
6. Effects - Dsbflux - Linear Transmission with these settings.
7. Selections - select none.
8. Duplicate this layer - Image - free rotate - 90 left.
9. Place this at the bottom.
10. Copy the tube dale and paste as a new layer.
11. Layers - Arrange - Move down 2 times.
12. Put the opacity of the layers 2 and 3 at 25.
13. Go to Eraser tool.

14. Stay at layer 3 and erase a piece of the hand.
15.Stay at raster 2 and erase a piece of the hat. see below
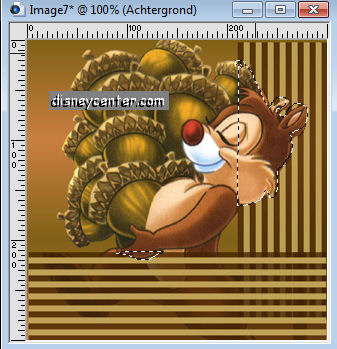
16. Put after this the opacity back at 100 for the layers 2 and 3.
17. Layers - Merge - Merge all Flatten.
18. Image - Resize 75%.
19. Open a new image 400x400
20. Flood fill this with the gradient from point 2.
21. Go to selection tool - selection- rectangle.
22. Make a rectangle at the left side 120x400.
23. New raster layer - flood fill with the foreground color.
24. Effects - Dsbflux - Linear Transmission the same settings as in point 6.
25. Duplicate this layer - Image - free rotate 90 right.
26. Place this at the bottom.
27. Lock the bottom layer and stay at 1 of the other layers.
28. Layers - merge - merge visible.
29. Duplicate this layer - Image - Mirror - Image - Flip.
30. Open the bottom layer.
31. Copy the tube Chip and paste as a new layer.
32. Layers - Merge - Merge all Flatten.
33. Open a new image 700x700.
34. Flood fill with the gradient
35. Duplicate this layer - image - mirror.
36. Put the opacity of this layer at 50.
37. Layers - Merge - Merge all Flatten.
38. Go to your second image ( with the chip tube)
39. Image - Add border 10 background color #ca7f42
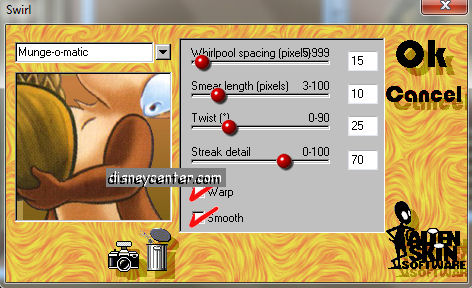
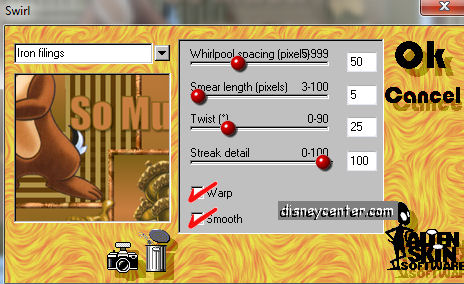
40. Select the border - Effects - Alien Skin - Swirl 2.1 with this setting.
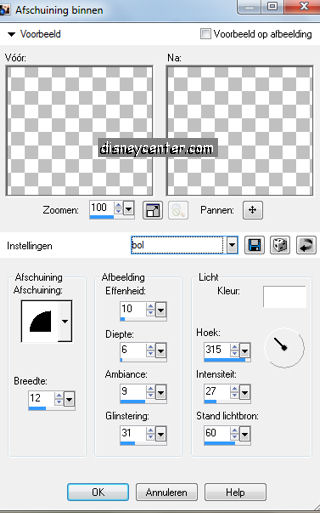
41. Let selection stay - Effects - 3D Effects - Inner Bevel .
42. Selections - select none.
43. Do the same with the other tube (dale). Image - add border 10 color white.
44. Select the border - Effects - Alien Skin - Swirl 2.1 with the same setting
as in point 40.
45. Let selection stay - Effects - 3D Effects - the same Inner Bevel as in point 41.
46. Selections - select none.
47. Go to the image 700x700.
48. Go to selection tool - selection - circle.
49. Make a circle over the whole image. Stay 25 - 30 pixels from the border.
50. New raster layer - flood fill with the foreground color.
51. Go to selection tool - selection - circle.
52. And make another circle. Space between the other circle 50 pixels.
53. Click now at the delete key of your keyboard.
54. Selections - select none.
55. Effects - 3D Effects - Inner Bevel same as in point 41.
56. Copy the tube bladeren and paste as a new layer.
57. Place this at the left side at the circle. (The last leave at the bottom)
59. Duplicate this layer - Image - mirror - image - flip.
60. Copy now the image 400x400 (with the chip tube) and paste as a new layer.
61. Place this left at the top. Ca. 20 pixels of the top.
62. Copy the image 300x300 (with the dale tube) and paste as a new layer.
63. Place this right at the bottom. Also ca. 20 pixels of the bottom.
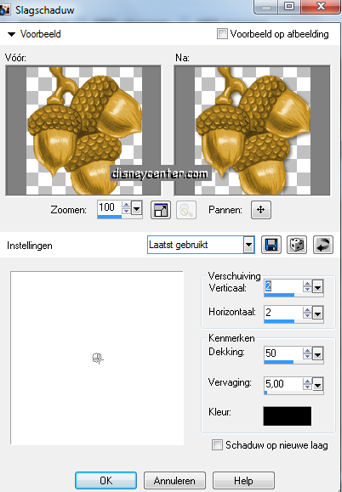
64. Copy the tube eikels and paste as a new layer.
64a.Effects - 3D Effects - drop shadow.
65. Place this right at the top of the 400x400 image.
66. Duplicate this layer and place this at the bottom of the image. See image.
67. Copy the tube blad and paste as a new layer.
68. Place this right at the bottom.
69. Duplicate this layer 4 times more.
70. Place 2 near the other ones at the bottom.
71. And place there 2 left at the top.
72. Go to text tool - font Impact, size 175 points (no pixels) - and write So
Much

73. Give the same drop shadow as in point 64a.
74. Layers - merge - merge all flatten.
75. Image - resize 75% and one more time 75%.
76. Put your watermark into the image.
77. Image - Add border 35 color white.
78. Select the border - flood fill this with the foreground color.
79. Let selection stay. Effects - Alien Skin - Swirl 2.1.
80. Effects - 3D Effects - Inner Bevel same as in point 41.
81. Selections - select none.
82. Save the image as jpg.
Ready is the tag
I hope you like this tutorial.
greetings Emmy,

Tutorial written
01-09-2009
