Open your tubes, wordart and doodle in PSP.
Lady
en de Gentleman
foreground color #50b5cc and background color black.
1.
Open new transparent image 700x500.
fill this with color #adcfd5.
Effects - Filter Unlimited 2.0 - Paper Texture - Papyrus - click OK.
2.
Go to preset shape tool - look cgerdaR - and pull it in the corner about 300x300.
Place this left at the bottom.
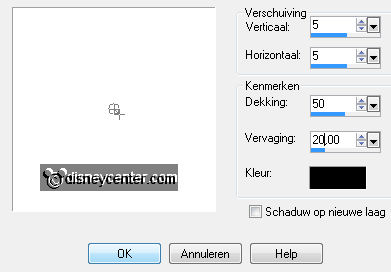
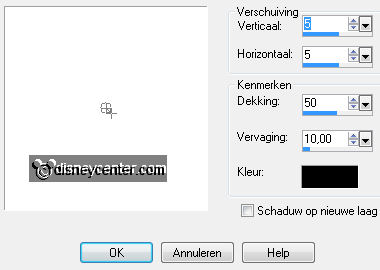
Effects - 3D Effects - drop shadow with this setting.
Duplicate this layer - Image - mirror - image - flip.
3.
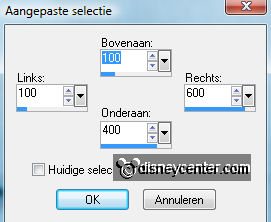
Go to selection tool - selection - custom selection with this setting.
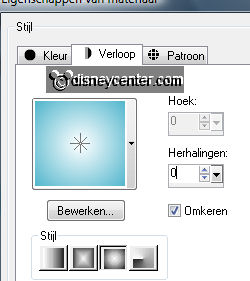
New raster layer - set your background at white - and make a gradient sunburst.
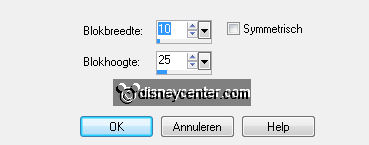
Effects - Distortion effects - Pixelate - with this setting.
Selections - select none.
Effects - Edge Effects - enhance more.
Effects - FM Tile Tools - Blend Emboss - default setting.
4.
Layers - arrange - move down - and one more time.
Place now the preset shape exactly at the border - see below.
5.
Copy micminmisted and paste as a new layer.
Place this at the rectangle.
Duplicate this layer - set the blend mode at darker.
Layers - merge - merge down.
6.
Copy yezdoodles52 and paste as a new layer.
Image - resize 75% - all layers not checked.
Image - free rotate - right 90 - 1 more time right 45.
Give the same drop shadow as in point 2.
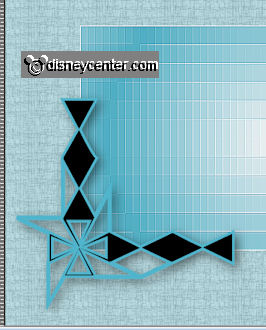
Place this in the left upper corner. see exampled.
7.
Duplicate this layer - image - mirror - image - flip.
Set both layers at the preset shape layers.
8.
Open wordartmicmin and copy Minnie and paste as a new layer.
Place this at the top next to the doodle.
Effects - 3D Effects - drop shadow with this setting.
9.
Copy wordart Mickey and paste as a new layer.
Place this at the bottom next to the doodle..
Give the same drop shadow as in point 8.
10.
Image - add border 1 - black.
Image - add border - symmetric not checked - 50 left and right -
top and bottom 0 - foreground color.
Select the border - fill this with the gradient from point 3.
11.
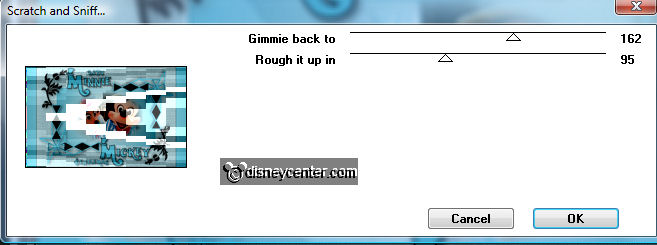
Effects - Two Moon - Scratch and Snif... - with this setting.
Effects - Distortion Effects - Pixelate - with the same setting as in point 3.
Effects - Edge Effects - more enhance,
Effects - FM Tile Tools - Blend Emboss - default setting.
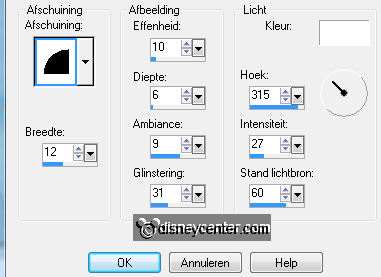
Effects - 3D Effects - Inner Bevel - with this setting.
12.
Image - add border - symmetric not checked - 0 left and right - top and
bottom 50 - foreground color.
Select the border - fill this with the gradient from point 3.
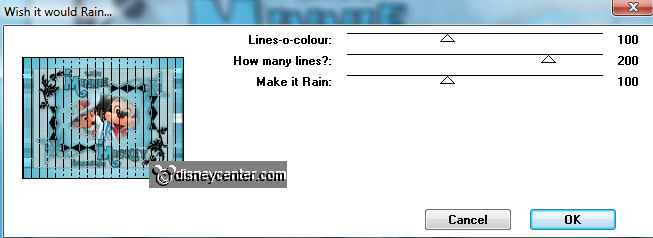
Effects - Two Moon - Wish it would rain - with this setting.
Effects - FM Tile Tools - Blend Emboss - default setting.
Effects - 3D Effects - Inner Bevel - with the same setting as in point 11.
13.
Image - add border - symmetric checked - 1 black.
New raster layer - put your watermark into the image.
Image - resize 75% - all layers checked.
14.
You can now save your image, or you can make an animation.
Edit - copy - Open Animation Shop.
Paste as a new animation - Edit - duplicate selection.
Edit - select all
15.
Open the glitter - edit - select all.
Copy - paste in the selected frame.
Look how much and where you want to paste.
Each paste into selected frame.
16.
File - save as - give name - click 3 times at next and than at finish.
Ready is the tag
I hope you like this tutorial.
greetings Emmy

Tutorial written
21-07-2011