Foreground color black and background color #9977a0
1.
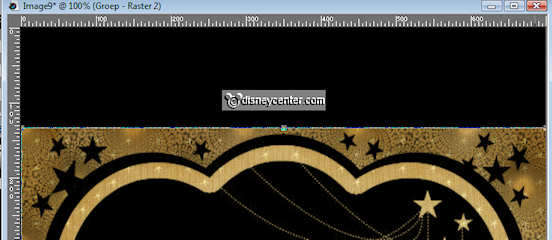
Open new transparent image 700x700.
Fill this with the foreground color.
New raster layers - selections - select all.
Copy GGS Paper3 - paste into selection.
Selections - select none.
2.
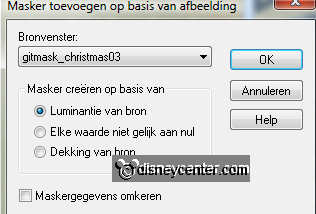
Layers - new mask layer - from image - with this setting.
Layers - merge - merge group.
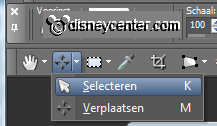
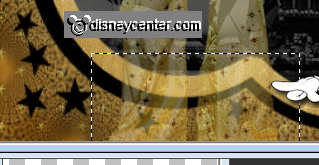
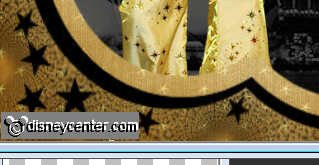
Go to selection tool - select- see below.
Get him with the arrow about 125 pixels down, see below.
Go back to Move Tool
3.
Copy from the scrapkit GGS_Beads and paste as a new layer on the
image.
Image - free rotate - left 90.
Place this on the edge of black and mask.
4.
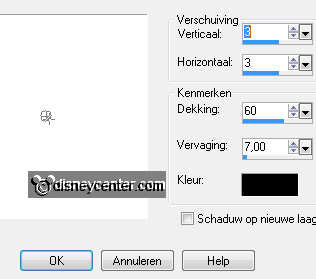
Effects - 3D Effects - drop shadow - with this setting
Open GGS_Banner and select the part Happy New Year.

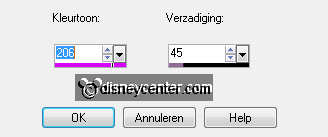
Adjust - Hue and Saturation - colorize - with this setting
You don't need to do this.
5.
Copy this and paste as a new layer on the image.
Place this in the black part.
Image - resize 75% - all layers not checked.
6.
Make the mask layer active
Click with the magic wand in the middle of the mask - this is what
you get.
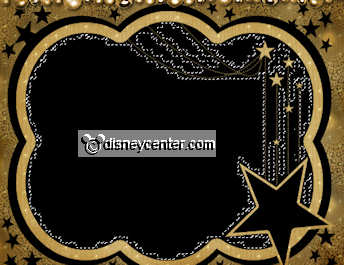
Selections - modify - expand 20.
Copy Fireworks1 and paste as a new layer on the image.
Pull it down something-so it on the mask.
Selections - invert - click at the delete key.
Selections - select none.
Effects - Edge effects - enhance.
7.
Layers - arrange- move down.
Erase carefully the image away from the star.
Make raster 4 active.
Set the Blend mode of this layer at Luminance (Legacy) and the
opacity at
35.
8.
Copy goofyfeest and paste as a new layer on the image.
Effects - Image effects - offset - with this setting
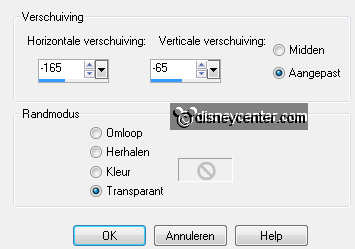
Duplicate this layer and put the copy layer under group raster 2.
9.
Lock copy layer and make raster 5 active.
Set the opacity of this layer for now at 50.
Erase now the lower part on the edge of the mask - see below.
Open the copy layer and erase there the same part.
Set the opacity back from raster 5 at 100.
So it must look like, if it is good.
10.
Open from the scrapkit GGS_tree - image - resize 50% - all
layers checked.
Copy this and paste as a new layer on the image.
Place this just near Goofy - see example.
Give the same drop shadow as in point 4.
11.
Duplicate this layer - image - resize 75% - all layers checked.
Place this near the other.
Open from the scrapkit GGS_Wine Glass - image - resize 2 times 50% -
all layers checked.
Adjust - sharpness - sharpen.
12.
Copy this and paste as a new layer on the image.
Effects - Image effects - offset - with this setting
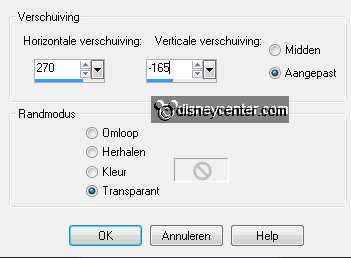
Give the same drop shadow as in point 4.
Duplicate this layer - and place this left from the glass - a little
down.
13.
Open from the scrapkit GGS_Champagne Bottle - image - resize 50%
and 1 time 75% - all layers checked.
Copy this and paste as a new layer on the image.
Effects - Image effects - offset - with this setting

Give the same drop shadow as in point 4.
14.
Open from the scrapkit GGS_Star Wand - image - resize 85% - all
layers checked.
Copy this and paste as a new layer on the image.
Place this at the left side.
Give the same drop shadow as in point 4.
Duplicate this layer.
15.
Open from the scrapkit GGS_Sparkly Edge Bow - image - resize 50% -
all layers checked.
Adjust - Hue and Saturation - colorize - setting stays right.
Copy this and paste as a new layer on the image.
16.
Place it right on top of the mask-see example.
Give the same drop shadow as in point 4.
Image - free rotate - right 10.
17.
New raster layer - set your watermark into the image.
Image - add border - 2 pixel - color black.
Image - resize 75% - all layers checked.
18.
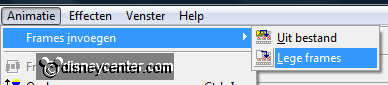
Edit - copy - Open animation shop.
Paste as a new animation.
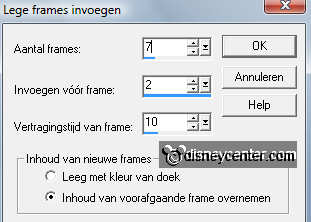
Animation - Insert frame - Empty - with this setting
19.
Open animation Emmyvlammen - Edit - select all.
Copy - paste into selected frame.
Place this on the christmas candle.
20.
Open animation bubbles - Edit - select all.
Copy - paste into selected frame.
Place this in the first glass.
Paste into selected frame - place this in the second glass.
File - save as - give name - click 3 times at next and than at
finish.