Set the foreground color at #a32101 and the background color at
#e5c0b7
Open new transparent image 700x700.
Fill this with the background color.
Copy heartframe and paste as a new layer on the image.
Image - resize 85% - all layers not checked.
2.
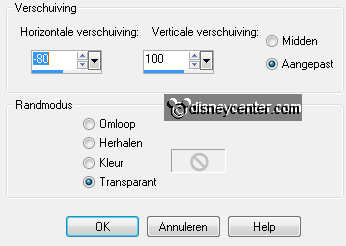
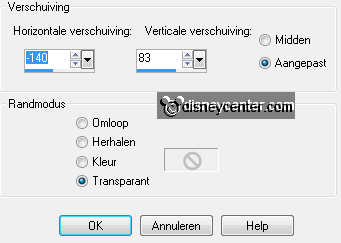
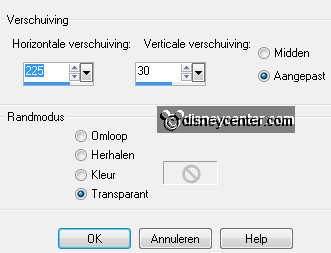
Effects - Image Effects - Offset - with this setting.
Duplicate this layer.
Image - resize 75% - all layers not checked
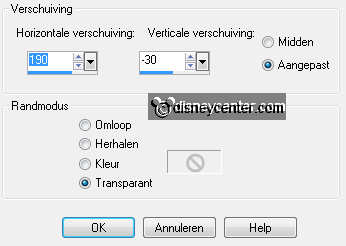
Effects - Image Effects - Offset - with this setting.
Make raster 2 active.
Go to eraser tool - size 16 - and erase this part below of the heart-
see below.


Make the top layer active.
Layers - merge - merge down.
3.
Go to the magic wand - with this setting.

Select inside the 2 hearts - Selections - modify - expand
2.
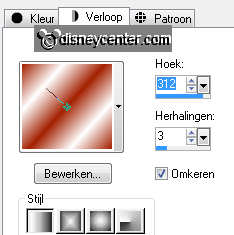
Set the foreground at white and the background at #a32101
New raster layer - fill this with the gradient linear - with this
setting.
Selections - select none.
Layers - arrange - move down.
4.
Make the top layer active.
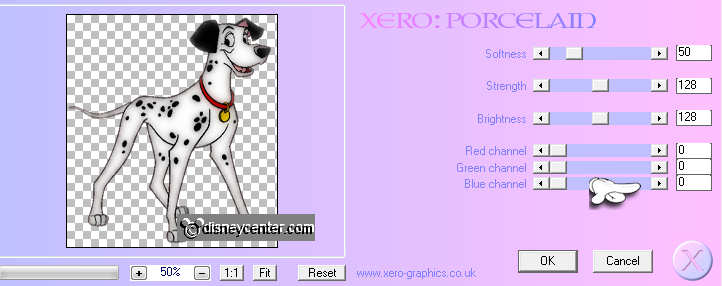
Copy 101 Dalmatiers16 and paste as a new layer on the image.
Effects - plug-ins - Xero - Porcelain - with this setting.
Effects - Image Effects - Offset - with this setting.
Go to eraser tool - size 16 - and erase the part under the heart. Be
careful by the border.
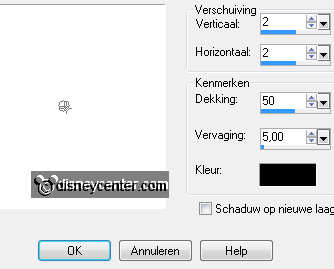
Effects - 3D Effects - drop shadow - with this setting.
5.
Copy 101 Dalmatiers17 and paste as a new layer on the image.
Effects - Xero - Porcelain - same setting as in point 4.
Effects - Image Effects - Offset - with this setting.
Go to eraser tool - size 16 - and erase the part under the heart.
Give the same drop shadow as in point 4.
Make raster 2 active - give the same drop shadow as in point 4.
6.
Make 101 Dalmatiers169 active.
Select with the magic wand the red heart - fill this with the
background color #a32101 (stays good)
Selections - select none.
Make the top layer active.
Copy this and paste as a new layer on the image.
Move the tube a little down - see example.
Give the same drop shadow as in point 4.
7.
Open from the scrapkit DBV Romancing element6 - image -
resize 50% - all layers checked.
Copy this and paste as a new layer on the image.
Image - free rotate - left 35 - place this right under the bottom of
the frame - see example.
Give the same drop shadow as in point 4.
Duplicate this layer - image - mirror.
Paste (stays in memory) - image - resize 85% - all layers not
checked.
Place this in the middle of the leaves.
Give the same drop shadow as in point 4.
Layers - merge - merge down - 1 more time.
8.
Open from the scrapkit DBV Romancing element8 - image -
resize 50% - 1 time 75% - all layers checked.
Copy this and paste as a new layer on the image.
Place this at the leaves in the middle.
Give the same drop shadow as in point 4
Layers - merge - merge down.
Duplicate this layer - image - mirror.
Place this a little to the right, so that he stays at the red heart.
9.
Open from the scrapkit DBV Romancing element7 - image -
resize 50% - 1 time 75% - all layers checked.
Copy this and paste as a new layer on the image.
Place this at the left side below the leaves.
Give the same drop shadow as in point 4.
Layers- arrange - move down.
Make the top layer active.
10.
Open from the scrapkit DBV Romancing element5 - image -
resize 50% - all layers not checked.
Copy this and paste as a new layer on the image.
Place this to the left side below the flower.
Give the same drop shadow as in point 4.
11.
Copy word-art real love stories and paste as a new layer on the
image.
Place this on the red heart - see example.
Layers - arrange - move down.
New raster layer - set name or watermark into the image.
Layers - merge - merge all.
12.
Selections - select all.
New raster layer - fill this with the color #a32101.(background)
Selections - modify - contract 5 - click at the delete key.
Effects - 3D Effects - cutout- with this setting.
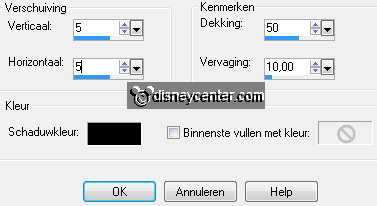
New raster layer - repeat cutout - now with vert. and horz. -5
Selections - select none.
Layers - merge - merge all.
Image - select 85% - all layers checked.
File - export - JPEG optimizer.