|

This
Tutorial is copyrighted to the Tutorial Writer, © Emmy Kruyswijk 2011.
This Tutorial
may
not be forwarded, shared or otherwise placed on any Web Site or group without written
permission from
Emmy Kruyswijk
Do you want to link my lessons?
Please send
me a mail.
Materials:
download here
1
Disney tube, scrapkit van
Meodorlady
filter: MuRa's Meister - Copies.
Download
here
Before you begins.......
Filters : Install first your plug-ins before you open PSP and put
them in the folder plug-ins.
Open your tubes in PSP
Open the scrapkit in PSP
Loving you Always

Foreground color #fdd6dc and background color #b90a25.
1. Open new image 700x700.
2. Fill this with the foreground color.
3. Copy the tube Valentijn 7 and paste as a new layer.
4. Adjust - Blur - Gaussian blur - Radius 25.00.
5. Effects - Texture effects - Mosaic Glass with default setting.
6. Copy the tube Valentijn 7 again and paste as a new layer..
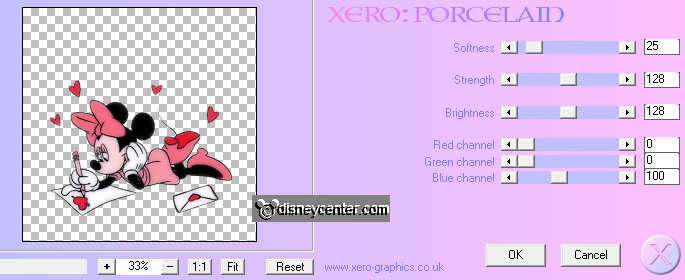
7. Effects - Xero - Porcelain with this setting.
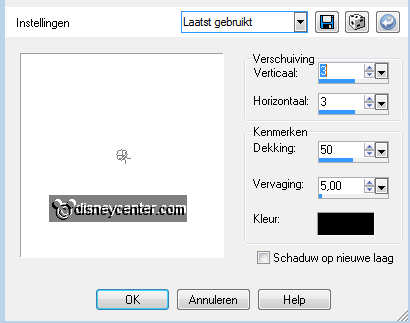
8. Effects - 3D Effects - drop shadow with this setting.
9. Image - Resize 85% - Resize all layers not checked.
10. Place this in the middle below. Bottom of the tube about
60 pix. from the bottom.
11. Copy the tube 3hearts and paste as a new layer.
12. Select the white border - new raster layer - fill this with the
background color.
13. Selections - select none.
14. Selections - select all - selections - expand 3.
15. New raster layer - fill this with the color white.
16. Lock all layers, except the top 3 layers.
17. Stay at 1 of the other layers - Layers - merge - merge all
visible layers.
18. Place this in the middle of the top. Top of the tube about 80
pix. from the top.
19. Unlock the other layers.
20. Select the first heart (left)
21. Copy image mickey1 and paste as a new layer.
22. Place this on the selected heart, so the had is into the heart.
23. Selections - Invert - click at the delete key of your keyboard.
24. Selections - select none.
25. Repeat the steps 19 through 23, but than with the middle heart
en image mickey2.
26. Repeat the steps 19 through 23, but than with the last heart
(right) and image mickey3.
27. Set the opacity of the 3 layers to 50.
28. Copy the tube Be Mine Always 2 and paste as a new layer.
29. Place this in the left upper corner.
30. Give the same drop shadow as in point 7.
31. Duplicate this layer - image - mirror.
32. Duplicate this layer - image - flip.
33. Image - Resize 50% - Resize all layers not checked.
34. Duplicate this layer - image - mirror.
35. Copy the text and paste as a new layer.
36. Place this in the middle at the bottom.
37. Give the same drop shadow as in point 7.
38. Put your watermark into the image.
39. Layers - merge - merge all layers.
40. Image - Resize 65% - Resize all layers checked.
41. Image - add border 1 - background color.
42. Image - add border 35 - foreground color.
43. Copy the tube Be Mine Always 4 and paste as a new layer.
44. Place this in the middle on the border below.
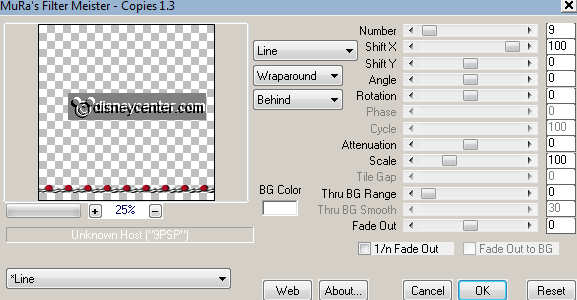
45. Effects - MuRa's Meister - Copies with this setting.
46. Duplicate this layer - image - flip.
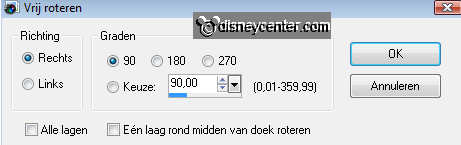
47. Duplicate this layer - Image - free rotate.
48. Duplicate this layer - image - mirror.
49. Image - add border 1 - background color.
50. Selections - select all - selections - modify - contract 36.
51. Effects - 3D Effects - drop shadow with this setting.
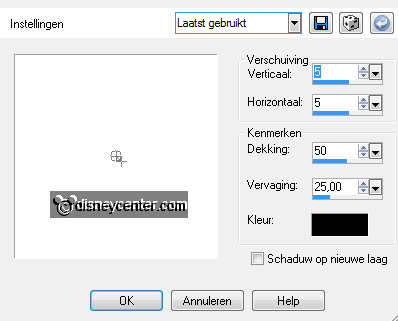
52. Repeat the drop shadow, but now horz. and vert. on -5.
53. File - export - jpeg - optimizer.
Ready is the tag
I hope you like this tutorial.
greetings Emmy,

Tutorial written 11-06-2009
| 