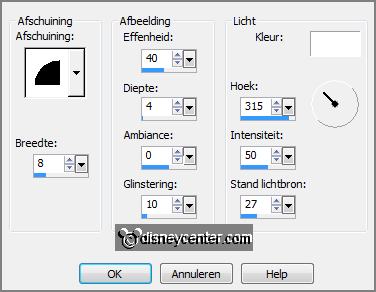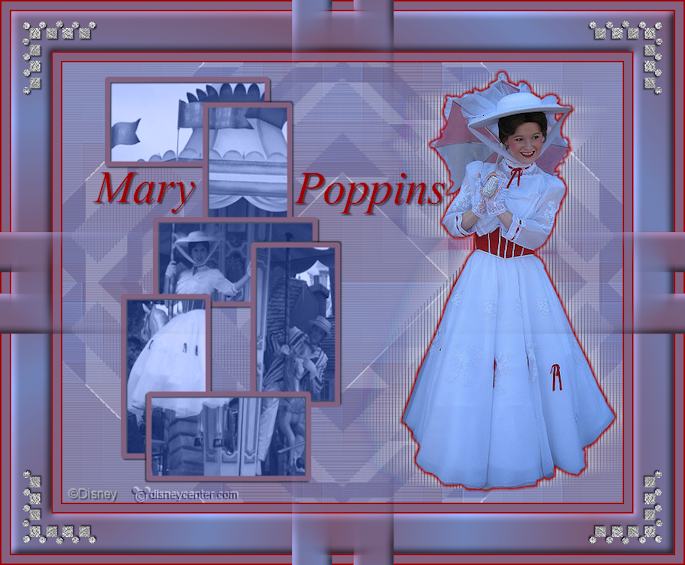
1.
File - open new transparent image
700x550.
File - open new transparent image
#836281 and the background color on
#7b8ec8.
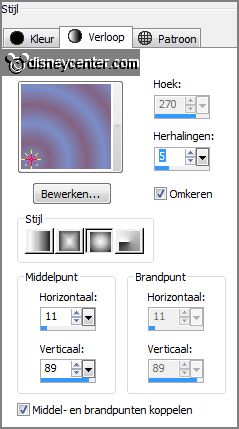
Make from the foreground a gradient sunburst - with this setting.
2.
Activate flood fill tool -
fill the layer with the gradient.
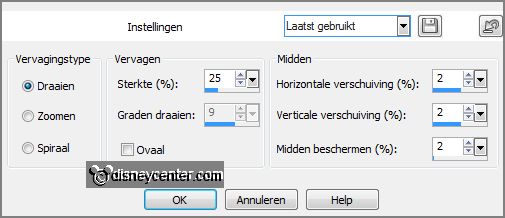
Adjust - blur - Radial blur - with this setting.
Layers - duplicate.
3.
Image - mirror.
Set the opacity of this layer in the layer palette to 50.
Layers - merge - merge down.
4.
Effects - plug-ins - Mehdi - Sorting Tiles -
with this setting -
click
OK.
Effects - Edge effects - enhance.
Effects - Image effects - seamless tiling -
with this setting.
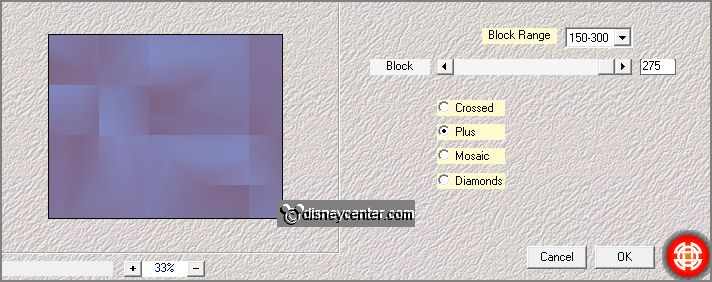
Effects - Distortion Effects - Pixelate -
with this setting.

Effects - Edge effects - enhance more.
5.
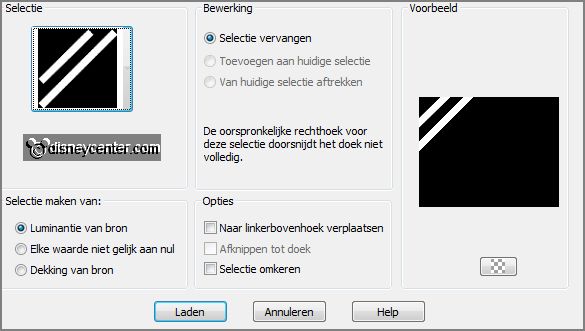
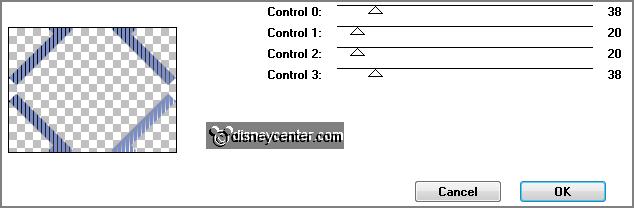
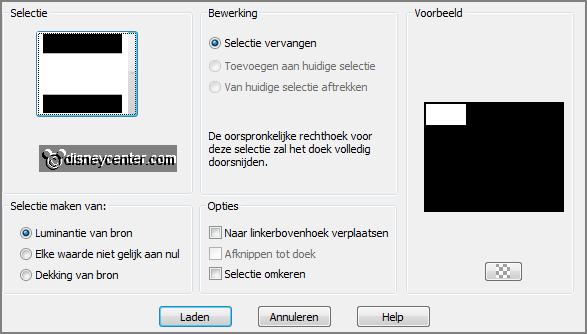
Selections - load/save selection - load selection from disk - look Emmymary -
with this setting.
Layers - new raster layer.
Fill the selection with the background color.
6.
Layers - duplicate.
Image - mirror.
Layers - merge - merge
down.
7.
Layers - duplicate.
Image - flip.
Layers - merge - merge
down.
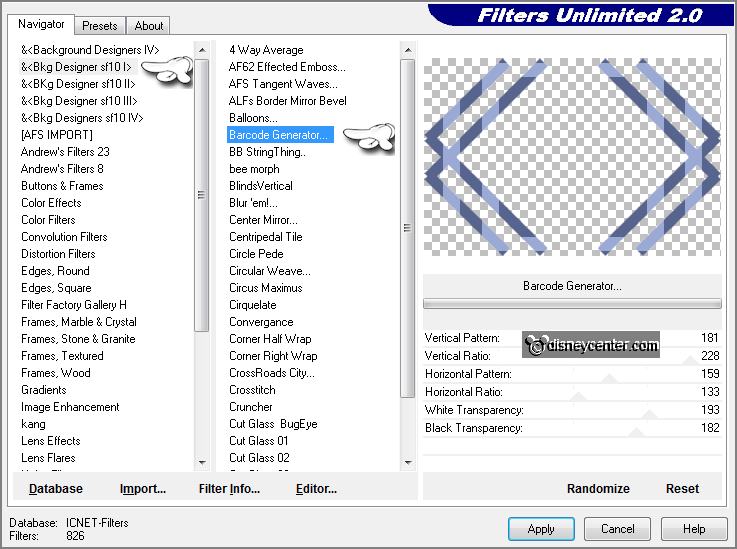
Effects - plug-ins
- I.C.NET Software - Filters Unlimited 2.0 - &<Bkg Designer sf10 I - Barcode
Generator -
with this setting -
click Apply.
8.
Lock the bottom layer for now.
Activate the magic wand - with setting below - and select as below (between the 2 lines).
Selections - modify - expand 2pixels.
9.
Layers - new raster layer.
Fill the selection with the background color.
Effects - plug-ins
- Tramages - Tow the Line -
with this setting -
click
OK.
Selections - select none.
Open the bottom layer again.
Layers - arrange - move down.
10.
Activate the top layer.
Layers - merge - merge
down.
Set the opacity of this
layer in the layer palette to 50.
Effects - plug-ins - Simple - Half Wrap -
click OK.
Effects - plug-ins - Pizza Slice Mirror -
click OK.
Effects - plug-ins - Top Left Mirror -
click OK.
11.
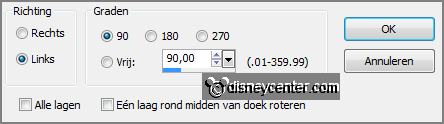
Layers - duplicate.
Image - free rotate -
with this setting.
Layers - merge - merge
down.
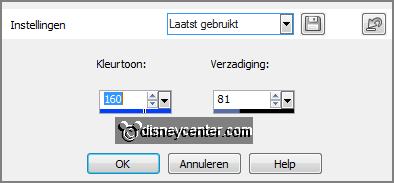
Adjust - Hue and Saturation - colorize -
with this setting.
Set the opacity of this
layer in the layer palette to 50.
12.
Selections - load/save
selection - load selection from disk - look
Emmymary1 -
with this setting.
Layers - new raster layer.
Fill the selection with
the background color.
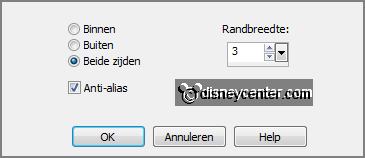
Selections - modify - select selected borders -
with this setting.
13.
Set in the material palette the foreground back to color.
Fill the selection with
the foreground color.
Effects - 3D Effects - drop shadow -
with this setting.

Selections - select none.
Layers - merge - merge
down.
14.
Layers - duplicate.
Image - free rotate -
with this setting.
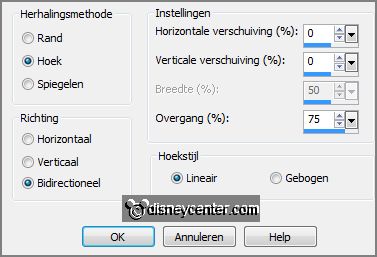
Effects - Image effects - offset -
with this setting.
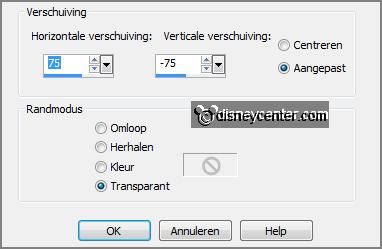
Layers - merge - merge
down.
15.
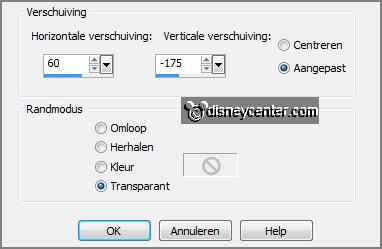
Layers - duplicate.
Effects - Image effects - offset -
with this setting.
16.
Layers - duplicate.
Image - flip.
Image - free rotate -
with this setting.
Effects - Image effects - offset -
with this setting.
Layers - merge - merge
down - and 1 more time.
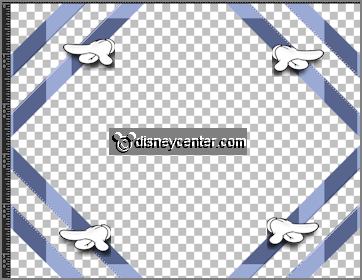
17.
Select with the magic wand - setting is right - the blue squares.
Layers - new raster layer.
Activate the image maryandbert - edit - copy.
Edit - paste into selection.
Selections - select none.
Set the blend mode op Luminance (Legacy) and set
the opacity of this layer in the layer palette to.
Layers - merge - merge
down.
Effects - Image effects - offset -
with this setting.
18.
Activate the tube marypoppins1 -
edit - copy.
Edit - paste as a new layer on the image.
Activate move tool - place this right.
Layers - duplicate.
19.
Activate raster 4.
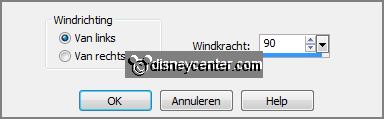
Effects - Distortion Effects
- Wind -
with this setting.
Effects - Distortion Effects - Wind -
with this setting.
Effects - plug-ins - Tramages - Tow the Lines -
setting is right -
click OK.
Activate the top layer.
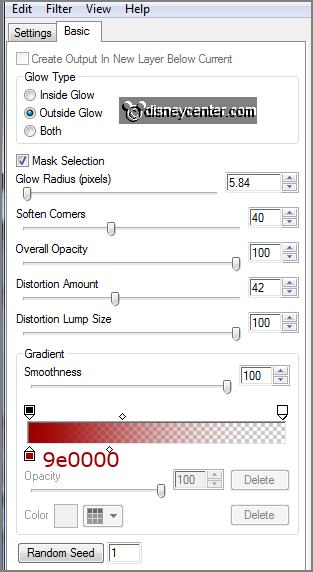
Effects - plug-ins
- Alien Skin Eye Candy 5 Impact - Gradient Glow -
with this setting - click
OK.
20.
Set in the material palette the background color on #9e0000.
Activate text tool - font Vijaya - size 72 - background color and lock the
foreground color.
Write Mary - convert to raster layer.
Place this left - see example.
Write - Poppins - convert to raster layer.
Place this in the middle - see example.
Layers - merge - merge
all.
Effects - 3D Effects - drop shadow - setting is right.
21.
Image - add borders - symmetric - 2 pixels background color (
#9e0000).
Image - add borders -
symmetric - 10 pixels background color
(#836281).
Image - add borders -
symmetric - 2 pixels background color (
#9e0000).
Image - add borders -
symmetric - 50 pixels foreground color
(
#7b8ec8).
Image - add borders -
symmetric - 2 pixels background color
(
#9e0000).
Image - add borders -
symmetric - 10 pixels background color
(#836281).
Image - add borders -
symmetric - 2 pixels background color
(
#9e0000).