|

This
Tutorial is copyrighted to the Tutorial Writer, © Emmy Kruyswijk
15-08-2013.
This Tutorial may not be forwarded, shared or otherwise placed on any Web Site
or group without written
permission from
Emmy Kruyswijk.
Many of the material are made by me.
Please respect my work and don't change the file names.
At all Disney creations must be copyrighted.
Do you want to link my lessons?
Please send
me a mail.
Needing:
1
tube, 1 image, 1 mask, 1
word-art and 1 gradient all made by me.
Plug-ins: Mehdi - Sorting Tiles, Simple - Pizza
Slice Mirror, Simple - Simple - Top Left Mirror, Tramages - Tow the Line, AAA
Frames - Foto Frame,
download here
Before you begins.......
Open the tube, the image and the word-art in PSP.
Set the mask in the
folder masks, the gradient in the folder gradients and the plug-ins in the
folder plug-ins.
Material

Mexico
1.
File - open new transparent image
700x550.
File - open new transparent image
#a00100
and the background color on
#008000.
Make from the foreground a gradient
linear - Emmymexico - with this setting.
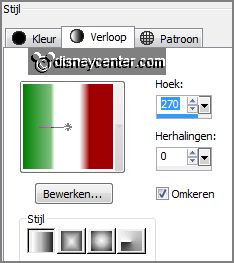
2.
Activate flood fill tool - fill the layer with the gradient.
Effects - Image effects - seamless tiling -
with this setting.
Adjust - blur - Gaussian blur - radius 17.
3.
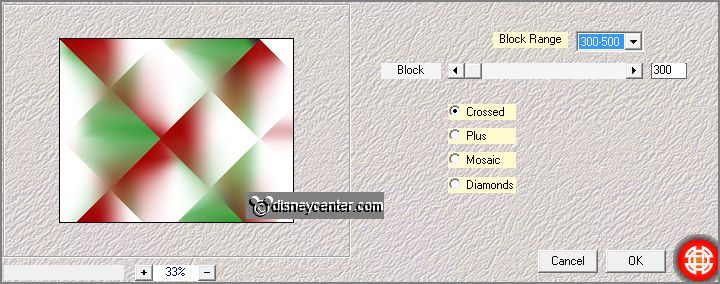
Effects - plug-ins - Mehdi - Sorting Tiles -
with this setting - click
OK.
Effects - plug-ins
- Simple - Pizza Slice Mirror - click OK.
Effects - plug-ins
- Simple - Simple - Top Left Mirror - click OK.
Effects - Art Media Effects - Brush Strokes -
with this setting.
4.
Layers - duplicate.
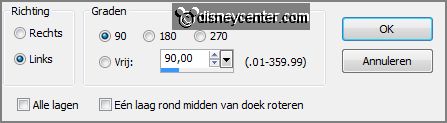
Image - free rotate -
with this setting.
Set the opacity of this layer to 50.
Layers - merge - merge down.
Effects - Image effects -
seamless tiling
- setting is right.
Layers - merge - merge all.
5.
Set in the material palette the background back to color.
Layers - new raster layer.
Fill the layer with the background color.
6.
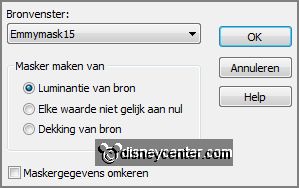
Layers - new mask layer - from image - look Emmymexico -
with this setting.
Layers - merge - merge group.
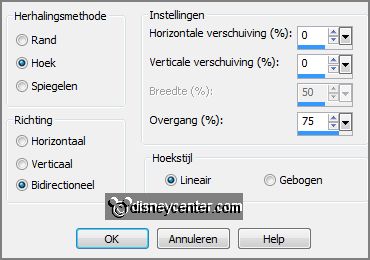
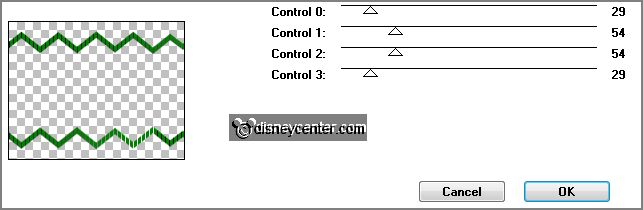
Effects - plug-ins - Tramages - Tow the Line -
with this setting
- click
OK.
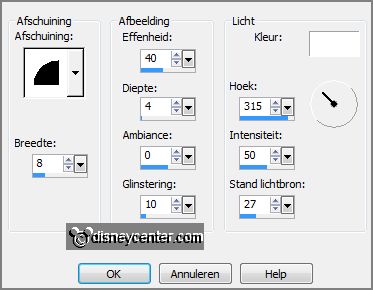
Effects - 3D Effects - Inner Bevel -
with this setting.
7.
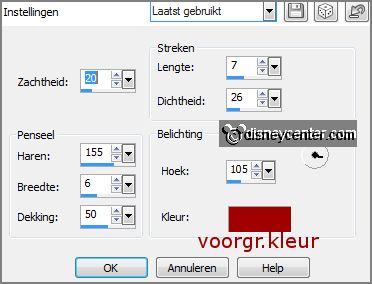
Activate pen tool - with setting below.


Turn
the colors in the material palette.
Lock the bottom layer - so you can better see the line that you make.
Make a line - as below.
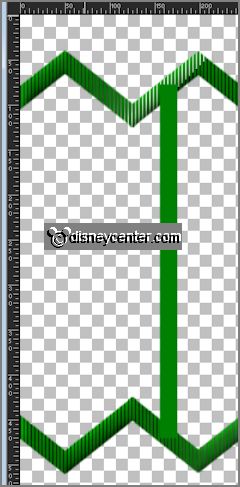
Convert
to raster layer.
8.
Effects - plug-ins - Tramages - Tow the Line - setting is right -
click OK.
Effects - 3D Effects - Inner Bevel -
setting is right.
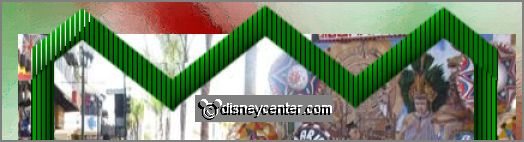
Layers - arrange - move down.
9.
Layers - duplicate.
Image - mirror.
Layers - merge - merge down.
Activate the top layer.
Layers - merge - merge down.
10.
Activate selection tool - rectangle - and make a selection - as below - click at
the delete key.
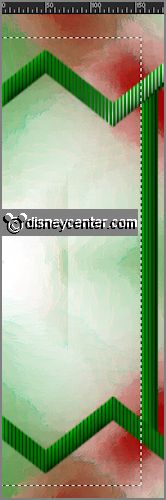
Move the selection to the other side - by pressing
and holding the mouse right
- click at the delete key.
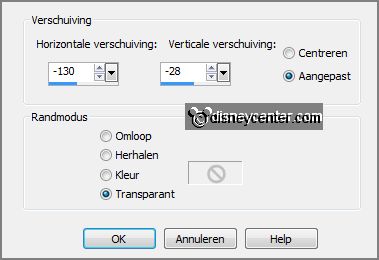
Effects - Image effects - offset -
with this setting.
11.
Activate the bottom layer.
Activate the image tijuana - edit - copy.
Edit - paste as a new layer on the image.
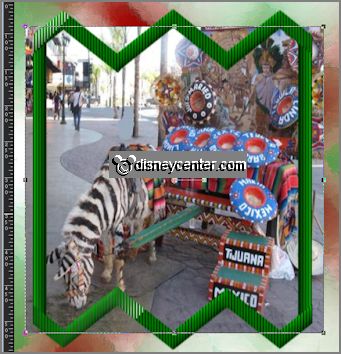
Activate move tool - place the image in the frame - set the bottom right.
Activate pick tool - and pull the image up - till it stays right.
12.
Set pick tool back to move tool.
Activate eraser tool - size 15 - erase the part away what comes outside the
frame.
Do this also at the bottom of the frame.
13.
Activate the top layer.
Layers - merge - merge down.
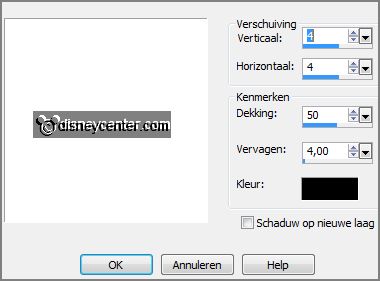
Effects - 3D Effects - drop shadow -
with this setting.
14.
Image - add border 2 pixels - symmetric - foreground color.
Image - add border 2 pixels -
symmetric - color white.
Image - add border 2 pixels -
symmetric - background color.
15.
Image - add border 50 pixels -
symmetric - color white.
Activate the magic wand - with setting below - and select the white border.
Set in the material palette the background back to gradient Emmymexico.
Fill the border with the gradient linear -
setting is right.
Selections - select none.
16.
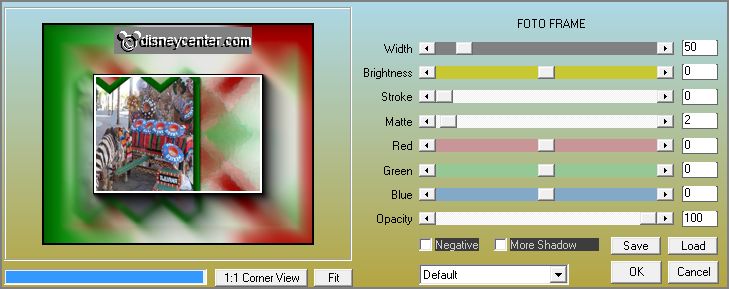
Effects - plug-ins - AAA Frames - Foto Frame -
with this setting.
Selections - select all.
Selections - modify - contract 50 pixels.
Selections - invert.
Effects - plug-ins - Tramages - Tow the Line -
setting is right -
click
OK.
Selections - select none.
17.
Image - add border 2 pixels -
symmetric - foreground color.
Image - add border 2 pixels - symmetric - color white.
Image - add border 2 pixels - symmetric - background color.
18.
Activate the tube mexicanmickey -
edit - copy.
Edit - paste as a new layer on the image.
Move this to the right side - see example.
19.
Layers - duplicate.
Make the original layer active.
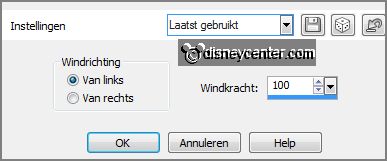
Effects - Distortion effects - wind -
with this setting.
Effects - plug-ins - Tramages - Tow the Line -
setting is right -
click
OK.
20.
Activate the top layer.
Effects - 3D Effects - drop shadow -
setting is right.
21.
Activate word-art Emexico -
edit - copy.
Edit - paste as a new layer on the image.
Place this above the frame - see example.
Effects - 3D Effects - drop shadow -
setting is right.
22.
Layers - new raster layer - put your watermark into the image.
Layers - merge - merge all.
23.
Image - resize 85% - all layers checked.
File - export - JPEG Optimizer.
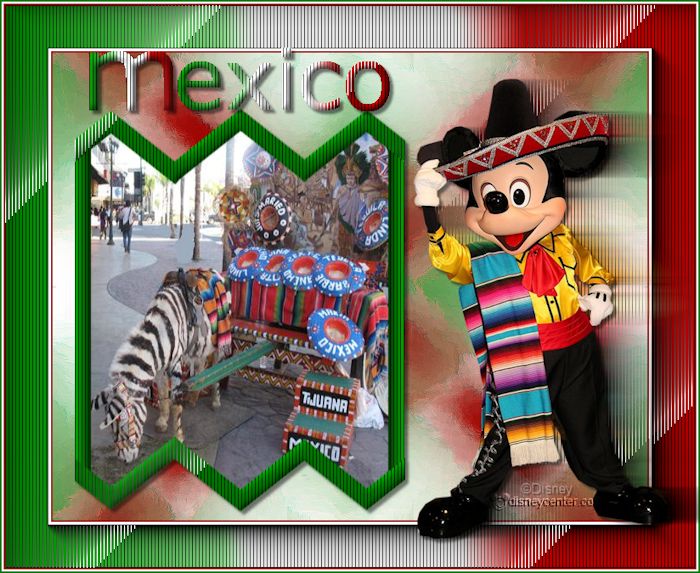
Ready is the tag
I hope you like this tutorial.
greetings Emmy
Tested by Nelly

tutorial written
15-08-2013
| 