1. Open a new image 600x600
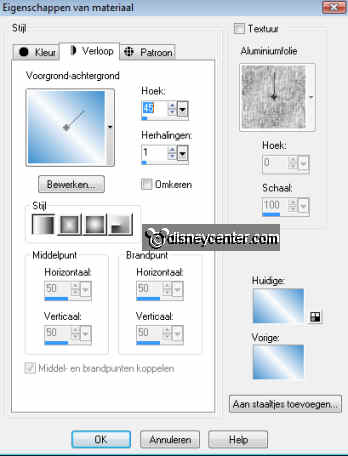
2. Make a gradient of the 2 colors
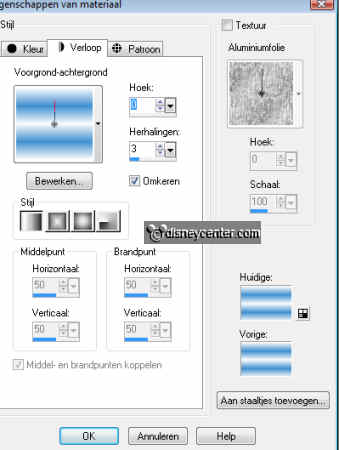
3. Flood fill the image with this gradient,
4. Duplicate this layer
5. Image......Mirror.....Opacity 50.
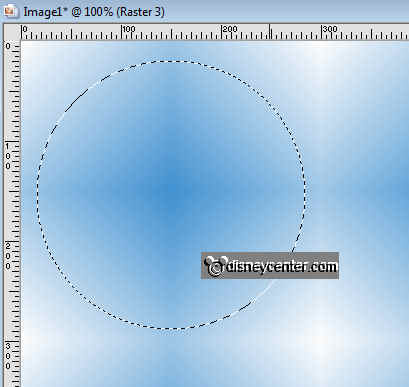
6. Go to selection tool...circle.....an place this in the left
upstairs corner .(see below)
7. New raster layer
8. Flood fill this with the dark color.
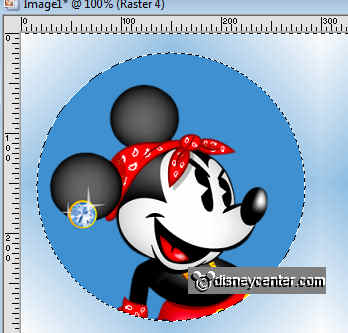
9. Copy your tube and past as a new layer.
10. Put it in the circle, see below.
11. Go to selections....Invert... and click on the delete key on
your keyboard.
12. Selections....select none.
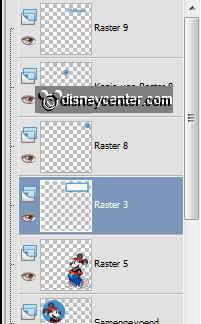
13. Lock the2 lower layers
14. Stay at raster 3 of 4 ....go to layers.....merge....merge
visible layers.
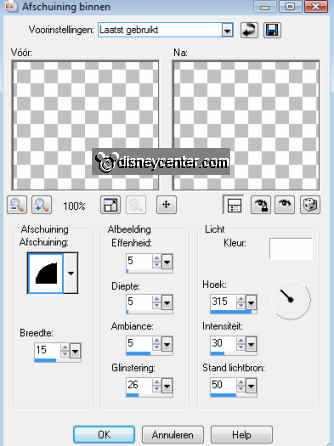
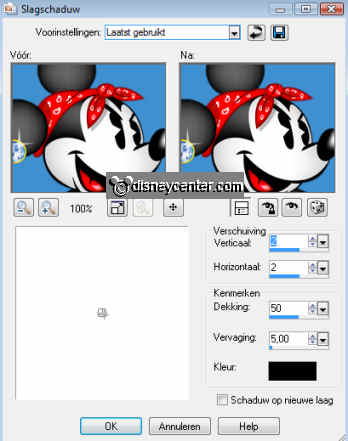
15. Effects....3D effects.....drop shadow,
16. Unlock the 2 lower layers.
17. Copy the tube and paste as a new layer.
18. Image.....Mirror... and place this right below.
19. Effects....3D effects...drop shadow as in point 15
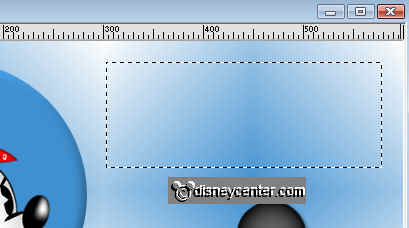
20. Go to selection tool...rectangle.....and place this right above
(see below)
21. New raster layer... flood fill with the dark color
22. Go to selections...modify...contract 15
23. Flood with the selection with the light color.
24. Selections....select none.
25. Click with the Magic Wand at the dark color
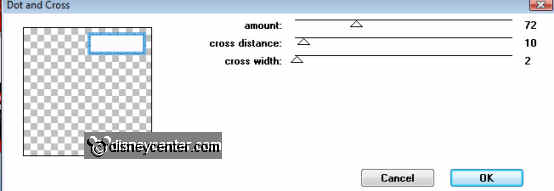
26. Go to effects....Penta.com...Dot and Cross
27. Copy the Flower2 tube and paste as a new layer into the image.
28. Place this in the right upper corner in the rectangle.
29. Effects..3D effects...same drop shadow as in point 15.
30. Duplicate this layer and place this left below of the rectangle.
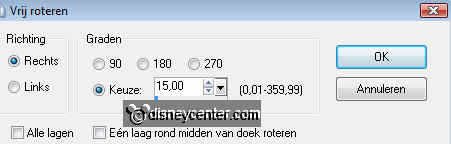
31. Copy the Deko1 tube and paste as a new layer...image....free
rotate...right 15
32. Place this left below of the image
33. Pull this layer below the merge circle layer
34. Same drop shadow as in point 15.
35. Duplicate this layer.....image....Resize....3x 75%
All layer not checked.
36. Image...free rotate...left 20...Place this near the other (see image
at the top)
37. same drop shadow as in point 15.
38. Go to text tool...size 48 and write Flowers
(colors see image below)

39. Place this in the light rectangle.
40. Same drop shadow as in point 15.
41. Duplicate the rectangle with filter (raster 3)