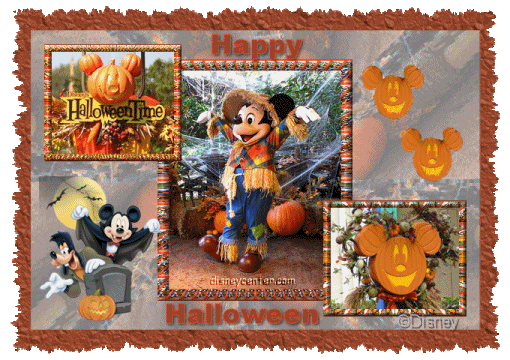
foreground color #f34520 background color #9a4528
1. Open a new image 600x400.
2. Convert to raster layer.
3. Selections - select none.
4. Copy the michalloween image and paste into the selection.
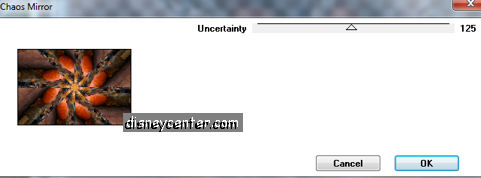
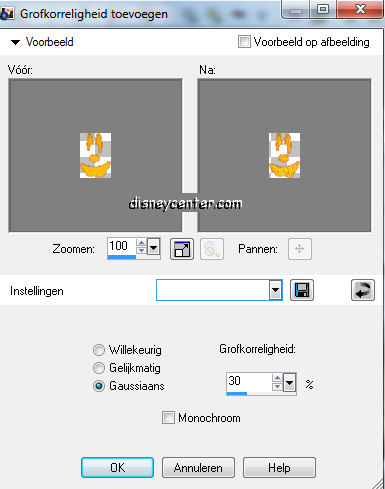
5. Effects - Funhouse - Chaos - Mirror with this setting.
6. Put the opacity of this layer at 50.
7. Selections - select none.
8. Layers - Merge - merge all flatten.
9. Go to the image michalloween.
10. Image - Resize 75%.
11. Image - add border 15 with foreground color.
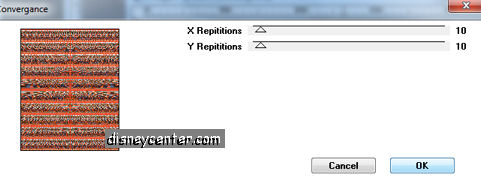
12. Select the border - Effects - Funhouse - Convergance with this setting.
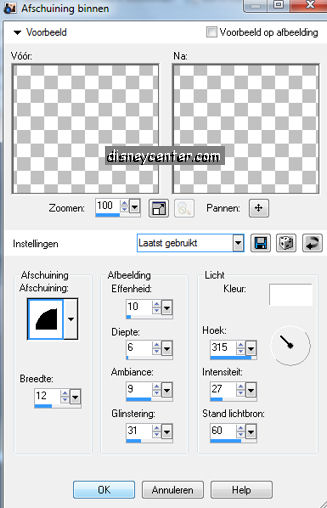
13. Effects - 3D Effects - Inner Bevel.
14. Selections - select none.
15. Copy this image and paste as a new layer.
16. Open the image halloweentime.
17. Image - add border 1 background color.
18. Image - add border 8 foreground color..
19. Image - add border 1 background color.
20. Selections - select all.
21. Selections - modify - contract 10
22. Selections - convert.
23. Effects - Funhouse - Convergance same setting as in point 12.
24. Give the same Inner Bevel as in point 13.
25. Copy this and paste as a new layer.
26. Place this left to the top.
27. Open now the image Halloween.
28. Repeat the points 17 t/m 23, but now the x and y repititions at 5.
29. Give the same Inner Bevel as in point 13.
30. Copy this and paste as a new layer.
31. Place this right at the bottom.
Now we make the animation
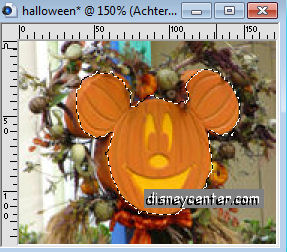
32. Go again to the image halloween.
33. Make a selection - free hand - of the mickey pompon.
34. Copy as a new image.
35. Image - Resize 75%.
36. Select now the yellow part.
37. Duplicate this layer 2 times more.
38. Stay at the first layer. Adjust - Add/Remove noise - Add noise.
39. Go to the second - Add noise at 40
40. Go to the third - Add noise at 50
41. Selections - select none.
Minimize this. We use this later in the animation shop.
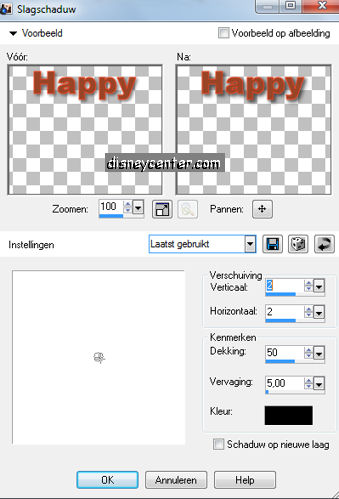
42. Go to text tool, font Arial Black, size 36 pixels.

43. Write Happy and place this in the middle at the top.
44. Effects - 3D Effects - drop shadow.
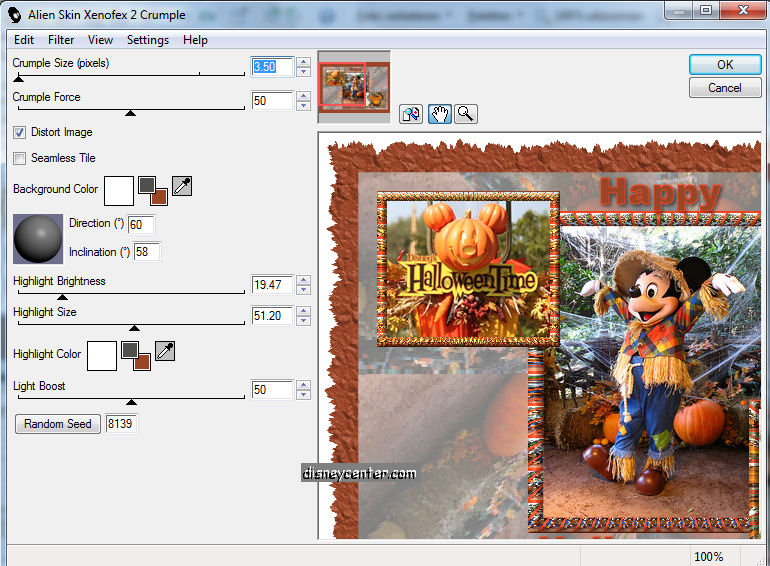
45. Write Halloween and place this in the middle at the bottom.
46. The same drop shadow as in point 44.
47. Image - add border 40 background color.
48. Select the border - Effects - Alien Skin Xenoflex 2 - Crumple.
49. Selections - select none.
50. Layers - Convert to raster layer.
51. Select the white part - click at the delete key of your keyboard.
52. Selections - select none.
53.Put your watermark into the image.
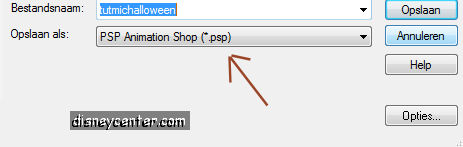
54.Layers - merge - merge visible
55. Duplicate this layer 2 more times.
56. File save as......PSP Animation shop.
57. Open the tube halloween1
58. Select the moon - Duplicate this 2 more times.
59. Lock the 2 top layers and stay at the first layer.
60. Effects - Alien Skin Xenoflex2 - Lightning.
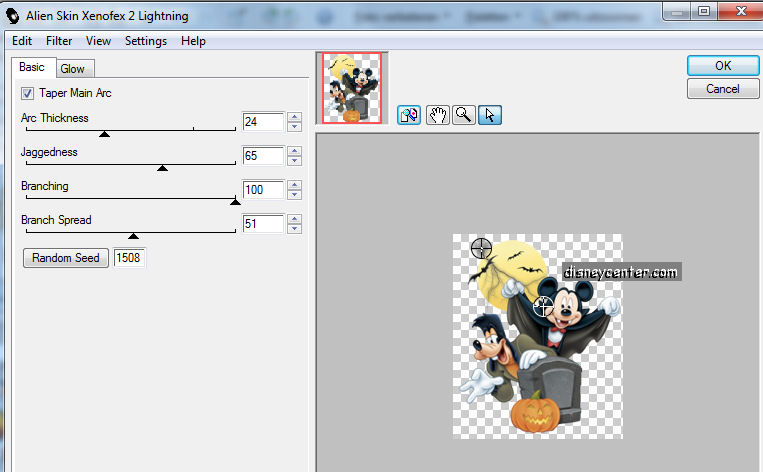
61. Lock the first layer and open the second.
62. Same Lightning only now click at the random seed.
63. Lock the second layer and open the third.
64. Again the same Lightning and click at the random seed.
Now you have 3 images.
The big ones is al saved..
65. Save halloween1 the same as in point 54. - File - Save as......PSP
Animation shop.
66. Do the same with the micpompoen. -File - Save as......PSP
Animation shop.
Open now animation shop.
67. File - open - Look for the 3 saved images
68. First the big image.
69. Edit - select all.
70. Now halloween1 - Edit - select all.
71. Copy -now click in the big image - paste into selected frame.
72. Place this left at the bottom. see example.
73. Now the Mickey pompon - Edit - select all.
74. Copy -now click in the big image - paste into selected frame.
75. Place this right to the top. Near the center image.
76. Click one more time and paste into selected frame .
77. Place this diagonally to the other. ( see image)
78. Animation - Resize animation 75%.
79. File - save as .... give a name and click 3 times at next and than complete.