
This
Tutorial is copyrighted to the Tutorial Writer, © Emmy Kruyswijk 2011.
This Tutorial
may
not be forwarded, shared or otherwise placed on any Web Site or group without written
permission from
Emmy Kruyswijk
Do you want to link my lessons?
Please send
me a mail.
Material
s
download
here
1
image,
Filters
download
here
FM Tile Tools - Blend Emboss,
FM Tile Tools - Bricks,
Neology - Sinus Waves,
BorderMania - frame#2,
VM Distortion - Kaleidoscope
Put the filters in the folder plug-ins.
Maybe you must import filter Neology - Sinus Waves
into Filters Unlimited.
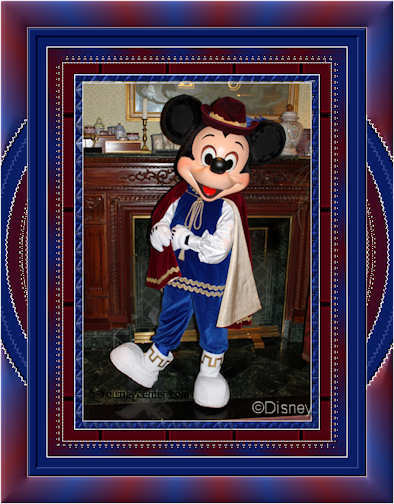
Lord
Mickey
Foreground color #091d64 and background color #4d030f
1. Open the image - shift + D - close the original.
2. Image - add border 1 - color white.
3. Image - add border 10 - foreground color.
4. Select the border - Effects - texture effects - Tiles.
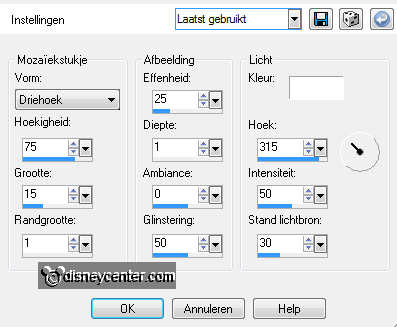
5. Effects - FM Tile Tools - Blend Emboss with this setting.
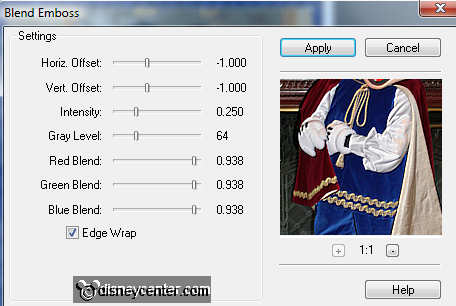
6. Selections - select none.
7. Image - add border 1 - color white.
8. Image - add border 15 - background color.
9. Select the border - Effects - FM Tile Tools - Bricks - with this setting.
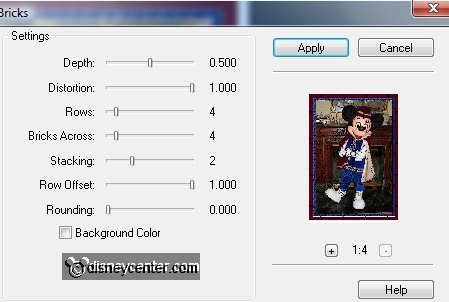
10. Effects - Edge Effects - Enhance.
11. Selections - select none.
12. Image - add border 1 - color white.
13. Image - add border 15 - foreground color.
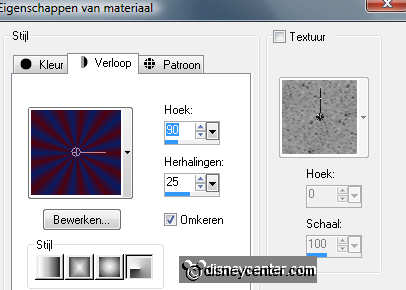
14. Select the border - fill this with gradient radial.
15. Effects - Neology - Sinus Waves - all at 8.
16. Selections - select none.
17. Image - add border 1 - color white.
18. Image - add border 25 - foreground color.
19. Select the border - Effects - BorderMania - frame#2 with this setting.
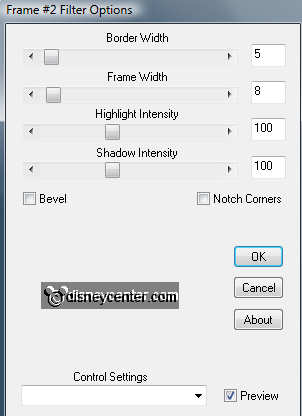
20. Selections - select none.
21. Image - add border 1 - color white.
22. Image - add border 35 - background color..
23. Select the border - Effects - VM Distortion - Kaleidoscope with this setting.
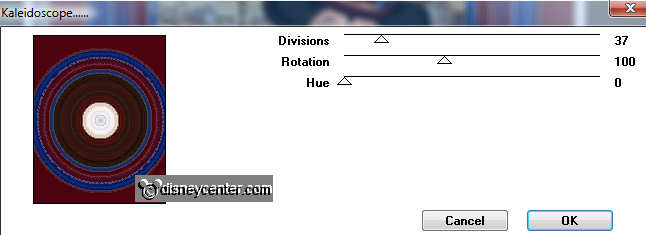
24. Selections - select none.
25. Select now the top and bottom border - fill this with gradient from point
14.
26. Effects - 3D Effects - Inner Bevel with this setting.

27. Selections - select none.
28. Put your watermark into the image.
29. Image - add border 1 - color white.
30. Image - Resize 75% - resize all layers checked.
31. File - Export - jpeg optimizer.
Ready is the tag
I hope you like this tutorial.
greetings Emmy,

Tutorial written 21-06-2009
