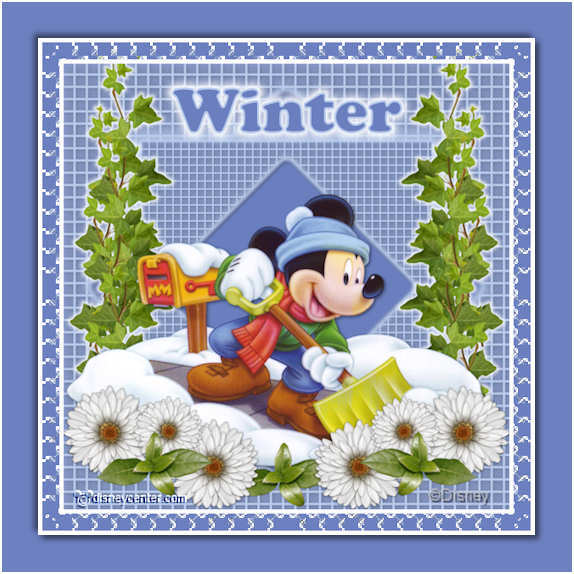
foreground color #bbcdec and background
color #6c7fbf
1. Open new image 700x700
2. Fill this with the background color.
3. New raster layer - fill this with the foreground color.
4. Layers - Load/Save Mask - Load Mask from Disk.

5. Layers - merge - merge group.
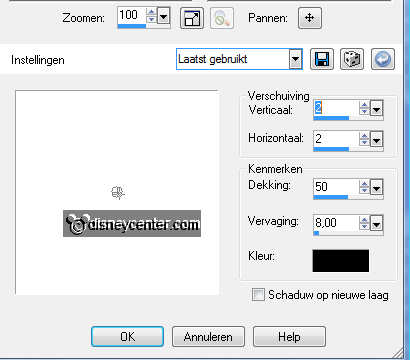
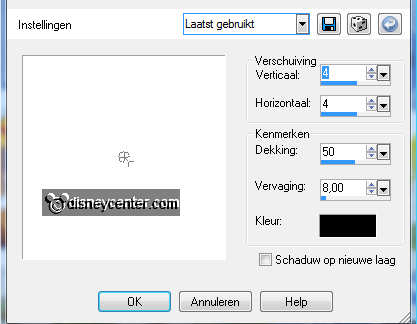
6. Effects - 3D Effects - drop shadow with this setting.
7. Duplicate this layer - image - Resize 65% -
resize all layers not checked.
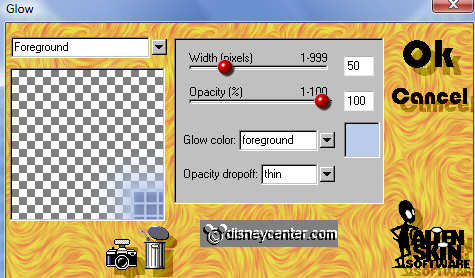
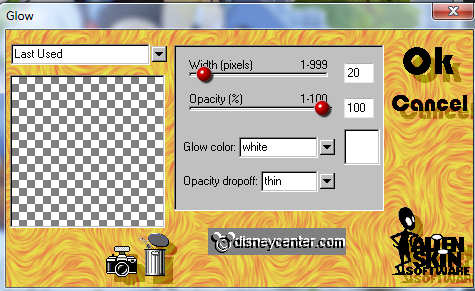
8. Effects - Alien Skin - Glow 2.1 - with this setting.
9. Copy the tube hedera and paste as a new layer.
10. Place this at the left side.
11. Copy the tube micshovel and paste as a new layer.
12. Place the bottom of the tube - about 70 pixels from the
bottom.
13. Give the same drop shadow as in point 6.
14. Go back to the tube hedera layer - go to the eraser tool en
remove the pieces.

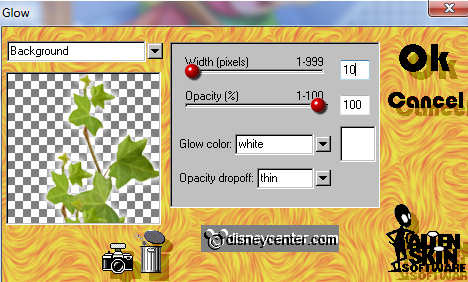
15. Effects - Alien Skin - Glow 2.1 - with this setting.
16. Duplicate this layer - image - mirror.
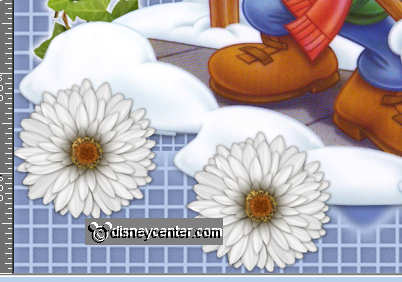
17. Copy the tube SD NTG Daisy2 and paste as a new layer.
18. Give the same drop shadow as in point 6.
19. Place this at the bottom left.
19. Duplicate this layer - put it slightly down and next
to it. ....see below.
30. Duplicate again - image - resize 75% -
resize all layers not checked.
31. Place this in the middle of the flowers.
32. Copy the tube cdvforeverminefoliage4 and paste as a new
layer.
33. Place this also in the middle under the flowers.
34. Give the same drop shadow as in point 6.
35. Lock all layers, except the top 4.
36. Stay at 1 of the other layers - Layers - merge - merge all
visible layers.
37. Duplicate the merge layer - image - mirror.
38. Copy the tube cdvforeverminefoliage4 and paste as a new
layer.
39. Place this now in the middle - between the flower borders.
40. Give the same drop shadow as in point 6.
41. Layers - arrange - Move down 2 layers
42. Stay at the top layer.
43. Go to text tool - font Cooper Black -
size 100 - and write - Winter.

44. Effects - Alien Skin - Glow 2.1 - with this setting.
45. Layers - merge - merge all layers.
46. Image - Resize 75% - Resize layers checked.
47. Put your watermark into the image.
48. Image - add border 5 - color black.
49. Select the black border and fill this with white.
50. Selections - select none.
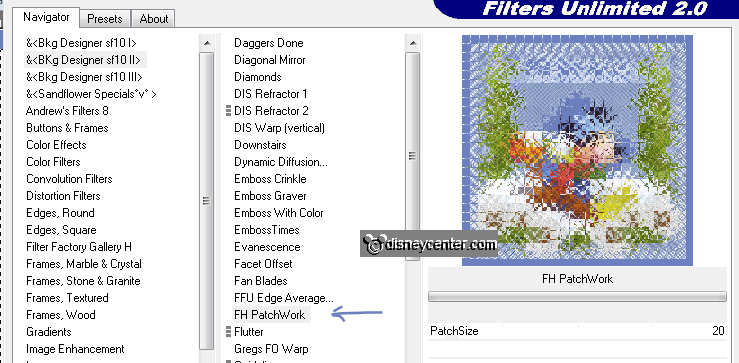
51. Image - add border 20 - background color
52. Select the border- Effects - Filter Unlimited - Bkg
Designer sf10 II - FH Patchwork.
53. Selections - select none.
54. Image - add border 5 - color black.
55. Select the black border and fill this with white.
56. Selections - select none.
57. Image - Resize 500x500 - Resize layers checked.
58. New image 570x570 - fill this with the background color #6c7fbf.
59. Back to your image - copy and paste as a new layer.
60. Effects - 3D Effects - drop shadow with this setting.
61. Give the drop shadow again, but now horz.- and vert. at
-4.
62. Image - add border 2 - color white.