|

This
Tutorial is copyrighted to the Tutorial Writer, © Emmy Kruyswijk
06-08-2013.
This Tutorial may not be forwarded, shared or otherwise placed on any Web Site
or group without written
permission from
Emmy Kruyswijk.
Many of the material are made by me.
Please respect my work and don't change the file names.
At all Disney creations must be copyrighted.
Do you want to link my lessons?
Please send
me a mail.
Needing:
1 tube from LB her site is
here.
1
tube, 1 image, 1
word-art, and 2 selection made by me.
Plug-ins:
Graphics Plus - Cross Shadow,
download
here
Before you begins.......
Open the image, the tubes and the word-art in PSP.
Set the plug-in in the
folder plug-ins and the selection in the
folder selection.
Material

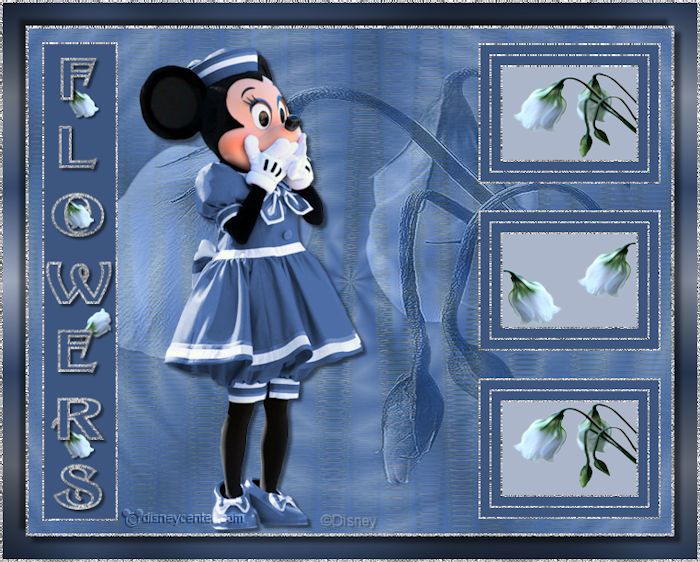
Flowers
1.
File - open new transparent image
700x550.
Set in the material palette the foreground color on #adb5cc
and the background color on
#3b5183.
Convert to raster layer.
Selection - select all.
2.
Activate the tube 1116-flowers - layer capa1 - edit - copy.
Edit - paste into selection.
Selections - select none.
3.
Effects - Image effects - seamless tiling - default setting.
Adjust - blur - Gaussian blur - radius 15
Effects - Reflection Effects - Caleidoscope -
with this setting.
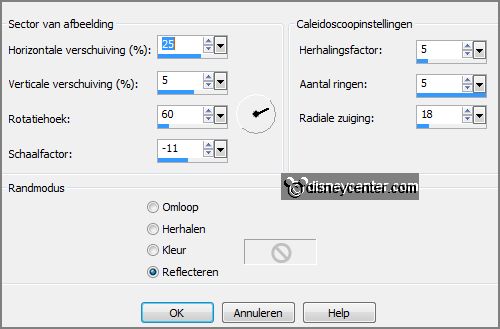
Repeat the Caleidoscope - same setting.
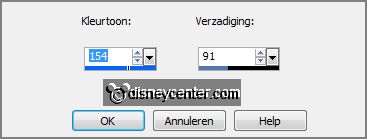
Adjust - Hue and Saturation - colorize -
with this setting.
4.
Activate the image doolhof - edit - copy.
Past as a new layer on the image.
Image - resize 75% - all layers not checked.
Adjust - blur - Gaussian
blur - radius 15.
5.
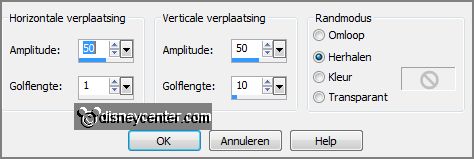
Effects - Distortion effects - Wave -
with this setting.
Effects - Image effects -
seamless tiling
-
with this setting.
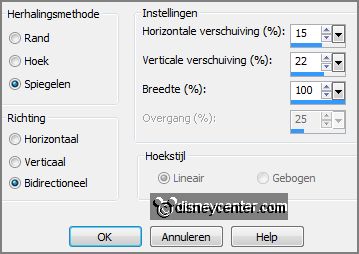
Set in the layer palette the opacity to 38.
Layers - merge - merge down.
6.
Activate the tube 1116-flowers layer tube -
edit - copy.
Past as a new layer on the image.
Effects - Image effects -
Offset
-
with this setting.
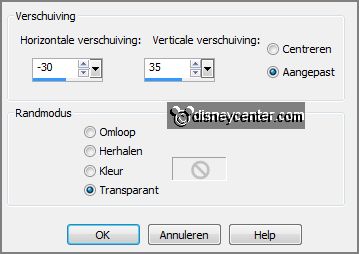
Set in the layer
palette the blend mode on Luminance (legacy) - opacity to 40.
Effects - Edge effects - enhance.
7.
Selections - load/save selection - load selection from disk - look
Emmybloemen -
with this setting.
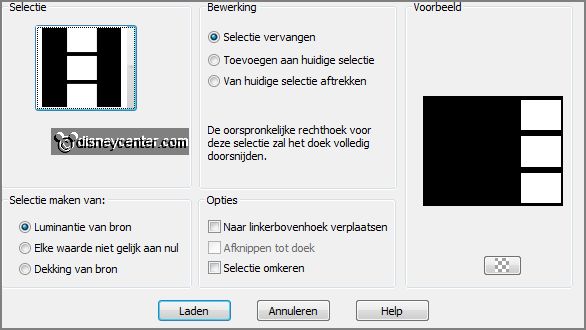
Layers - new raster layer.
Set in the material palette the foreground at pattern zilverEmmy - angle 0 - scale
100.
Fill the selection with the silver pattern.
Selections - modify - contract 2 pixels.
8.
Layers - new raster layer.
Fill the selection with the
background color.
Selections -
modify - contract 10 pixels.
Fill the selection with the silver pattern.
Selections - modify - contract 2 pixels.
9.
Layers - new raster layer.
Fill the selection with the background color.
Selections - modify - contract 10 pixels.
Fill the selection with the silver pattern.
Selections - modify - contract 2 pixels.
10.
Layers - new raster layer.
Set in the material palette the foreground
back to color.
Fill the selection with the
foreground color.
Layers - merge - merge down - and 2 more times.
Effects - 3D Effects - drop shadow -
with this setting.
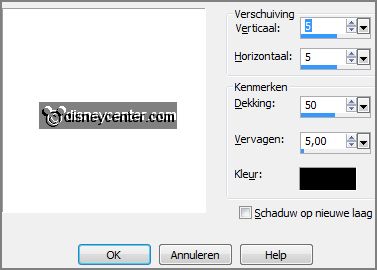
11.
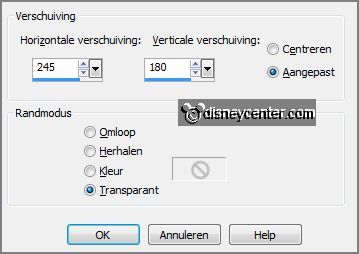
Activate the tube miniflower -
edit - copy.
Past as a new layer on the image..
Effects - Image effects -
Offset -
with this setting.
12.
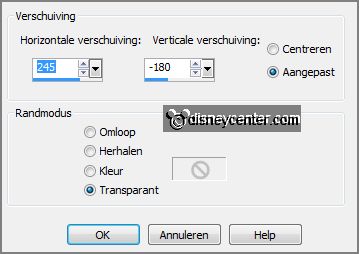
Edit - paste (is still in memory) as a new layer on the image.
Effects - Image effects -
Offset -
with this setting.
13.
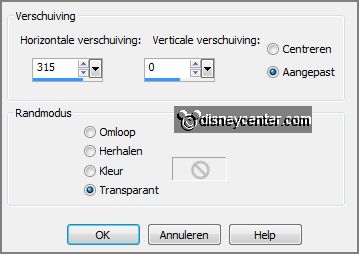
Edit - paste (is still in
memory) as a new layer on the image.
Effects - Image effects -
Offset -
with this setting.
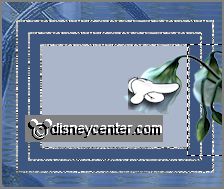
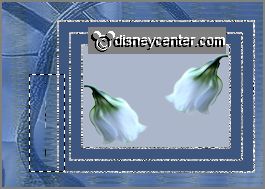
Activate selection tool - rectangle - and make a selection - as below.
Click at the delete
key.
Selections - select none.
14.
Layers - duplicate.
Image - mirror.
Activate move tool - place this left on the rectangle - see example.
No do you see a little of the whole tube - make a selection again -
click
at the delete key.
15.
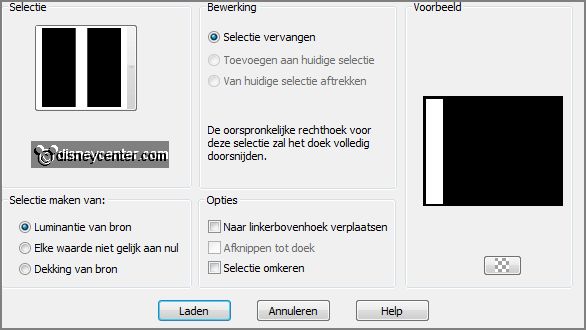
Selections - load/save
selection - load selection from disk - look
Emmybloemen -
with this setting.
Layers - new raster layer.
Set in the material palette the foreground back to pattern - zilverEmmy.
Fill the selection with the silver pattern.
Selections - modify - contract 2 pixels.
16.
Layers - new raster layer.
Fill the selection with the
background color.
Selections - select none.
17.
Activate word-art-Eflowers - edit - copy.
Edit - paste as a new layer on the image.
Place this on the rectangle.
18.
Activate the tube minnieblgrijs -
edit - copy.
Edit - paste as a new layer on the image.
Image - resize 82% - all layers not checked.
Move the tube a little to the left - see example.
Effects - 3D Effects -
drop shadow - setting is right.
19.
Layers - new raster layer - put your
watermark into the image.
Image - add borders 3 pixels - symmetric - foreground color.
Activate the magic wand - with settings below - select the border.

Fill the selection with the silver pattern.
Selections - select none.
20.
Image - add borders 25 pixels -
symmetric - background color.
Select the border with the magic wand - setting is right.
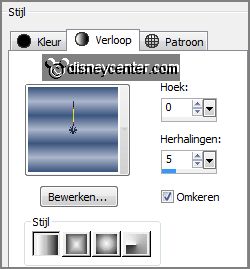
Make from the background a gradient linear -
with this setting.
21.
Fill the selection with the gradient.
Effects - plug-ins - Graphics Plus - Cross Shadow -
with this setting -
click OK.

Selections - select none.
22.
Image - add borders 3pixels -
symmetric - foreground color.
Select the border with the magic wand - setting is right.
Fill the selection with the silver pattern.
Selections - select all.
23.
Selections - modify - contract 28 pixels.
Effects - 3D Effects -
drop shadow -
with this setting.
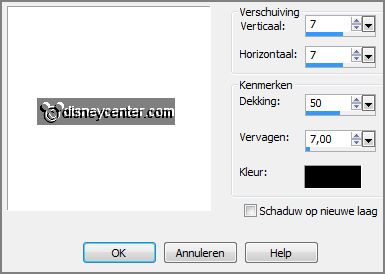
Repeat the
drop shadow - now with vert. and horz. op -7.
Selections - select none.
24.
Image - resize - 700 pixels breed - all layers checked.
File - export - JPEG Optimizer.
Ready is the tag
I hope you like this tutorial.
greetings Emmy
Tested by Nelly

tutorial written 06-08-2013
|