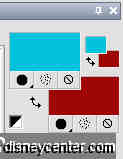
Choose 2 colors from the image.
I took foreground color #00c3db and background color #9e0906.
Open the template in PSP.
1. Open new image 600x600.
2. Fill this with the background color
3. Copy frame large and paste as a new layer.
4. Effects - 3D Effects - drop shadow with this setting
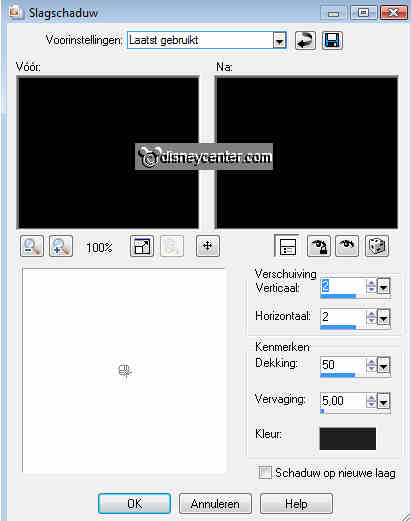
5. Give the same drop shadow again, but now with vert. and horz. at -2
5. Copy the 3balken and paste as a new layer.
6. Give the same drop shadow as in point 4 and 5.
7. Layers - arrange - move down.
8. Go to selection tool - selection - circle.
9. And draw a circle from the center of the image.
Stay around 50 pixels from the edge.
10. New raster layer - fill this with the foreground color. Make this only
slightly lighter in color.
11. Let selection stay.
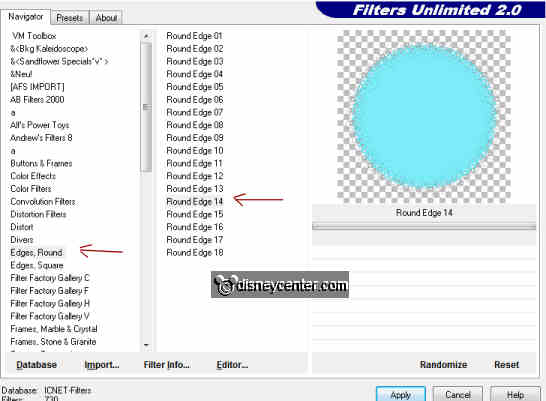
12. Effects - Filters Unlimited 2.0 - Edges Round - Round Edge 14.
13. Give the same drop shadow as in point 4
14. Layers - arrange - move down. He is now under the 3 balken.
15. Copy 1 of the 4 doodles and paste as a new layer.

16. Place it in the top left corner.
17. Give the same drop shadow as in point 4
18. Layers - arrange - move down. He is now under the circle with effects.
19. Duplicate this layer - Image - mirror.
20. Duplicate this layer - Image - flip.
21. Duplicate this layer - Image - mirror.
22. Stay at the black large frame.
23. Copy frame small and paste as a new layer.
24. Stays directly good.
25. Select inside the left frame
26. Selections - Modify - expand 4
27. Copy the image and paste as a new layer. (see image below)
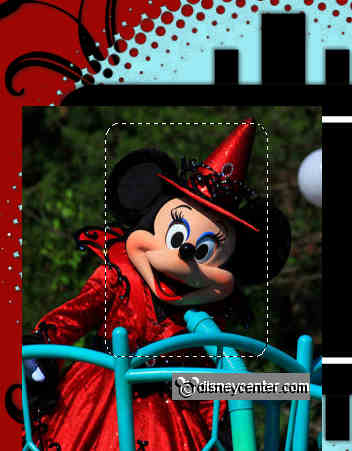
28. Selections - Invert - click at the delete key of your keyboard.
29. Layers - arrange - move down.
30. Select inside the right frame
31. Selections - Modify - expand 4.
32. Mirror now first your image.
33. Copy the mirrored image and paste as a new layer. (Same as in point 27)
34. Selections - Invert - click at the delete key of your keyboard.
35. Layers - arrange - move down.
36. Copy the dotted frame and paste as a new layer.
37. Adjust - Hue and Saturation - Colorize - make this with the foreground
color.
38. Give the same drop shadow as in point 4
39. Copy the flowers and paste as a new layer.
40. Repeat point 37.
41. Give the same drop shadow as in point 4 and 5
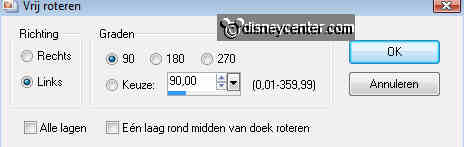
42. Copy the large flowers and paste as a new layer.
43. Image - free rotate - links 90.
44. Repeat point 37.
45. Give the same drop shadow as in point 4
46. Place this in the middle.
47. Lock now the mirrored image.
And at that black frame, write the text.
48. Go to text tool - font Verdana - size 24.

49. Write Happy Halloween.
50. Give the same drop shadow as in point 4
51. Copy 1 of the 2 large flowers (don't forget to colorize) and paste as a new
image.
52. Duplicate this layer - Image - Resize 75%. - all layers not checked.
53. Place this in the middle of the other flower.
54. Give the same drop shadow as in point 4 and 5.
55. Lock all layers, except the top 3 layers
56. Stay at 1 of the top layers.
57. Layers - merge - merge all visible.
58. Open now the other layers.
59. The mirrored image layer remains closed.
60. Image - Resize 75%. - All layers checked.
61. Stay at the bottom layer.
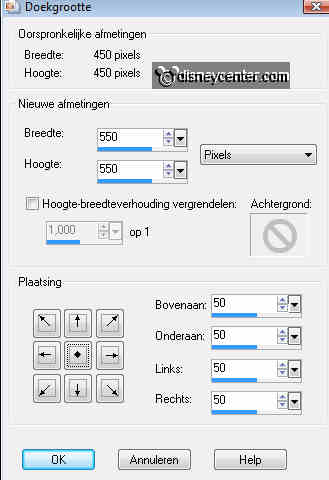
62. Image - Canvas size - with this setting.
63. New raster layer - fill this with the foreground color.
64. Effects - Filters Unlimited 2.0 - Paper Texture - Japanese Paper.

65. Layers - arrange - move down.
66. Stay at raster 1 (red background)
67. Effects - 3D Effects - drop shadow with this setting.

68. Give the same drop shadow again, but now with vert. and horz. at -5.
69. Selections - select none.
70. Selections - modify - contract 15.
71. New raster layer - fill with background color.
72. Give the same drop shadow as in point 67 and 68.
73. Put your watermark into the image.
74. Make sure the mirrored image layer is locked .
75. Edit - Copy merged.
76. Open Animation Shop - paste as a new animation.
77. Back in PSP.
78. Open the mirrored image layer and close the merged text layer.
79. Edit - Copy merged.
80. Back in Animation Shop - paste after current frame.
81. Edit - select all.
82. Animation - properties of frame on 150.
83. File - save as - give name - click 3 times at next and than on finish.