1. Open a new image 700x500
2. Flood fill this with the foreground color #8f8f8d
3. Copy the tube Disneyland Paris 72 and paste as a new layer.
4. Effects - Nirvana - Radial Sinality with these settings.
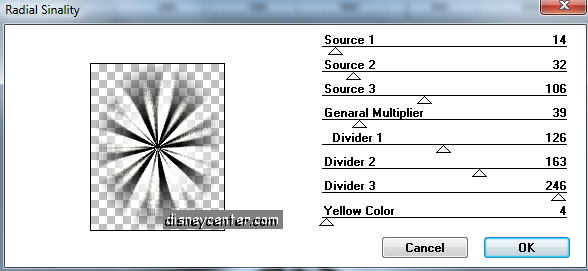
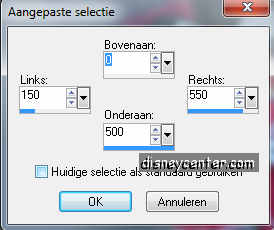
5. Go to selection tool - selection - Custom selection
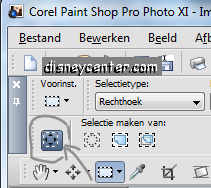
With these settings.
6. Selections - Invert.
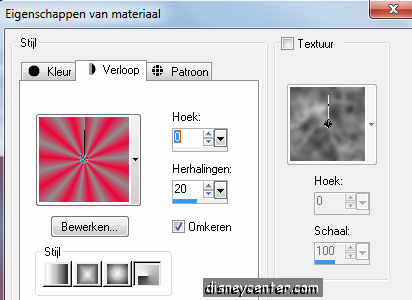
7. Flood fill this selection with the gradient radial.
8. Effects - texture effects - texture - Corel 15_015
9. Selections - select none.
10. Go to pen tool and make a line down. Start by the end of the
gradient at the left side.

11. Convert to raster layer.
12. Duplicate this layer. Image - Mirror.
13. Copy the tube Disneyland Paris 56 and paste as a new layer.
14. Place this left at the middle square.
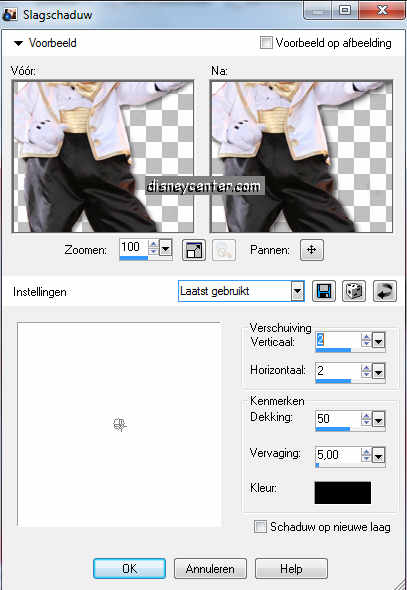
15. Effects - 3D Effects - drop shadow.
16. Copy the tube Disneyland Paris 57 and paste as a new layer.
17. Place this right at the middle square.
18. Give the same drop shadow as in point15.
19. Open a new image 5x300.
20. Flood fill this with the foreground color.
21. Image -Add border 1 color black.
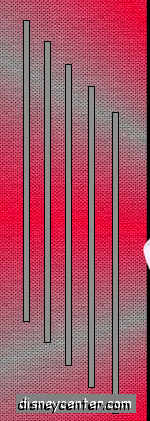
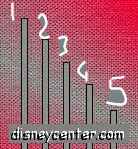
22. Copy the vertical line and paste as new layer at your image.
23. Place this left at the gradient. see image below.
24. Duplicate this layer 4 more times and place it so I have
done. see below.
25. Lock the first 6 layers from the bottom and stay at 1 of the
others.
26. Layers - Merge - Merge visible.
27. Duplicate this layer. Image - Mirror.
28. Unlock the other layers.
29. Copy the tube TL M.handen and paste as a new layer.
30. Place this left below.
31. Give the same drop shadow as in point15.
32. Duplicate this layer. Image - Mirror.
33. Go to text tool, Curlz MT, size 125 points (no pixels).
(the size 125 only when you use my font. Otherwise you look for
yourself what is the best size)

fore- and background for the font.

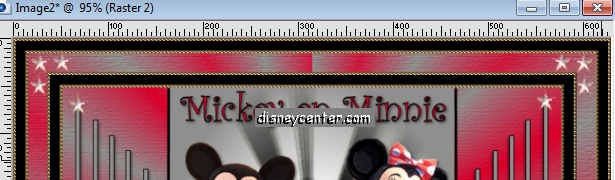
34. Write Mickey and Minnie and give the same drop shadow as in
point 15.
35. Image - Resize 75%.
36. Image - add border 3 color black
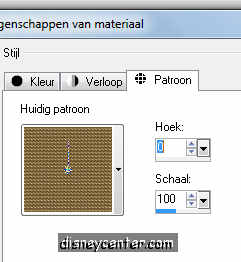
37. Select the black border - flood fill with the gold pattern.
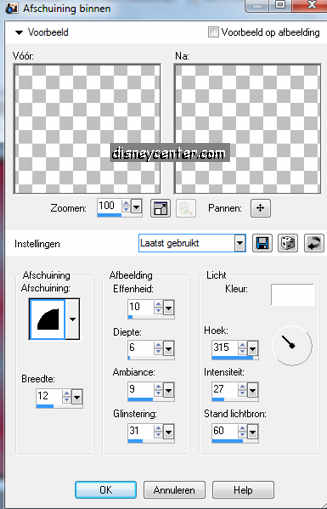
38. Effects - 3D Effects - Inner Bevel.
39. Selections - Select none.
40. Image - add border 10 color black.
41. Image -add border 3 background color #ce1a3e
42. Select the red border - flood fill with the gold pattern.
43. Give the same Inner Bevel as in point 39.
44. Selections - select none.
45. Image -add border 20 background color #ce1a3e
47. Select the red border - flood fill with the gradient from
point 7.
48. Effects - texture effects - texture - Corel 15_015
49. Selections - select none.
50. Image - add border 3 color black
51. Select the black border - flood fill with the gold pattern.
52. Give the same Inner Bevel as in point 39.
53. Image - add border 10 color black.
54. Image -add border 3 background color #ce1a3e
55. Select the red border - flood fill with the gold pattern.
56. Give the same Inner Bevel as in point 39.
57. Selections - select none.
58. Copy the tube sterretje 1 and paste as a new layer.
59. Place this at the vertical line at the left side. see below
60. Duplicate this 4 more times and place them at the 2e, 3e, 4e
and 5e vertical line.

61. Do the same at the right side.
62. Copy the tube sterretje 1 and paste as a new layer.
63. Place this in the left upper corner.
64. Duplicate this layer and place this near the first tube
sterretje.
65. Duplicate this layer and place this under the first tube
sterretje.
66. Lock all the layers, except the 3 top layers.
67. Stay at 1 of the other layers.
68. Layers - Merge - Merge visible.
69. Unlock the other layers.
70. Effects - Simpel - Left Top Mirror click at OK
71. Open animation shop
72. Lock the layers with the little stars on the vertical lines,
except the top (1). From the left and the right side.
73.Click at the blue border of the image and Copy Merge.

74.Bck in animation shop - paste as a new animation.
75. Back in PSP. Lock the top layer(1) at both sides and
open the second layers at both sides.
76. Copy Merge again.
77. Back in animation shop. Paste after current frame. Watch
that always is selected the last frame.
78. Back in PSP. Lock the second layer at both sides and
open the third layers at both sides.
79. Copy Merge again.
80. Back in animation shop. Paste after current frame.
81. Back in PSP. Lock the third layer at both sides and
open the fourth layers at both sides.
82. Copy Merge again.
83. Back in animation shop. Paste after current frame.
84. Back in PSP. Lock the fourth layer at both sides and
open the fifth layers at both sides.
85. Copy Merge again.
86. Back in animation shop. Paste after current frame.
87. Edit- Select all - Frame properties - at 40.
88. File -save as gif.
89. Click 3 times at next and than at ready.